
Alginate Impression Material: Practice Guide
- , by SurgiMac
- 22 min reading time
Get practical alginate impression material guidance for reliable mixing, setting, storage, and clinical workflows. Browse SurgiMac options for your practice.
Alginate Impression Material: Practice Guide
Flawless dental casts start with stable, well-mixed alginate impression material. This versatile hydrocolloid remains a practical choice for diagnostic models and other routine workflows when dental teams control proportions, timing, moisture, and tray technique.
Browse SurgiMac's alginate impression material options for your practice.
Alginate impression material is an elastic and irreversible hydrocolloid that dental experts use to make copies of a patient's teeth. This powder is made from brown algae and turns into a flexible gel when mixed with water. It is a top choice for making study models because it is cheap and easy to handle in a fast-paced clinic. According to researchers at the NCBI, these materials offer a detailed record in just one step. You must pour the model quickly after taking the impression to avoid shrinkage or expansion. This simple tool remains a vital part of every dental office that needs fast and reliable results for routine work.
What is alginate impression material?
Alginate is an elastic, irreversible hydrocolloid that dental teams use to create mouth models. It was first used in dental shops in 1940. Now, it is a key tool for making study casts, bleach trays, and night guards. This tool is popular because it costs less than other items and is easy for staff to use.
What makes up the powder
This tool starts as a powder made from alginic acid. This acid is a natural sugar found in brown sea grass. When you mix the powder with water, it has a chemical change. The salt sodium alginate reacts with a reactor called calcium sulfate to form a firm gel. Many fast-setting alginate impression material types also use sodium phosphate. This part slows the change so you have time to work.
Filler parts and fluoride are also in the mix. The filler gives the gel its body and strength. Fluoride helps speed up the set and can protect the tooth during the process. Most reliable alginate impression material types will set fully in two to three minutes after mixing starts.
Pros and cons for dental use
One big pro of alginate is that patients find it easier to take than heavy putty. It feels less bulky in the mouth and gets detail in just one step. Many pros prefer high-quality alginate impression material for daily tasks because it saves time. It works well for most basic dental needs and does not need special tools.
But alginate does have some limits with its size over time. It can lose or gain water based on the air. This change can cause the mold to shrink or swell. To keep the mold right, you should pour the impression in 15 to 30 minutes. While it is great for study models, it may not be exact enough for complex crown or bridge work.
When should a dental practice use alginate?
Alginate is an elastic and irreversible hydrocolloid tool. It is a top pick for many clinics because it is cheap and easy to use. Most teams use it to get a quick copy of a patient's teeth in just one step. Per studies on dental tools, it is helpful because it is fast and patients like it. Most powder types have a shelf life of one to two years if you store them in a cool spot.
The powder has parts like sodium alginate and calcium sulfate. These parts react when you add water to form a gel. This change is what makes the paste turn into a firm mold. If you stir the mix too much, it might set too fast or lose its strength. You must follow the mix guide for each brand to get the best results.
Common clinical uses
Dentists often use high-quality alginate impression material for checkup models. It works well for making study casts for teeth work or first drafts of mouth guards. Its springy nature helps it pull away from teeth without breaking. This makes it safe for copying mouths with deep curves. It is the best choice for a first look at a new case.
Most powder mixes have a set time of two to three minutes. This gives the team enough time to place the tray in the mouth. Since it is easy to use, it helps cut down on chair time for the patient. You can get a clear mold of the teeth without a long wait or high cost. You can find many types of alginate, such as fast-set or regular-set. Fast-set types work best for kids or patients who gag. They set in a short time to make the process easier. Regular-set types give you more time to load the tray and get it in place.
Choosing the right material
Alginate is great for many tasks, but it is not always the best pick. It can lose water or soak it up, which changes its size. You must pour the cast within 15 to 30 minutes to keep it correct. If you need a model that stays perfect for days, you might need some other choice. Many teams find luck checking PVS and alginate impression material before they start a case.
PVS tools are often better for final crowns. They do not shrink like hydrocolloids do. While alginate is cheaper, PVS offers more detail for tough jobs. Picking the right tool depends on how much detail the lab needs to make the part. Using the right tool for each job saves time and money for the clinic. It ensures the final dental work fits the patient well.
Stability and precision
Alginate is an elastic tool that can stretch and snap back. But its lack of long-term firmness makes it poor for final bridges. For those jobs, a more stable tool is better. Since it can dry out fast, you should pour it soon after you take it from the mouth. To stop it from drying, you can keep the mold in a damp spot while you wait.
When you take the mold out, you must clean it right away. This stops the spread of germs. But do not soak it in water for too long. Too much water can make the mold swell and lose its shape. A quick rinse and a damp wrap are often best. You must also pick the right tray size for the best results. A good fit keeps the tool from moving while it sets. If the tray is too small, the mold may not show all the teeth. Using the right amount of water and powder is also key to a strong set.
| Feature | Alginate | PVS |
|---|---|---|
| Unit Cost | Low | High |
| Pouring Time | 15 to 30 Minutes | Up to 14 Days |
| Ease of Use | Very Simple | Moderate |
| Best Use | Study Casts | Final Crowns |
| Firmness | Low (must pour fast) | Very High |
How do setting time and working time affect results?
Working time and setting time are two key phases in the dental impression process. Working time starts as soon as you mix the powder and water. During this phase, you must mix the paste, load the tray, and seat it in the patient's mouth. If you take too long, the mix may start to harden before it is in place. Setting time is the total time from the start of the mix until the material becomes a firm gel. Most alginate impression material formulas have a setting time of two to three minutes.
Understanding working and setting times
Working time is your window to get the job done. It includes the time spent stirring the mix and placing the tray. You need enough time to get a smooth mix without any air bubbles. Once the tray is seated, the setting time continues until the material is fully set. You must hold the tray steady during this time. Any movement can cause flaws in the final cast. Using a high-quality alginate impression material helps ensure these times stay the same across other batches.
Factors that change setting speeds
Several factors can change how fast the material sets. Water warmth is one of the most common ways to control the speed. Warm water makes the mix set faster. Cold water gives you more time to work. The room's heat and moisture can also have an effect. You must follow the rules from the maker for the best water-to-powder ratio. Adding too much or too little water can change how the material behaves. It can even make the final impression weaker.
The mix of the powder itself also matters. Most powders contain a retarder like sodium phosphate to slow down the reaction. They also have accelerators to help it set when ready. Some pros prefer a fast-setting alginate impression material for patients with a strong gag reflex. These fast-set options help get the tray out of the mouth sooner. This makes the visit much more easy for the patient.
Managing time for better impressions
Good time handling leads to better results. You should have all your tools ready before you start the mix. Avoid over-mixing the paste, as this can speed up the reaction and leave you with less working time. Once you place the tray, stay still until the material feels firm to the touch. Knowing how your exact brand reacts to heat and moisture will help you get a clear and exact copy of the teeth every time.
A repeatable alginate impression workflow
Getting a perfect dental copy needs more than just good hands. You need a set path that you follow every time. This helps you get the same high results with each patient. A steady routine also cuts down on wasted time and tools. When you use a reliable alginate impression material, the process becomes even easier for the whole team.Prep and measure with care
Good work starts long before the tray goes into the mouth. You must use the right tools for the job. Always check that your bowls and spatulas are clean and dry. Any old stuff can speed up the setting time or cause weak spots. This is because the chemical change starts as soon as the water hits the powder. You must follow the brand's guide for the water-to-powder ratio. Using too much water makes the mix thin and weak. Using too little can make it set too fast. It is best to use cool water to give yourself more working time. This is key when you use a high-quality alginate impression material to capture fine details.Mix and load for strength
The way you mix the stuff changes how hard it will be. You should press the mix against the sides of the bowl. This helps to get rid of air spots. Air can cause gaps in your final model. You want a smooth, creamy paste with no lumps. This step makes sure that the alginate impression material flows into every small gap in the mouth. Pick a tray that fits the patient well. It should cover all teeth and leave some room for the mix. When you load the tray, do not overfill it. Place the mix evenly across the arch. This stops the stuff from running down the patient's throat. It also helps to keep the patient calm and at ease during the work.- Measure out the powder and water based on the brand's rules to ensure the best mix.
- Mix the powder and water together by pressing the paste hard against the bowl walls.
- Fill the dental tray from the back to the front to keep air from getting trapped.
- Seat the tray in the mouth with firm pressure and hold it still until it sets.
- Remove the tray with a quick snap to prevent the stuff from stretching or tearing.
- Rinse the mold under cool water to remove spit and blood before you move on.
- Disinfect the mold with a safe spray to kill germs without changing the shape.
Post-care and quick pouring
Once the mold is out of the mouth, you must act fast. Alginate is a hydrocolloid that can lose or gain water easily. If it dries out, it will shrink. If it sits in water, it will swell. These changes can ruin how exact your model is. You should keep the mold in a damp paper towel if you cannot pour it right away. Experts suggest that you should pour the impression within 15 to 30 minutes of taking it. This time helps to keep the model as close to the real teeth as possible. Waiting too long leads to changes in the size and shape. By following this simple path, you make sure that every dental cast you make is exact and useful for your work.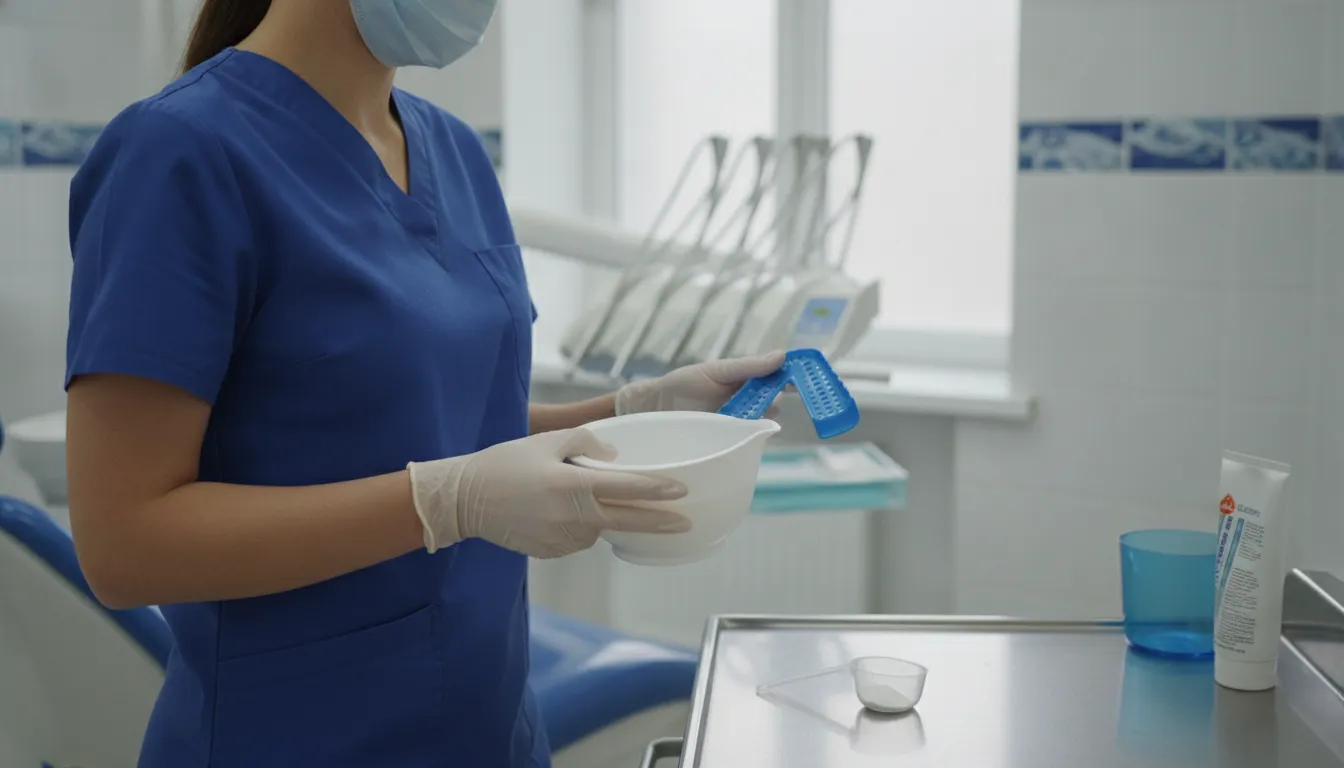
Compare alginate impression material choices before your next case.
How should alginate be stored and handled?
Proper care of your alginate impression material is vital for clinic success. Poor storage can lead to bad results and wasted money. You must follow strict steps to keep the powder fresh and the set impressions stable. Taking care of these items helps ensure your clinic runs well and your models stay exact.Storing the powder for long life
Keep your alginate powder in a cool and dry place. High heat and damp air are the two biggest threats to the powder. Most brands have a shelf life of one to two years when kept in the right space. You should keep the jar airtight to block moisture from the air. Damp air can make the powder clump or set too fast during use. This causes major errors when you try to mix the material for a patient. Using high-quality alginate impression material helps, but storage still matters. Open the tub only when you need to scoop the powder. Close the lid right after each use to keep the chemical balance safe. It is also wise to use an older tub before opening a new one. This "first in, first out" method stops the powder from sitting on the shelf for too long. A fresh batch ensures a smooth mix and a steady set time every time you use it.Managing set impressions and moisture
Once you take the impression, moisture control becomes the top goal. Alginate is a gel that can lose water or soak it up from the space around it. These shifts are known as syneresis and imbibition. Syneresis happens when fluid leaves the gel, which causes it to shrink. This often occurs when the impression sits in dry air for too long. Imbibition is when the gel soaks up water and swells. Both lead to a loss of shape and size in the final model. You must stop the material from drying out to keep its size true. If you cannot pour the cast right away, keep the impression in a damp space. A sealed plastic bag with a wet paper towel works well for this task. This helps stop shrinkage by keeping the air moist around the gel. But you should not soak the impression in a bowl of water. Too much water will cause the model to expand and lose its true shape. Finding the right balance of moisture is the key to a good fit.Timing the pour for exact models
Time is a huge factor for how exact the model is. You should pour the dental cast as soon as you can to get the best result. Experts say to pour the impression within 15 to 30 minutes of taking it out. This short window prevents the material from changing shape too much. Even with good storage, the size of the gel will shift as time passes. Waiting too long can ruin the fit of the final piece. This can lead to extra work and more visits for the patient. If your lab is off-site, you must use a stable shipping way that keeps the impression damp. Fast handling ensures your test models and study casts stay exact for your work. Following these simple rules will help you get the best results from your reliable alginate impression material.How to choose alginate impression material
Choosing the right alginate depends on the specific needs of your clinic. Many dental offices use alginate impression material for diagnostic models and orthodontic study casts because it is easy to use. You should look for options that balance precision with patient comfort. High-quality choices like AlgiMac provide the detail needed for daily tasks while keeping practice costs low.
Match set speed to patient needs
Most alginate types offer different setting speeds to help you manage your time. Regular-set items often take 2 to 3 minutes to harden fully in the mouth, which gives you more time for hard cases. Fast-set options work best for patients with a strong gag reflex or for quick scans. Using a fast-setting alginate impression material can also improve the patient visit by cutting time in the chair.
Focus on dust control and sight
Dust control is vital for keeping a clean and safe work area. Dust-free alginate powders stop fine bits from entering the air, which keeps your team safe and makes cleanup much easier. Some modern types also use color-change cues to show when it is ready to seat or remove. This visual aid helps new staff learn the right timing for every impression.
Think about texture and bags
A smooth texture is key for making a good dental cast with less detail loss. A smooth mix leads to better results and fewer do-overs for the clinic. Buying a high-quality alginate impression material in bulk can help you save money while keeping a steady stock. Most powders have a shelf life of 1 to 2 years if kept in a cool, dry place.
Troubleshooting common alginate impression problems
Solving mixing and setting errors
Poor mixing or the wrong water-to-powder mix often causes a grainy alginate impression material. If the mix looks lumpy or has dry spots, check your tools for old powder or dust. Mixing the blend for too long can also lead to trouble by speeding up the chemical change. This reduces your working time and can make the final mold weak or brittle.
Brand rules for the water-to-powder mix help keep the paste strong and smooth for every use. Water heat also plays a big role in how the material sets in the mouth. Warm water makes it set fast, while cold water slows it down for a longer work time. If your mix sets too soon, check your room heat and water source for changes.
The chemical process between the sodium salt and the calcium sulfate reactor must happen at the right pace. Using a high-quality alginate impression material can help you get more stable results during your daily lab tasks.
Avoiding voids and poor detail
Air bubbles and voids can ruin a good mold and lead to a poor fit for the final cast. These gaps often come from how you load the tray or a lack of firm force. To prevent them, press the mix into the tray firmly to push out all the trapped air.
You can also wipe a small amount of the mix onto the teeth with your finger before you seat the tray. This helps the paste flow into small spaces and reduces the risk of air getting trapped in the deep spots of the bite.
If you see the metal or plastic tray showing through the mix, you may have used too much force. Picking a tray that is too small for the patient can also cause this show-through. Proper tray choice and stable seating are key to getting a clear copy of the teeth and gums.
The tray must stay still until the material is fully set. Moving it too soon can cause the mold to look blurry, dragged, or warped. For cases that need even more detail, you might think about comparing PVS and alginate impression material to see which one fits the job best.
Managing tears and size changes
Alginate can tear if the layer is too thin or if you pull it out too slowly. To keep it whole, use a quick "snap" motion when you remove it from the patient. This uses the elastic nature of the mix to clear deep spots and undercuts without breaking the mold.
If the mold tears often, check that you have enough bulk around the teeth and gums. A thin edge is much more likely to rip when you pull it away from the mouth. Once the mold is out, you must act fast to keep its size right and avoid errors in the cast.
Size changes often stem from three main issues:
- Syneresis, where the material loses water and shrinks over time.
- Imbibition, where the material takes in water and expands.
- Poor storage, such as leaving the mold in the open air to dry.
To stop these size changes, pour the stone model within 15 to 30 minutes of taking the mold. If you must wait, keep the mold in a damp spot to keep it from drying out in the room air.
A published study on pouring time and cast accuracy reinforces why dental teams should control the interval between impression removal and model pouring. You should also disinfect the impression according to compatible product instructions without causing avoidable dimensional change.
Shop dependable alginate impression material for efficient practice workflows.
Frequently Asked Questions
Why is alginate called an irreversible hydrocolloid?
Alginate is a hydrocolloid that turns from a liquid to a solid through a chemical change. This change cannot be undone once it is done. According to the National Institutes of Health, this item is elastic and easy to use. Its low cost and speed make it a top choice for dental study models. It gives a clear copy of the mouth in just one simple step for the dental team.
How do you disinfect an alginate impression without causing damage?
You must clean the impression right after you take it to stop the spread of germs. But you should not let the item soak for too long in the fluid. The CDC's dental infection-prevention guidance emphasizes following manufacturer instructions for cleaning and disinfection. For alginate, excessive immersion can also contribute to dimensional change. This leads to a model that does not fit right. Always rinse the mold and follow the time rules set by the maker to keep it exact.
Why can alginate impressions be removed from deep undercuts?
The stretch of this material lets it pull and snap back into place after it has set. This means you can pull it away from tight spots and deep gaps without it breaking. Research indexed by PubMed on alginate impression accuracy shows why controlling clinical and storage conditions matters when capturing detail. This trait makes it a great tool for making casts for braces or study models. It stays strong enough to keep its shape through the whole pull.
What happens if you mix alginate with too much water?
Using the wrong mix of powder and water will change how the gel works. Too much water can make the mix weak and slow down the set time. Following the rules from the National Library of Medicine is key to getting a good result. If the mix is too thin, it may not pick up all the small details of the teeth. It also makes the final mold more likely to tear or break when you take it out.
Ready to shop for best alginate supplies in the country today?
Using poor quality tools leads to bad molds which force you to do work again and waste time for your staff and your dental patients. By choosing to buy high-quality items today you can stop these errors before they start and keep your clinic running at a very steady pace. Waiting to update your stock can cause gaps in care that hurt your name and lead to lost pay for your dental office every day.
Are you ready to shop for the top dental supplies that will help your team give the best care to every person in your chair? Ready to shop? Call 646-866-7634 to shop professional impression materials.
Tags
Blog posts
-
, by SurgiMac A Clinician's Guide to Absorbable Suture Material
-
, by SurgiMac A Clinician's Guide to Dental Composite Resin Kits
-
, by SurgiMac How to Disinfect with Metrex CaviWipes Correctly
