
How to Mix Alginate Impression Material Step by Step
- , by SurgiMac
- 19 min reading time
Schedule your alginate supply review and learn how to mix alginate impression material correctly to avoid voids and setting errors.
Small deviations during alginate preparation can create visible voids, uneven detail, or a set impression that is difficult to seat and remove. For dental assistants and clinicians, consistent results begin before the tray is loaded: condition the powder. Measure both components accurately, and control the working time from the first addition of water.
To learn how to mix alginate impression material correctly, follow the manufacturer's powder-to-water ratio, add powder to the measured water, and incorporate it with deliberate figure-eight strokes. Spatulate forcefully against the bowl wall until the mix is smooth and creamy, usually within the product's specified working time.
Alginate is an elastic, irreversible hydrocolloid, so temperature, timing, and handling directly affect its setting behavior and dimensional stability. The sequence below breaks the procedure into practical chairside steps, from preparing the powder and measuring water through loading the tray without introducing air.
Browse alginate impression materials for your practice
How to Mix Alginate Impression Material Step by Step
Consistent alginate mixing depends on controlling the powder, water, sequence, and spatulation technique. Prepare the calibrated measuring devices, a clean flexible mixing bowl, and a firm spatula before opening the container. Follow the specific product instructions for the powder-to-water ratio, working time, and setting time, because formulations can vary. The following protocol provides a repeatable manual workflow for dental assistants and clinicians.
- Loosen and fluff the powder. Gently agitate the closed container or use a clean scoop to lift and loosen the powder before measuring. Fluffing helps produce a more consistent powder density, which supports accurate proportioning. Do not compress the powder into the scoop or pack it down.
- Measure both components accurately. Use the manufacturer's supplied scoop and water measure, or other calibrated devices appropriate for the product. Measure the exact powder and water volumes specified in the instructions. The water quantity is as important as the powder quantity, and an improvised estimate can change the material's working and setting behavior.
- Place the water in the bowl first. Add the measured water to the clean mixing bowl before introducing the alginate powder. This sequence helps the powder incorporate more evenly and reduces dry pockets. Add the fluffed powder promptly, keeping the material within the bowl.
- Incorporate the powder with rapid strokes. Use quick figure-eight strokes to bring the powder into the water. Work decisively rather than slowly folding the material. Rapid incorporation promotes a uniform mix during the short working period and helps limit air entrapment.
- Spatulate forcefully against the bowl walls. Press and smear the mixture firmly against the sides of the bowl while continuing to gather it with the spatula. Maintain this motion for approximately 30 to 45 seconds, or for the time specified by the manufacturer. Forceful spatulation helps eliminate air bubbles and distributes the powder throughout the liquid phase.
- Check the final consistency. The completed mix should be smooth, creamy, and free of visible lumps. If dry powder remains or the mix is visibly uneven, it has not been adequately incorporated. Do not add extra water or powder to correct the consistency after mixing, because changing the ratio can produce an unpredictable impression. Instead, follow the product instructions and remake the mix when necessary.
- Load the tray without delay. Once the mix reaches the correct consistency, load the selected impression tray promptly and proceed according to the manufacturer's working-time guidance. Careful loading and smooth adaptation help reduce additional air bubbles before seating.
For clinics that need greater process consistency across operators, a mechanical alginate mixer may provide more uniform and efficient mixing. Manual technique remains reliable when staff use calibrated measurements, maintain rapid spatulation, and recognize the smooth, creamy endpoint.
What Is the Correct Powder-to-Water Ratio for Alginate?
There is no universal powder-to-water ratio that applies to every alginate impression material. Use the exact ratio stated in the product instructions, and measure both components with the manufacturer-supplied or appropriately calibrated device. The ratio is part of the material's formulation, not a casual adjustment for achieving a preferred consistency.
Following the manufacturer's ratio is essential for preserving the chemical and physical properties established for that product. Deviating from it can produce an unpredictable mix and sub-optimum clinical results, even when the material appears workable. This is especially important when multiple alginate products are used across a practice, because their powder composition, working time, and setting behavior may differ. For procurement teams and clinical leads, standardizing the product-specific instructions at the operatory helps reduce avoidable variation.
Why the ratio affects alginate chemistry
Alginate powder contains several components that participate in or support the setting reaction. The formulation includes sodium or potassium alginate, filler particles, calcium sulfate as the reactor, fluoride as an accelerator, and sodium phosphate as a retarder. Calcium sulfate reacts with the alginate during setting, while the retarder helps control when that reaction proceeds. The balance among these ingredients is designed around a defined amount of water.
Adding too much water dilutes the reactive system and can leave a mix that is overly fluid or weaker than intended. Too little water may make incorporation difficult, increase stiffness, and prevent the powder from becoming uniformly hydrated. Either error can affect handling and the resulting impression. The specific clinical effect depends on the product. So do not compensate by adding extra powder or water after mixing has started unless the product instructions explicitly permit it.
How to measure consistently in the operatory
Before dispensing powder, loosen or fluff it so settling does not create inconsistent powder density. Measure the specified powder and water separately, using level measures and a calibrated device rather than estimating by eye. Water should be measured first according to the product directions, followed by the powder. Then incorporate and spatulate promptly within the stated working time.
For a dependable supply of product-specific instructions, review AlgiMac alginates and confirm the ratio on the package or technical documentation for the selected formulation. If a mix repeatedly seems too thin, too thick, lumpy, or slow to set, check measurement technique and the product instructions before changing the ratio. A consistent process protects impression accuracy and makes troubleshooting more objective.
Mastering Spatulation to Eliminate Voids and Air Bubbles
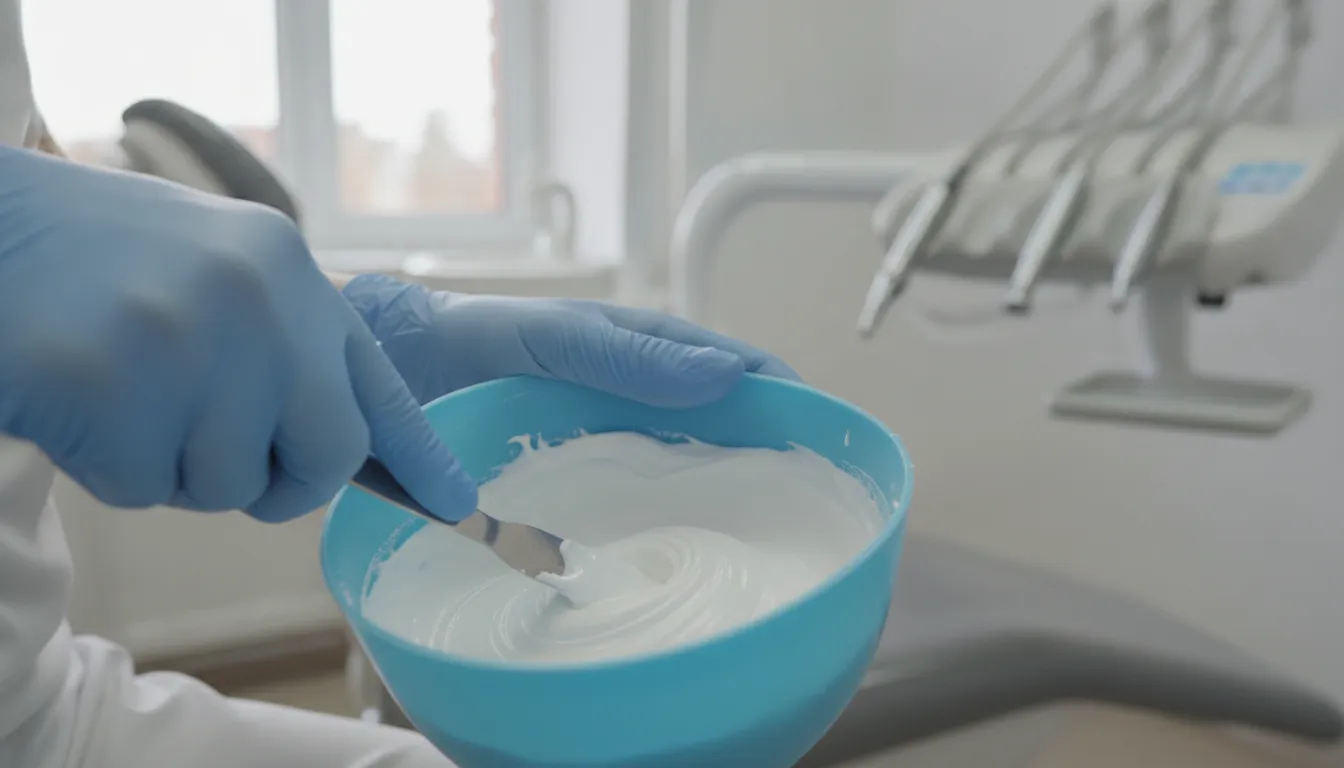
Spatulation is more than blending powder and water. The technique determines whether the alginate impression material captures smooth, continuous anatomy or contains defects that compromise the diagnostic cast. A controlled, forceful motion helps disperse powder, reduce entrapped air, and produce a uniform working mix before the material reaches the tray.
Use the bowl walls to release trapped air
After adding the measured powder to the water, spatulate rapidly and forcefully against the sides of the bowl. Press the spatula through the mix and smear it firmly along the bowl wall rather than simply stirring in a circular motion. This shearing action helps break up dry pockets and remove air bubbles from the developing hydrocolloid mix. Work continuously within the manufacturer-specified mixing time, because delays can reduce the available working time for tray loading and seating.
Correctly spatulated alginate should appear smooth, creamy, and lump-free. Dry granules, visible clumps, streaks of unmixed powder, or a grainy consistency indicate incomplete incorporation. These irregularities can create voids or weak areas in the impression surface, especially around fine tooth anatomy and gingival margins. If the mix remains visibly inconsistent, do not assume tray seating will correct it. Remake the mix according to the product instructions instead.
Load the tray without introducing new bubbles
Tray loading is the next opportunity to control porosity. Transfer alginate into the tray deliberately, keeping the spatula in contact with the material as you place it. Avoid dropping large portions from a height or repeatedly lifting and folding the mix, both of which can introduce additional air. Fill the tray evenly, press the material into the tray rather than packing it loosely, and smooth the surface before insertion.
For areas where bubbles are especially likely, such as the occlusal anatomy, apply a small amount of well-mixed alginate directly over the critical surfaces before seating the tray. Seat with a steady, controlled motion and maintain appropriate positioning while the material sets. Excessive manipulation after placement can disturb the material and increase the risk of defects.
Inspect the impression under good lighting after removal. Voids appear as round or irregular depressions, while tears, drag marks, and missing anatomy may signal poor consistency or movement during setting. If a defect affects a preparation margin, tooth surface, ridge, or other clinically important area, repeat the impression rather than relying on a compromised cast. Consistent spatulation and careful loading are central to learning how to mix alginate impression material reliably in a busy dental practice.
How Water Temperature Affects Alginate Setting Time
Water temperature is one of the simplest variables to control when mixing alginate impression material, yet it can significantly affect the working window available to the dental team. Cold water slows the setting reaction, while warm water accelerates it. This relationship allows clinicians to make small timing adjustments when room conditions or patient circumstances require them, but temperature should never replace the manufacturer's specified technique.
Cold water extends the working time
When the water is colder, the alginate generally remains workable for longer before it reaches its final set. That extra time can help when a clinician is managing a complex tray, positioning a patient carefully, or coordinating with an assistant. However, intentionally using very cold water can create an inconsistent workflow if the temperature varies from one mix to the next. It may also encourage unnecessary delays during loading and seating, which can affect the impression before the material reaches the mouth.
Warm water shortens the setting window
Warm water accelerates setting and reduces the time available for powder incorporation, spatulation, tray loading, and intraoral placement. This may be useful when a faster set is clinically appropriate, but it leaves less tolerance for interruptions or technique errors. If the material begins to lose flow before the tray is seated, the impression may record less detail or develop defects related to incomplete adaptation. Water that is too warm can therefore turn a manageable procedure into a rushed one.
Why the reaction has two practical phases
Alginate setting is commonly described as a biphasic reaction. An initial slowing phase provides a short period during which the material can be mixed and manipulated. The setting phase follows, as the material develops its elastic, irreversible hydrocolloid structure. Temperature influences the pace at which the mix moves through these phases. The goal is not simply to delay or accelerate the set, but to preserve enough working time for a thorough mix and accurate tray seating.
Always check the product instructions for the recommended water temperature, powder-to-water ratio, and mixing time. Alginate formulations differ, so a technique that works for one product may not produce the same setting behavior with another. Use a consistent measuring method and document any practice-specific adjustments that are approved by the manufacturer. In a busy dental office or DSO, standardizing these variables helps assistants and clinicians achieve more predictable results across operators and appointments.
Common Mixing Mistakes That Cause Setting Errors
Setting errors often begin before the alginate reaches the impression tray. Small inconsistencies in measurement, powder handling, or spatulation can change the material's working time, consistency, and final accuracy. Because alginate formulations vary, use the product manufacturer's instructions as the clinical standard rather than relying on a familiar routine.
Changing the powder-to-water ratio
Adding extra water to extend working time or extra powder to stiffen the mix may seem practical, but it changes the material's intended chemical and physical properties. Manufacturer testing is based on a specified powder-to-water ratio. Deviating from that ratio can produce unpredictable results and sub-optimum impressions, including a mix that is too fluid, too stiff, or inconsistent during setting. Measure both components with the supplied or appropriately calibrated devices, and do not estimate by eye. Manufacturer ratio guidance reinforces why repeatable measurement matters in clinical workflows.
Under- or over-spatulating
Under-spatulation can leave dry pockets, lumps, and poorly incorporated powder. These areas may compromise the impression surface and contribute to an uneven set. Spatulating too briefly also allows more air to remain in the mix. In contrast, excessive spatulation can consume working time and may make the material difficult to load or seat before it reaches its setting phase. Follow the product's stated mixing time. For manual mixing, forcefully work the alginate against the bowl wall until the consistency is smooth and creamy, without visible lumps. The standard technique commonly calls for approximately 30 to 45 seconds, but the manufacturer's directions take priority.
Allowing moisture into the powder
Leaving the powder container open between cases, or failing to reseal it fully, allows the powder to absorb moisture from the operatory. Moisture exposure can affect powder handling and may contribute to inconsistent setting behavior. Close the container immediately after dispensing, keep it in a cool, dry storage area, and inspect the powder for clumping before use. Do not attempt to compensate for questionable material by changing the water ratio.
Skipping the fluffing step
Powder can settle and compact during storage. Fluff it gently before measuring so the powder density is more consistent and the measured portion is accurate. Scooping compacted powder without loosening it can result in an unintended excess, even when the measuring scoop appears full.
Prevention checklist
- Read the current product instructions before mixing and use the specified ratio.
- Fluff the powder, then measure powder and water with calibrated devices.
- Reseal the container immediately and store powder in a cool, dry location.
- Use the specified water temperature and mixing time.
- Spatulate forcefully enough to achieve a smooth, lump-free mix without delaying tray loading.
- Discard material when moisture contamination or unexplained setting changes are suspected.
Pouring and Handling Your Set Alginate Impression
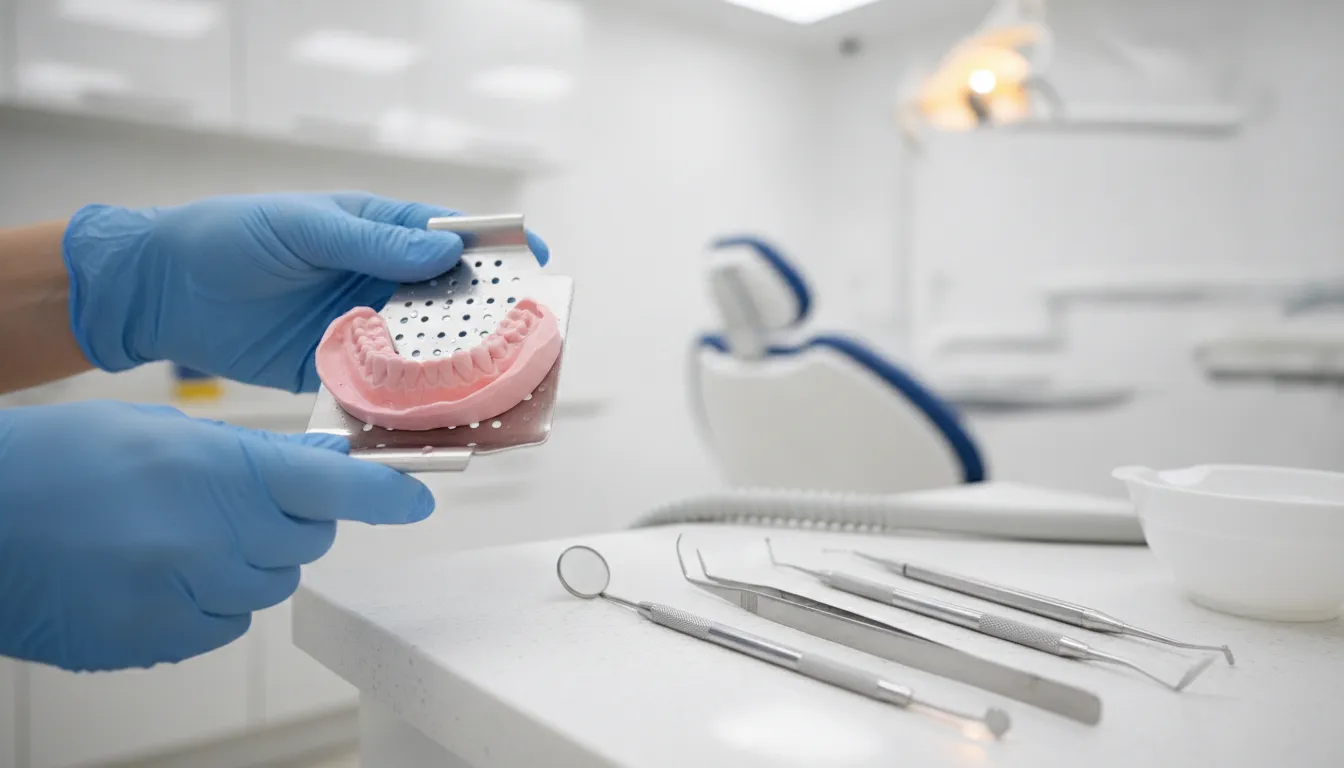
Accurate alginate work continues after the tray is removed. The impression is a temporary negative record, and its dimensions can change if it is stored improperly or left unattended. Plan the laboratory step before beginning the clinical impression so the impression can be rinsed, disinfected, and poured with dental stone as soon as possible.
Remove the impression without distortion
Once the alginate has set, break the seal and remove the tray with one quick, controlled snap movement. Slow rocking or gradual peeling can flex the elastic impression and deform critical anatomy, especially around undercuts. A decisive removal reduces the time the material spends under strain and helps preserve the recorded tooth surfaces and soft-tissue contours. The snap-removal recommendation is supported by dental nursing guidance: alginate handling guidance.
Rinse and disinfect immediately
Rinse the impression under cool running water to remove saliva and visible debris. Disinfect it according to the disinfectant manufacturer's instructions and the alginate manufacturer's compatibility guidance. Do not allow the impression to sit exposed while the team searches for a pouring area. If an unavoidable delay occurs, follow the product instructions for temporary storage. A damp paper towel may help limit moisture loss, but it does not make extended storage acceptable.
Control moisture before pouring
Alginate is an irreversible hydrocolloid, so it remains vulnerable to water exchange after setting. Syneresis is water loss from the impression, which causes shrinkage and reduces dimensional accuracy. Imbibition is water absorption, which can cause expansion and distortion. These mechanisms are why authoritative clinical references recommend pouring the impression with dental stone as soon as possible after it is taken: NCBI Bookshelf reference on alginate impressions.
After disinfection, gently shake off or wick away excess surface water. Do not scrub the alginate or dry it aggressively. The goal is a clean, lightly moist surface without pooled water that could interfere with the stone's contact and produce a poorer-quality model. Inspect the impression for tears, voids, tray show-through, or areas of collapse before investing time in the pour.
Use the specified dental stone and follow its water-to-powder instructions. Introduce the stone carefully into the deepest anatomy, using controlled vibration or an appropriate dispensing technique to reduce trapped air. Continue until the impression is fully supported. Prompt, disciplined handling protects the clinical record and gives the laboratory a more reliable model for diagnosis, treatment planning, or appliance fabrication.
Choosing a Reliable Alginate for Consistent Results
Alginate remains a practical choice for many preliminary impressions because it combines low cost, patient tolerability, procedural simplicity, and useful precision. It is an elastic, irreversible hydrocolloid impression material, so the material can flex around undercuts during removal but does not return to a workable state after setting. That combination makes product selection and handling discipline important for dental practices managing predictable clinical workflows.
For a concise technical overview of alginate composition and behavior, see the NCBI Bookshelf reference. When comparing products for a practice, evaluate the intended indication, working and setting characteristics, powder consistency, packaging, and supplier reliability. A familiar product that can be reordered consistently is often more valuable than a nominally lower-cost material that produces variable mixes or requires frequent process adjustments.
Match the material to the procedure
Not every impression-material product belongs in the same procurement category. Use alginate for appropriate diagnostic, preliminary, study-model, and opposing-arch applications, while reserving more dimensionally stable materials for indications that require longer-term accuracy or delayed pouring. The following comparison helps separate the SurgiMac collections by material type and common workflow use. Always confirm the product instructions and intended indication before standardizing a material across operatories.
| Collection. | Material type. | Best-fit use. | Procurement consideration. |
|---|---|---|---|
| AlgiMac alginates | Alginate, an elastic irreversible hydrocolloid. | Routine preliminary impressions, study models, opposing-arch impressions, and other workflows requiring efficient economical handling. | Prioritize consistent powder-to-water instructions, dependable setting behavior, and packaging that supports frequent clinical use. |
| MacImpress | Impression-material collection for dental workflows. | Cases where the practice needs to select an impression material according to the required accuracy, handling, and working-time profile. | Compare the specific product indication and manufacturer instructions rather than treating every impression material as interchangeable. |
| MacBite | VPS bite-registration material. | Bite registrations and occlusal records, where a dedicated bite material is more appropriate than alginate. | Stock separately from alginate and align purchasing quantities with bite-registration volume and chairside workflow. |
Standardize mixing where volume justifies it
Manual spatulation can produce excellent results when the operator follows the labeled ratio, measures both components accurately, and uses an efficient technique. In higher-volume practices, DSOs, and laboratories, a mechanical alginate mixer can provide more consistent and rapid mixing than manual spatulation while reducing the risk of air incorporation. The benefit is not a substitute for correct dosing or product-specific instructions, but it can reduce operator-to-operator variation when the same material is used repeatedly. Review the supplier's compatibility guidance before adopting equipment, then validate the mix and setting performance with the selected alginate.
For purchasing teams, consistency should be assessed across the full workflow: powder dispensing, water measurement, mixing, tray loading, seating, and prompt pouring. A reliable supply program should include clear lot tracking, sealed storage, repeatable reorder specifications, and a product that clinical staff can use without improvising the manufacturer's ratio. This approach protects impression quality while keeping material costs and chairside disruptions under control.
Source reliable alginate impression material from SurgiMac
Frequently Asked Questions
How do you mix alginate impression material?
Measure the water and fluffed powder according to the product instructions. Add the measured water to the bowl, incorporate the powder with rapid figure-eight strokes. Then spatulate forcefully against the bowl walls until the mix is smooth and free of lumps. This approach helps limit entrapped air and supports consistent tray loading.
What is the correct powder-to-water ratio for alginate?
Use the exact powder-to-water ratio specified by the manufacturer for that alginate formulation. Changing the ratio can alter the material's physical and chemical properties, making the impression result unpredictable. Do not estimate by volume or compensate for a thick mix by adding unmeasured water. Manufacturer mixing guidance explains why ratio control matters.
Does water temperature affect the setting time of alginate?
Yes. Cold water generally slows the setting process, while warm water accelerates it. Use room-temperature water unless the product instructions specify otherwise, and follow the manufacturer guidance because formulations can have different temperature requirements. Clinical mixing guidance supports this temperature relationship.
How long should you spatulate alginate?
For a manual mix, spatulate forcefully against the bowl walls for approximately 30 to 45 seconds, or for the time stated by the manufacturer. Stop when the material is smooth, creamy, and free of visible lumps. Work efficiently after mixing because delays reduce the available working time. Alginate technique guidance describes the 30- to 45-second interval.
Ready to Choose the Right Alginate for Your Practice?
Consistent impressions begin with a reliable hydrocolloid material and a mixing process your team can repeat. When you are ready to source alginate for routine clinical use, browse SurgiMac's AlgiMac alginate impression materials and related supplies. Review the available options for your practice, then follow the selected product's instructions for powder measurement, water ratio, spatulation, and working time.
Tags
Blog posts
-
, by SurgiMac A Clinician's Guide to Absorbable Suture Material
-
, by SurgiMac A Clinician's Guide to Dental Composite Resin Kits
-
, by SurgiMac How to Disinfect with Metrex CaviWipes Correctly
