
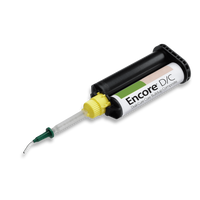
Optimizing Bite Registration Accuracy with VPS
- , by SurgiMac
- 16 min reading time

Improve VPS bite records with a repeatable workflow for preparation, material delivery, seating, stabilization, removal, and error checks.
Optimizing bite registration accuracy with VPS starts before the material reaches the teeth. A repeatable record depends on a stable mandibular position, controlled material delivery, an undisturbed set, and a careful check after removal. This guide focuses on the clinical workflow for making and evaluating a VPS bite record, not on selecting an impression technique for every restorative case. Follow the material manufacturer’s instructions for use (IFU), the treating clinician’s protocol, and the requirements of the intended laboratory or digital workflow.
What does an accurate VPS bite registration need to capture?
A bite registration records the relationship between the maxillary and mandibular teeth at a specified position. The record should be stable enough to reproduce that relationship when it is evaluated or used downstream. It should not introduce an avoidable shift by rocking, flexing, or dragging against the teeth during setting or removal.
Accuracy is not simply a matter of using a particular material. The operator must identify the intended position, guide the patient consistently, deliver enough material to capture the necessary contact areas, and hold the relationship until the material has set according to its IFU. The record then needs to be checked for incomplete capture, distortion, and interference from excess material. A technically neat record can still be wrong if the patient closed into the wrong position.
Published research on maxillomandibular registration considers the accuracy of intraoral recording approaches, while studies of scannable and conventional registration materials examine dimensional stability. These are useful reminders that both the recording method and the material can matter; they do not replace case-specific judgment or product instructions. See the study on precision of maxillomandibular registration and research on accuracy and dimensional stability of registration materials.
How should the team prepare before dispensing VPS?
Start by confirming the purpose of the record and the intended jaw relationship. The operator should know which teeth or surfaces need to be captured and how the record will be evaluated or used. If the patient’s closure is inconsistent or the prescribed position is unclear, pause and resolve the clinical question before dispensing. Material cannot correct uncertainty about the desired relationship.
- Review the IFU. Confirm the product’s compatible dispenser and tip, mixing method, working time, intraoral setting time, and any stated handling limits. Do not transfer times or handling steps from one VPS product to another.
- Check equipment and supplies. Confirm that the cartridge, dispensing device, and mixing tip are compatible and ready. Stage the required items in a consistent order. A mixing-tip option can be part of that planned setup when it is specified as compatible for the selected material.
- Prepare the patient and field. Explain the closure task in simple language. Position the patient so the operator can observe and guide the mandible without losing access. Use routine patient protection and infection-prevention procedures; for example, dental bibs can be included in the operatory setup.
- Assess the teeth and access. Identify the intended contact areas, obstacles, and any condition that could prevent a repeatable closure. Manage moisture and soft tissues in a manner consistent with the product IFU and the clinical situation. Avoid assuming that one isolation or drying method suits every patient or material.
- Agree on the sequence. Decide who will dispense and who will guide or observe, if the team is working together. Confirm the cue for closure and the plan for holding the patient in position until setting is complete.
Keep patient-care supplies organized and separate from items that could contaminate the material or working area. Teams may stage a setup tray as part of their normal operatory preparation, while maintaining their established clean and contaminated zones. Organization supports a consistent sequence; it does not substitute for material compatibility checks.
A brief pre-dispensing pause can make these checks practical in a busy operatory. The assistant can verify the planned product and tip while the clinician confirms the jaw position and patient cue. Before opening or dispensing material, check the expiration date and storage history against the product labeling, and make sure the cartridge is undamaged. If any detail is uncertain, consult the IFU or the practice’s protocol rather than relying on memory. This division of roles can reduce last-minute searching and helps ensure that the person guiding closure is ready before working time begins.
How can the team control material delivery and mixing?
Use only the dispensing and mixing method specified by the selected VPS product. Check the cartridge and dispenser before use, then attach the correct tip securely. If the system uses an automix cartridge, follow its priming instructions where applicable. Do not improvise cartridge preparation, reuse a single-use component, or combine components from different systems unless the manufacturer explicitly permits it.
Dispense steadily and deliberately. Avoid unnecessary starts and stops that could create gaps or uneven coverage. Place material where it can capture the required occlusal surfaces without obstructing the planned closure. The goal is sufficient coverage of the intended record area, not the greatest possible volume. Excess material can complicate seating and removal, while inadequate material can leave contact surfaces unrecorded.
Keep the tip opening in the material as directed by the IFU, and maintain control of the dispenser. This helps the operator deliver a continuous volume rather than trap avoidable voids. Do not allow the working end to contact surfaces that could contaminate the material. If a tip becomes blocked or material delivery looks irregular, stop and assess rather than trying to compensate by forcing the dispenser.
Where an intraoral tip is required, verify the product system and the tip’s intended use before the appointment. A set of intraoral tips may be relevant to supply planning, but staff must confirm compatibility with the specific material and dispensing device. Product availability alone does not establish that a component is suitable for a particular VPS system.
Think through the delivery path before dispensing: identify the surfaces that must be captured, the direction of access, and where surplus material could pool or interfere with closure. This planning is especially useful when access is limited or the intended record area is narrow. Deliver a controlled amount that covers the required region while preserving a clear path for the patient to close as instructed. If the material begins to set before seating is complete, do not force the record into place or extend handling beyond the product’s stated working time. Follow the IFU and clinician’s protocol for deciding whether to restart.
What is a repeatable seating and stabilization sequence?
- Reconfirm the intended position. Give the patient the agreed cue. Guide closure as clinically appropriate and verify that the mandible reaches the intended position before the material begins to lock the teeth together.
- Seat without rocking. Apply the registration material and bring the patient into the planned relationship with controlled movement. Avoid a side-to-side or forward slide that could alter the record. Do not use the tray or material as a lever to reposition the jaw.
- Stabilize consistently. Maintain the position with steady, appropriate support until the material has set for the product-specific time. Avoid changing hand position in a way that moves the mandible or flexes the record. Ask the patient to remain still and avoid talking or making repeated closure movements.
- Wait for the full set. Use the IFU’s stated timing and conditions. A surface that feels firm is not, by itself, a reliable substitute for the specified setting time. Do not remove early to save time.
- Release and remove carefully. Once the material has set, release the record along a controlled path that avoids twisting or bending it. Use the clinician’s established method and the product instructions. Do not pry against teeth or restorations in a way that risks damage.

These steps are procedural checkpoints, not a universal technique prescription. Patient anatomy, the planned record, the product’s working characteristics, and the clinician’s protocol may affect how the sequence is carried out. The central control is consistency: the patient should be guided into the same intended relationship, and that relationship should remain undisturbed through setting.
Patient communication is part of stabilization. A short instruction before dispensing—such as explaining the closure cue and asking the patient to stay still until told otherwise—can reduce uncertainty once the material is in place. Avoid giving multiple competing directions during the set. If the patient needs to swallow or is uncomfortable, respond in accordance with clinical judgment and the planned protocol; do not treat continued movement as a harmless interruption. The operator should be able to observe whether the patient maintained the intended closure, rather than assuming stability from the patient’s silence.
Which handling choices can reduce common sources of error?
| Workflow point | Common risk | Practical control |
|---|---|---|
| Position selection | Patient closes into a different or inconsistent relationship | Confirm the intended position and closure cue before dispensing |
| Material delivery | Voids, gaps, or uneven coverage | Use the specified dispensing system and a controlled, continuous delivery technique |
| Seating | Record shifts as the patient closes | Guide closure deliberately and avoid lateral or forward sliding |
| Setting | Mandible moves or record is disturbed before completion | Stabilize steadily and follow the product-specific setting time |
| Removal | Record flexes, tears, or changes shape | Wait for the full set and remove along a controlled path |
| Evaluation | Defects or incomplete capture go unnoticed | Inspect the record and compare its contacts with the intended relationship |
Moisture management also deserves attention. Saliva, blood, or other contamination can interfere with clinical handling or obscure the record, depending on the material and situation. Follow the IFU and the clinician’s established approach to field management. Do not assume that a generic instruction to “dry everything” is appropriate for every patient, substrate, or product. If field conditions compromise visibility or control, address them before recording.
Other avoidable problems include selecting an incompatible tip, failing to follow required cartridge preparation, using expired or improperly stored material, and relying on a remembered set time from a different product. A quick pre-procedure check can catch these issues. Staff responsible for purchasing and stocking can help by keeping product instructions accessible and confirming that the cartridges and accessories ordered match the practice’s dispensing system. SurgiMac’s MacBite and MacImpress are relevant brand names to consider when sourcing registration and impression materials; confirm the specific product’s intended use and IFU before incorporating it into a protocol.
A useful troubleshooting approach is to trace a defect back to the stage where it could have been introduced. For example, a missing contact area may point to insufficient coverage or an incomplete seat, while a record that does not reproduce the observed closure may indicate movement or an incorrect starting position. Visible distortion after removal suggests reviewing both the set and the removal path. These are prompts for a clinical review, not definitive diagnoses of what went wrong. Record the observation, compare it with the sequence used, and change only the relevant step when the clinician determines a repeat is appropriate. Changing several variables at once can make it harder for the team to learn which adjustment improved consistency.
Similarly, when a record is questionable, separate defects that affect the required anatomy from cosmetic irregularities that do not alter the intended use. The receiving laboratory or workflow may have its own acceptance criteria, so clarify those requirements ahead of time. A record should not be accepted solely because it looks smooth, and a rough-looking margin should not automatically be treated as unusable without evaluating its relevance to the case. The clinician remains responsible for deciding whether the record is adequate for its intended purpose.
How should the removed record be evaluated?
Inspect the registration as soon as practical under good lighting. Confirm that the intended teeth and contact areas are represented and that the record has set as expected. Look for visible voids, incomplete surface capture, tears, distortion, or excess material that prevents the record from seating consistently. Check that the record is not visibly warped or damaged from removal.
Then assess whether it reproduces the intended relationship. A record can appear complete yet still reflect a slide or an incorrect closure. Compare the captured relationship with the clinical plan and the operator’s observation of the patient’s closure. If the record does not seat reproducibly or the relationship is uncertain, do not send a questionable record forward as though it were verified. Determine whether a new record is indicated under the clinician’s protocol.
Use a consistent inspection sequence rather than a quick glance. First, check that the record is fully set and intact. Next, identify whether all planned contact areas are represented and whether any void or excess material affects seating. Finally, evaluate reproducibility against the intended relationship and note any uncertainty. A second team member may assist with a check when appropriate, but the review should follow the clinician’s protocol and the requirements of the receiving laboratory. Consistent checks make it easier to distinguish a material-handling problem from a position or patient-cooperation issue.
Document relevant deviations or repeat attempts according to practice policy and the needs of the laboratory or downstream team. If a record is being used with a digital workflow, clarify the receiving system’s requirements rather than assuming every physical record is interchangeable with a scan or digital registration. The research literature examines both registration approaches and material behavior, but the appropriate method remains tied to the case and the receiving workflow.
Patient protection and clean handling remain part of the process from preparation through disposal. For example, teams may include oral swabsticks in appropriate patient-care setups, while following their own clinical protocol and the product’s labeled use. Keep clean supplies separate from used items, and process reusable equipment according to its applicable instructions and infection-prevention policy.
How can practices make the process more consistent?
A short, product-specific checklist helps keep the technique repeatable without turning it into a one-size-fits-all rule. Include the selected VPS product, compatible dispensing equipment and tip, IFU location, intended jaw position, operator roles, stabilization plan, and post-removal inspection points. Keep the checklist easy to update when a product or workflow changes.
- Train team members on the practice’s closure cue and who guides the mandible.
- Keep the manufacturer’s instructions available at the point of use.
- Check expiration dates, storage conditions, and accessory compatibility during routine inventory review.
- Review failed or repeated records for patterns, such as inconsistent patient positioning or premature removal.
- Communicate the record’s purpose and any special handling needs to the laboratory or receiving team.
Practices can make the checklist more useful by organizing it around the actual sequence: confirm position, verify product and components, prepare the patient, dispense and seat, stabilize through the set, remove, and inspect. A brief sign-off or verbal confirmation before dispensing can catch missing components without adding a complicated documentation burden. When a product changes, review the IFU and update the relevant checklist items instead of assuming the former material’s timings and handling apply. New staff should be shown the practice’s workflow and the limits of the checklist: it supports consistency but does not override case-specific clinical judgment.
Purchasing choices should support the protocol rather than determine it. Compare the material’s labeled indication and handling instructions, the practice’s dispenser and tip compatibility, and the needs of the cases being treated. SurgiMac’s MacBite line may be relevant for teams sourcing bite registration materials, while MacImpress provides a related impression-material brand reference. Verify current product details and instructions before selecting supplies; do not infer specific properties from a brand name alone.
Inventory planning can also prevent substitutions that disrupt a validated routine. Keep a clear record of which dispenser, cartridge, and tip combinations are approved for the materials in use, and identify an appropriate contact within the practice for resolving compatibility questions. Before placing an order, compare the exact product identification and intended application with the current clinical protocol. If a preferred item is unavailable, do not assume another accessory is interchangeable based on appearance or a similar package description; verify it with the product documentation and the clinician responsible for the procedure. These simple sourcing controls help preserve the workflow without making purchasing decisions a substitute for clinical evaluation.
Explore intraoral tip options for your supply plan
Frequently asked questions
Can VPS bite registration material replace a consistent closure technique?
No. The material records the relationship presented to it; it cannot correct an inconsistent or incorrectly selected jaw position. Confirm the intended relationship and guide the patient consistently before and during setting.
How long should the patient hold the bite?
Use the setting time and handling instructions for the exact VPS product. Do not use a time remembered from another material or remove the record merely because its surface feels firm.
What should the team do if the record has a void?
Assess whether the defect affects a required contact area or the record’s ability to reproduce the intended relationship. Follow the clinician’s protocol to decide whether a new record is needed rather than assuming the defect is harmless.
Can the same dispensing tip be used with every VPS cartridge?
No universal compatibility should be assumed. Confirm the cartridge, dispenser, and tip requirements in the selected product’s instructions, and use only components identified as compatible.
Make accuracy a repeatable workflow
Reliable VPS bite registration combines a clearly identified jaw relationship with controlled material delivery, steady stabilization, product-specific setting time, and a deliberate inspection after removal. When each step is planned and checked, the team is better positioned to identify a questionable record before it affects downstream work. Keep the clinician’s protocol and the material IFU at the center of every case.
Tags
Blog posts
-
, by SurgiMac A Clinician's Guide to Absorbable Suture Material
-
, by SurgiMac A Clinician's Guide to Dental Composite Resin Kits
-
, by SurgiMac How to Disinfect with Metrex CaviWipes Correctly
