


Bayonet Root Forceps: Design, Uses, and Selection
- , by SurgiMac
- 18 min reading time
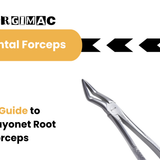
Get a professional guide to bayonet root forceps for root and fragment removal. Learn design, selection criteria, and safe extraction technique.
Removing a fractured root tip is often less about applying more force and more about gaining controlled access to a confined area. In the posterior maxilla, a straight instrument can obstruct the operator's view or struggle to align with the remaining root.
A bayonet root forceps uses an offset shank to reach deep, narrow, or angled areas of the dental arch, particularly around posterior maxillary root fragments. That geometry can improve visibility and instrument alignment while supporting a more controlled extraction approach. Appropriate forceps selection is part of minimizing unnecessary trauma and protecting surrounding tissues, as emphasized by the NCBI clinical reference on dental extraction instruments: NCBI Bookshelf.
The instrument's value becomes clearer when its offset profile is considered alongside the beaks, hinge, and handle. Those components determine how the forceps engage the fragment, how the clinician maintains tactile control, and when a different design is more appropriate. Understanding that relationship is the first step toward selecting an instrument that matches root anatomy, access, and the planned extraction technique.
Shop precision extraction instruments from SurgiMac
What Is a Bayonet Root Forceps? Design Is What Sets It Apart
A bayonet root forceps is a specialized extraction instrument designed for controlled access to root fragments, particularly in the posterior maxillary region. Its defining feature is not simply the shape of its beaks. The entire working profile is built around an offset, bayonet-shaped shank that helps the operator approach difficult anatomy while maintaining a clearer view of the surgical field. This design is especially valuable when a retained or fractured root lies deep within a narrow or angled portion of the dental arch.
Like other dental extraction forceps, a bayonet root forceps has three functional components:
- Beaks: The working ends that engage the tooth structure or root fragment. Their contour and width must correspond to the fragment being removed.
- Hinge: The joint that transfers controlled hand movement to the beaks and allows them to open and close smoothly.
- Handle: The portion held by the operator, providing grip, tactile control, and the leverage needed for carefully directed movement.
This beak, hinge, and handle arrangement follows the basic anatomy described for dental forceps under ISO 9173 terminology. Although the components are familiar, their relationship changes significantly when the shank is offset. The bayonet profile places the handles and hinge away from the direct line between the operator's hand and the beaks. That geometry can reduce obstruction from the hand and instrument while the beaks are positioned around a posterior tooth or root tip.
Why the offset shank matters
Standard straight-shanked forceps may be difficult to position when access is limited by the maxillary arch, adjacent teeth, soft tissue, or the crown of the tooth being treated. The offset shank of a bayonet instrument is engineered to reach into deep, narrow. Or angled areas of the posterior jaw that a straight instrument may not easily access. In practical terms, the shape helps the operator navigate around the arch and preserve a clearer line of sight during root-fragment removal. These design benefits are described in the NCBI Bookshelf review of dental extraction instruments.
The classic upper bayonet patterns include the #51 and #65 root forceps. Both are associated with maxillary root work. But their beak profiles and dimensions may make one more suitable than the other depending on the fragment's location, size, and remaining purchase. A universal bayonet pattern may be selected when access across different quadrants is needed, provided its beaks provide an appropriate fit and the operator can maintain stable control.
Instrument geometry does not replace clinical judgment. The beaks should engage the available root structure without unnecessary compression of surrounding tissues, and the instrument should support deliberate, atraumatic movements rather than excessive traction. Selecting the appropriate pattern for the anatomy helps the operator work through a smaller access path while keeping the extraction field visible and controlled.
How Bayonet Forceps Work: The Mechanics of Root Luxation
Bayonet root forceps are designed to luxate and deliver root fragments with controlled movement rather than brute pulling. Their offset shank helps the operator approach a deep or angled root while maintaining a clear visual and working path, particularly in the posterior maxilla. The instrument is most effective when the beak tips engage the tooth structure or fragment at the correct depth and the surrounding tissues are protected.
The underlying mechanical principle is a wedge. The beak tips are seated into the periodontal ligament space, close to the alveolar crest, so the instrument can gradually expand the socket as pressure is applied. This engagement converts small, deliberate hand movements into controlled displacement of the root. The goal is to sever or stretch the remaining periodontal attachment and mobilize the fragment, not to crush it or transmit unnecessary force to the cortical plate.
Proper seating matters. The beaks should follow the long axis of the root and obtain a stable purchase without levering against adjacent teeth or unsupported bone. If the tips are placed too coronally, the forceps may slip or fracture the remaining root. If they are advanced aggressively, they can damage the periodontal tissues or alveolar bone. Instrument selection and technique should be matched to the anatomy and the clinical objective. Consistent with guidance that appropriate extraction instruments help reduce traumatic procedures and iatrogenic injury (NCBI Bookshelf).
Once the beaks are seated, luxation usually combines several movements. Each should be light, progressive, and responsive to the resistance felt through the instrument:
- Apical pressure: Advance the beaks apically when anatomy permits. This improves purchase, places the wedge deeper into the ligament space, and can help expand the socket from its most accessible point.
- Buccal force: Apply controlled pressure toward the buccal aspect to expand the socket in that direction. The amount should reflect root shape, bone thickness, and radiographic findings.
- Lingual or palatal pressure: Use measured pressure toward the lingual or palatal side when the root and supporting bone allow it. Alternate with buccal movement rather than forcing one direction continuously.
- Rotational pressure: Rotate gently around the long axis when the fragment is single, relatively intact, or conical. Rotation is less suitable for curved, flattened, divergent, or fragile roots.
- Tractional delivery: Once mobility is established, lift the root from the socket with gentle traction. Traction should deliver a mobilized fragment, never substitute for luxation or become a forceful pulling motion.
These movements are not a fixed sequence for every extraction. The clinician may repeat or combine them according to root morphology, socket anatomy, and tactile feedback. If the fragment does not mobilize with controlled luxation, reassess visibility, beak purchase, and the need for a different instrument or surgical approach. Minimally invasive extraction principles favor reducing force on the tooth and alveolar bone when preservation is clinically important (PubMed).
Common Uses: Root and Fragment Removal
Bayonet root forceps are especially useful when a fractured or retained root tip sits in a confined area of the dental arch. Their offset profile can improve access and maintain the operator's line of sight, particularly during posterior maxillary procedures. The goal is controlled fragment retrieval, not forceful grasping. Before using the instrument, assess the fragment's position, remaining coronal structure, root morphology, surrounding bone, and soft-tissue access. Confirm that the selected beak can engage the fragment securely without compressing or damaging adjacent structures.
For a practical overview of instrument selection and handling, review this root tip forceps guide. The following sequence describes a controlled approach for a retrievable root tip and should be adapted to the clinical findings and the practitioner's judgment.
- Expose the root fragment. Establish adequate visibility and access with the least disruptive approach appropriate for the case. Remove obstructing tissue or small amounts of surrounding debris only when necessary to identify the fragment and its long axis. Avoid blind placement. Clear visualization helps the beak contact the root rather than the adjacent alveolar process or soft tissue.
- Seat the serrated beak along the long axis. Position the beak so its serrated working surfaces engage the root tip as parallel to its long axis as the anatomy permits. Advance with light apical pressure until the instrument is seated. Do not close the handles prematurely or clamp across unsupported root structure. A stable, apically directed purchase reduces the risk of slipping and limits unnecessary compression.
- Luxate with controlled motions. Use small, deliberate movements that match the root's anatomy and resistance. Avoid sudden traction. A gradual luxation motion can help disrupt the periodontal ligament attachment and mobilize the fragment while preserving surrounding tissues. If the fragment does not move, stop and reassess the purchase, access, and need for additional surgical exposure rather than escalating force.
- Deliver the fragment. Once the root tip is mobile, guide it out along the path of least resistance with steady traction. Maintain control as the fragment emerges so it is not displaced into a deeper space or released into the surgical field. Inspect the retrieved piece and the socket to confirm that the intended fragment has been removed. Then address the site according to the procedure and the patient's clinical needs.
Appropriate forceps selection is important because bayonet-style instruments can retrieve fractured or retained root remnants efficiently while reducing the need for extensive flap elevation, as reported in this PubMed study. That benefit does not replace careful diagnosis or atraumatic technique. If the beak cannot obtain a secure purchase, visibility is inadequate, or resistance suggests unfavorable root anatomy, change the plan rather than forcing the instrument.
Bayonet Root Forceps vs Straight-Shank Forceps
The choice between bayonet root forceps and straight-shank forceps is primarily a question of access, visibility, and control. Both instruments can support root and fragment removal, but their geometry places the operator's hand and line of sight differently relative to the working end. The appropriate choice depends on the tooth location, the remaining root structure, and the amount of access available after luxation.
Bayonet instruments use an offset shank that helps the beaks approach a root from a more favorable angle. This design is particularly useful in the posterior maxilla, where limited space, cheek interference, and the curvature of the dental arch can make direct instrument positioning difficult. The offset can also clear the operator's line of sight during root-fragment removal, a design rationale described in the NCBI Bookshelf review of dental extraction instruments.
| Consideration | Bayonet root forceps | Straight-shank forceps |
|---|---|---|
| Primary indication | Root tips and fractured or retained root fragments, especially when the access path is narrow or angled. | Teeth or root segments that can be approached directly with adequate coronal and buccal access. |
| Posterior maxillary access | The offset shank can reach deep, narrow, and angled posterior areas without requiring the handle to follow the same direct path as the beaks. | May be less adaptable in deep posterior spaces because the handle and beaks remain on a more direct axis. |
| Operator line of sight | Improves visual clearance around the working end, which can help the operator monitor beak placement near a root tip. | Provides a familiar direct approach, but the shank may occupy more of the visual corridor in a confined field. |
| Root-tip retrieval | Well suited to controlled engagement of accessible root fragments after appropriate luxation and exposure. | Effective when the fragment is visible and aligned with a direct path, but less useful when the fragment lies deep or at an angle. |
| Handle ergonomics | Requires the operator to understand the offset and maintain stable beak alignment while applying controlled force. | Offers straightforward visual and tactile orientation, which may feel intuitive during direct anterior or premolar access. |
Neither configuration replaces sound case assessment or atraumatic technique. A straight-shank instrument may be the more efficient option when the root is clearly visible and directly aligned. A bayonet design becomes more valuable when posterior anatomy, limited opening, or a deep fragment makes direct access awkward. Select the instrument that allows stable beak placement, a clear view of the working end, and controlled force along the intended path rather than choosing by shape alone.
How to Select the Right Bayonet Root Forceps
Instrument selection should begin with the tooth's location, root anatomy, and planned extraction mechanics, not with a preference for a familiar handle. Appropriate forceps selection helps prevent iatrogenic damage, reduce unnecessary trauma, and improve patient safety, as outlined in the NCBI oral surgery reference.
Match the forceps to the arch and root anatomy
For posterior maxillary root fragments. The offset shank of a bayonet design can improve access in a deep or narrow field while keeping the operator's hand and handle out of the line of sight. This is particularly useful when the remaining root is positioned at an angle or when adjacent teeth limit a straight approach. In contrast. A straight instrument may be more practical when the tooth and root are directly visible and the beaks can be seated along the long axis without interference.
Assess whether the root is single and conical or whether it is multiple, divergent, flattened, or irregular. A single conical root may tolerate controlled rotational movement after adequate periodontal ligament release. Multirooted teeth and fractured roots generally require more deliberate luxation and may call for a narrower beak or a root-tip pattern that can engage the remaining structure without gripping adjacent bone or tooth surfaces.
Compare common bayonet patterns and numbering
Numbering varies by manufacturer and catalog, so confirm the instrument's actual beak geometry rather than relying on the number alone. The #51 and #65 are commonly recognized upper root bayonet patterns, with narrow beaks intended for root access and fragment control. A universal bayonet, such as a #210 pattern, may offer a broader option when the practice needs one instrument that can serve more than one quadrant. The correct choice still depends on whether the beaks can reach the root and seat securely without excessive apical pressure.
Inspect the beak profile, tip width, and serration. Fine serrations can improve purchase on a root surface, but they should not substitute for proper seating or controlled luxation. Beaks that are too broad may contact surrounding structures, while beaks that are too narrow may concentrate force on a fragile fragment. Select the smallest pattern that provides stable engagement and preserves visibility.
Include handle ergonomics in the decision
Handle diameter, surface texture, balance, and spring or hinge action influence tactile control during a delicate extraction. A comfortable instrument can help the clinician maintain a neutral wrist and avoid compensating with excessive grip force. Review SurgiMac's Air Series and Slim Series when comparing ergonomic instrument options, then explore the broader professional surgical and dental instrument collection.
Finally, choose the forceps that support the least traumatic path. Minimally invasive vertical extraction aims to reduce forces applied to the tooth and alveolar bone, helping preserve bone structure for potential implants, according to this PubMed-indexed review. For a broader instrument-planning overview, see SurgiMac's guide to dental surgical instruments for extractions.
Best Practices for Safe, Atraumatic Root Extraction
Safe root removal depends on controlled luxation, appropriate visualization, and an instrument that matches the root's location and anatomy. A bayonet root forceps can improve access to deep or angled posterior areas, but it should not be used as a substitute for a clear treatment plan. Confirm the tooth or fragment position clinically and radiographically when indicated. Assess root curvature and remaining coronal structure, and establish whether the fragment is safely retrievable through the socket.
Luxate before applying traction
Root forceps are most effective after the periodontal ligament has been sufficiently released. Use apical pressure to seat the beaks as far apically as the anatomy permits, then apply small, controlled buccal, lingual, or rotational movements appropriate to the root form. Avoid a sudden pulling motion. Traction should be the final component of delivery, not the primary method of loosening a firmly retained root.
Keep the beaks aligned with the long axis of the root and maintain a stable fulcrum. Incremental movements provide tactile feedback and reduce the risk of crushing a fragile fragment, fracturing additional root structure, or transmitting excessive force to the alveolar process. If the fragment moves, reassess its position between movements rather than increasing force reflexively.
Protect the socket and surrounding tissues
Atraumatic extraction is not simply a matter of removing the root. It also means preserving the bony walls and soft tissues that support healing and future treatment. Minimally invasive vertical extraction concepts emphasize reducing forces applied to the tooth and surrounding alveolar bone to preserve bone structure for potential implant therapy. The evidence summarized in PubMed supports force-conscious extraction when alveolar preservation is clinically important.
- Use direct illumination, suction, and retraction that maintain visualization without traumatizing the flap or socket margin.
- Choose beak geometry and working length that engage the root securely without levering against an adjacent tooth or thin cortical plate.
- Pause if the root fractures further, visibility is lost, or the applied force no longer produces controlled movement.
Recognize when forceps are no longer the right instrument
Correct instrument selection helps prevent iatrogenic damage and traumatic procedures, improving patient safety, as described in the NCBI Bookshelf review of dental instruments. If a root tip cannot be engaged, is deeply displaced, lies near vital structures, or remains immobile despite appropriate luxation, do not escalate grip strength. Consider a controlled surgical approach, referral to an oral and maxillofacial surgeon, or removal under conditions that provide better access and protection. A limited surgical intervention may be safer than blind or forceful manipulation. Document the fragment's location, the instruments and technique used, and the reason for referral so the next clinician can proceed with a clear risk assessment.
Explore the Air Series for ergonomic, precision instruments
Frequently Asked Questions
What is a bayonet forceps used for?
A bayonet forceps is used when an offset shank improves access to a deep, narrow, or angled area of the dental arch. In extraction procedures. This design is especially useful in the posterior maxilla because it can improve the operator's line of sight while keeping the handle and hand clear of the working area. The exact instrument should still match the tooth, root anatomy, and extraction plan.
What are bayonet root forceps used for?
Bayonet root forceps are commonly selected for grasping and removing retained or fractured root tips, particularly in difficult-to-reach maxillary sites. A suitable beak can engage the remaining root without forcing a straight instrument into an unfavorable angle. For small fragments, use controlled apical and luxation movements rather than relying on forceful traction. Appropriate selection can help retrieve root remnants while limiting the need for extensive soft-tissue flap elevation, as discussed in this PubMed-indexed clinical report.
Are bayonet forceps appropriate for every tooth extraction?
No. Bayonet instruments are not a universal substitute for tooth-specific forceps. Consider the arch, quadrant, tooth morphology, root configuration, access, and whether the beaks can engage the tooth along its long axis. A #65-style instrument is commonly associated with maxillary root tips, while a universal bayonet pattern may be useful across quadrants depending on the clinical situation. Match the instrument to the anatomy and procedure rather than choosing by shape alone.
How can clinicians use bayonet root forceps more safely?
First obtain adequate luxation and visibility, then apply controlled forces appropriate to the root and surrounding bone. Avoid levering against adjacent teeth or using sustained traction before the socket has expanded. Instrument selection is part of atraumatic technique because the wrong beak or approach can increase tissue trauma and iatrogenic risk. Minimally invasive extraction principles also emphasize reducing force on the tooth and alveolar bone to help preserve bone structure for potential implant treatment, as summarized by PubMed.
Ready to Choose Your Extraction Instruments?
The right bayonet root forceps can support controlled access and precise handling during root and fragment removal. When you are reviewing options for your operatory or surgical setup, compare instrument designs, beak patterns, and handle ergonomics against the procedures your team performs most often. Shop SurgiMac's precision surgical and dental extraction instruments to get started with equipment selected for professional clinical use.
Tags
Blog posts
-
, by SurgiMac A Clinician's Guide to Absorbable Suture Material
-
, by SurgiMac A Clinician's Guide to Dental Composite Resin Kits
-

, by SurgiMac How to Disinfect with Metrex CaviWipes Correctly
