
Dry Heat Sterilization Nylon Pouches: A Dental Guide
- , by SurgiMac
- 16 min reading time
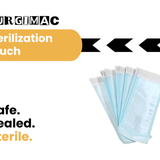
Learn how dental teams evaluate dry heat sterilization nylon pouches, including compatibility, sealing, indicators, storage, and manufacturer instructions.
Packaging is part of the sterilization process, not an interchangeable wrapper added at the end. For dental teams using dry heat, the pouch must tolerate the validated cycle, allow the sterilizing agent to reach the instrument, and preserve the sterile barrier after processing. Steam-service packaging cannot be assumed suitable for dry heat simply because both methods use heat.
Dry heat sterilization nylon pouches may fit a dental workflow when the specific pouch, instrument, and sterilizer instructions confirm compatibility. Teams should verify the approved time and temperature, prepare clean and thoroughly dry instruments, seal as directed, use appropriate chemical indicators, and follow facility policy. The pouch material and seal are only one part of that decision; the applicable manufacturer instructions control the cycle and packaging requirements (CDC guidance).
That makes the first practical question less about the word nylon and more about the job the pouch is validated to perform: creating a compatible barrier that supports sterilant penetration, processing, and protected storage.
What Are Dry Heat Sterilization Nylon Pouches Designed to Do?
Dry heat sterilization nylon pouches are packaging barriers intended to enclose compatible dental instruments during a validated dry-heat cycle and help protect those instruments from contamination after they leave the sterilizer. Their role is not to make an unvalidated cycle safe or to replace the sterilizer, instrument, or packaging manufacturer instructions. The pouch, its seal, the load configuration, and the dry-heat process must work together.
Compatibility depends on the pouch and the cycle
CDC guidance states that packaging should allow the sterilization agent to penetrate and maintain sterility after processing. It also says packaging must be compatible with the specific heat method being used. For dry heat, the material must not insulate the instrument from heat or be destroyed by the process temperature. An inappropriate barrier can prevent heat from reaching the instrument or otherwise compromise the sterilization process. See these dental sterilization guidelines and the CDC's packaging and sterilization guidance when evaluating a pouch system.
That is why the word nylon alone does not establish compatibility. A dental team should confirm that the pouch labeling and instructions for use specifically identify the intended dry-heat method, temperature, exposure time, instrument type, sealing method, and any load restrictions. The sterilizer IFU and facility policy also apply. Do not transfer a pouch from one process to another without product-specific validation.
One listed nylon pouch indication describes use with a dry-heat sterilizer operating at 160 degrees C (320 degrees F) for 60 minutes. It identifies nylon construction, a self-seal adhesive strip, and metal instruments as part of that product's intended use. Those details illustrate what product-specific validation can look like, but they are not universal specifications for every nylon pouch. A nylon sterilization pouch option from SurgiMac should be evaluated against its current labeling and IFU before it is included in a dry-heat workflow.
In practical terms, the pouch should permit the validated heat exposure, maintain a reliable closure, and preserve the sterile barrier afterward. If its material, adhesive, seal, or temperature rating is unclear, pause the packaging decision and obtain the manufacturer's documentation rather than extrapolating from appearance or from an autoclave pouch. Compatibility is a documented requirement, not a visual assumption.
How Do Nylon Pouches Differ From Autoclave Packaging?
The key difference is not the pouch shape. It is the validated sterilization method. Packaging must be compatible with the specific heat process, allow the sterilizing agent to penetrate, and preserve the sterile barrier after processing. CDC guidance also notes that dry-heat packaging must not insulate instruments from heat or be destroyed by the process temperature. A pouch validated for dry heat should therefore not be treated as an autoclave pouch unless its own instructions for use explicitly validate steam processing.
| Dry heat | Steam/autoclave |
|---|---|
| Requires packaging that tolerates the dry-heat temperature and does not insulate the load. CDC lists materials such as paper bags, aluminum foil, polyfilm plastic tubing, and wrapped perforated cassettes as examples of dry-heat packaging materials. | Requires packaging specifically validated for the autoclave's steam, pressure, temperature, and cycle parameters. A steam pouch assumption cannot be transferred to a dry-heat cycle, or vice versa, without product-specific validation. |
| A listed nylon-pouch indication specifies dry heat at 160 C (320 F) for 60 minutes. That example uses nylon, a self-seal adhesive strip, and metal instruments. It describes one product indication, not a universal rule for every nylon pouch. | Use only packaging whose IFU identifies the intended steam process and applicable cycle conditions. Confirm the pouch, instrument, and autoclave instructions before loading. |
| Product selection should be based on the pouch IFU, the dry-heat sterilizer IFU, and facility policy. For a product reference, see nylon sterilization pouches and dry-heat sterilization tubing. | Product selection should likewise be based on the specific steam pouch IFU and autoclave cycle. Do not infer compatibility from a similar appearance, material name, or self-sealing design. |
In either workflow, manufacturer instructions govern time, temperature, operating parameters, and indicator use. The CDC recommends following the instructions for the packaging, equipment, and supplies used during reprocessing. That makes the IFU the practical dividing line: if it names only dry heat, use it only within that validated scope; if it names steam cycles, follow those stated limits. When the documentation is unclear, pause the load and confirm compatibility with the packaging manufacturer and sterilizer manufacturer rather than improvising.
Packaging is also a post-cycle barrier. It protects instruments from contamination after removal from the sterilizer, so a pouch that survives the cycle is not automatically suitable for storage or handling. Inspect the finished package and apply the monitoring and labeling requirements for the selected process.
How Should Dental Teams Prepare and Seal a Pouch?
- Clean the instrument before packaging. Cleaning is the first step in every decontamination process because soil and organic contamination can interfere with sterilization. Remove visible debris using the instrument and facility procedures, then inspect the item before it enters the pouch. A pouch is a barrier for a cleaned instrument, not a substitute for cleaning. See this practical guide to how to use sterilization pouches for related pouch-handling fundamentals.
- Dry the instrument completely. After cleaning, allow the instrument to dry thoroughly before it is packaged. Do not place a damp instrument into nylon packaging. According to the CDC, wet instruments can compromise packaging integrity and the ability to maintain sterility. Check hinges, serrations, lumens, and other areas where moisture can remain, and follow the instrument manufacturer's drying instructions.
- Inspect the pouch and choose an appropriate size. Use packaging that is compatible with the specific dry-heat method, sterilizer, and validated process. The pouch should accommodate the instrument without stretching, folding around sharp edges, or placing stress on the seal. Check for tears, weak seams, contamination, or other defects before use. Packaging must allow the sterilizing agent to penetrate and must not insulate the item from heat or be destroyed by the process temperature. Compatibility cannot be assumed from the word nylon alone.
- Load conservatively. Place only the intended instrument or set inside the pouch, with enough clearance for the closure to seal evenly. Do not overload, force instruments into the package, or stack sharp tips against the pouch wall. If an instrument could puncture the material, select packaging validated for that item or use a protective arrangement approved by the applicable IFU. A puncture or stressed seam can compromise the sterile barrier even when the cycle itself runs correctly.
- Close the pouch using its approved closure. For a self-seal pouch, remove the liner and press the adhesive flap down across the full seal area, avoiding wrinkles, channels, and trapped debris. If the package requires heat sealing or another approved closure, use the equipment and settings specified by the pouch manufacturer. Never substitute staples, paper clips, or other metal closures. The CDC warns that metal closures can puncture packaging and breach sterility.
- Confirm the complete workflow before processing. Review the pouch IFU, instrument IFU, and sterilizer IFU together. Follow their validated loading arrangement, cycle parameters, and indicator requirements. There is no universal temperature or time for every dry-heat sterilization nylon pouch. If any instruction conflicts or compatibility is unclear, pause the load and obtain clarification from the manufacturer or the person responsible for infection-control policy.
These preparation steps protect both sterilization performance and the package's ability to maintain sterility after processing. A sealed pouch is ready for the cycle only when the instrument is clean and dry, the package is intact and appropriately sized, and the complete set of manufacturer instructions supports its use.
How Are Dry Heat Pouch Loads Monitored and Labeled?
Monitoring a dry-heat pouch load involves more than checking whether a package changed color. The goal is to create a documented connection between the packaged instrument, the sterilizer cycle, and the facility's validated reprocessing procedure. Chemical indicators provide evidence that the package was exposed to specified processing conditions, but an indicator alone does not prove that an item is sterile. The sterilizer, packaging, load configuration, cycle parameters, and staff procedures must all be appropriate for the process.
Use internal and external chemical indicators
Place a chemical indicator inside every package. The internal indicator should be positioned among the instruments so it can respond to conditions within the pouch, rather than only at the outer surface. CDC guidance also calls for an outside indicator on each package when the internal indicator cannot be seen from outside. This is especially useful during storage and before opening, because staff can confirm that the package has an external process mark without handling the contents.
Indicator selection must match the dry-heat process and the applicable manufacturer instructions. Do not substitute an indicator intended for steam sterilization or assume that a color change compensates for an incompatible pouch. Packaging must allow the sterilizing agent or heat to reach the instruments, and dry-heat packaging must not insulate the contents from heat or degrade at the process temperature. Follow the instructions for the specific pouch, sterilizer, instruments, and monitoring products used in the practice. CDC recommendations address chemical indicators inside and outside packages: review the source guidance before changing a monitoring workflow.
Label every pouch for traceability
After processing, label each sterile package with the sterilizer number, the cycle or load number, and the date of sterilization. Use a labeling method that remains readable without puncturing or otherwise compromising the pouch. This information lets the team connect an instrument to the correct cycle record, investigate a failed monitoring result, and manage recalls or reprocessing when necessary. It also reduces ambiguity when multiple sterilizers or loads are operating on the same day.
Keep load records according to the practice's validated monitoring procedure and policy. If your team needs structured support for reviewing sterilization indicators and records, SurgiMac offers a sterilization monitoring service. Treat any failed indicator, missing label, damaged seal, or uncertain load history as a reason to follow the facility's failure-response procedure, not as a minor documentation gap.
What Storage and Handling Rules Protect Sterility?
Dry-heat processing ends when the cycle is complete, but sterility protection continues through storage and point-of-use handling. Packaging should protect instruments from contamination after removal from the sterilizer. Store sealed pouches in a clean, dry, controlled area where they are less likely to be crushed, punctured, exposed to moisture, or handled unnecessarily. These practical controls support the broader dental sterilization guidelines used by infection-control teams.
Use event-related shelf life carefully
Event-related shelf life means a package remains sterile until an event compromises it, rather than becoming automatically contaminated simply because time has passed. The CDC identifies events such as a torn or wet package as reasons sterility may no longer be assured. Storage conditions and handling still matter, because repeated movement, crowded shelving, moisture, and contact with other items can damage the barrier. Facilities that use date-related policies must also follow their written policy and any product-specific expiration statement.
Do not turn that general principle into a universal shelf-life claim for every pouch. A product's validated instructions for use may specify a defined period. For example, one listed nylon pouch indication states that it maintains sterility for 30 days after a dry-heat cycle at 160 C (320 F) for 60 minutes. It directs the user to repackage and resterilize instruments that remain unused after that period. That is a product-specific statement, not a rule for all dry heat sterilization nylon pouches. Confirm the pouch IFU, sterilizer IFU, and facility policy before assigning a storage period.
Inspect every package before opening
Before use, inspect the entire package for barrier integrity and dryness. Look for tears, punctures, open or separated seals, wet spots, crushed areas, and any other damage. A package that is wet, torn, dropped on the floor, or damaged in any way should not be used. If the barrier has been compromised, do not attempt to repair the pouch or treat the instrument as sterile. Set it aside for reprocessing: clean the instrument, place it in new compatible packaging, and repeat heat sterilization according to the validated cycle.
Minimize handling of processed pouches and open them only when the instrument is needed. For a broader workflow reference, review these instrument sterilization steps, including preparation, packaging, monitoring, and documentation. The same discipline applies after dry heat: a successful cycle cannot compensate for a damaged barrier or careless storage.
When Should a Manufacturer's IFU Override a General Rule?
General infection-control guidance establishes the baseline, but a specific manufacturer's instructions control the details of a validated reprocessing workflow. CDC guidance directs dental teams to follow the manufacturer's instructions for the packaging, instruments, sterilizer, times, temperatures, operating parameters, and indicator use. In practical terms, do not assume that a nylon pouch suitable for one dry-heat process is suitable for every pouch, instrument, or sterilizer combination.
Use this compatibility checklist before selecting the pouch
- Confirm the sterilization method. Verify that the pouch IFU explicitly covers dry heat, not only steam or another process. Packaging must be compatible with the heat method being used, and it must not insulate the instrument from heat or be destroyed by the process temperature. See the CDC guidance on manufacturer instructions for dental sterilization and dry-heat packaging compatibility.
- Match the validated cycle. Record the sterilizer's mode, temperature, exposure time, and other operating parameters. One listed Steri-Dent/Steri-Sure nylon pouch indication documents use in a dry-heat sterilizer at 160 C (320 F) for 60 minutes. That is a product-specific indication, not a universal rule for dry heat sterilization nylon pouches or a substitute for your pouch and sterilizer IFUs.
- Confirm the instrument scope. The same listed indication describes nylon packaging for enclosed metal instruments. Check that the instruments fit without overloading, sharp edges will not damage the pouch, and the instrument manufacturer's instructions permit the selected cycle.
- Validate the seal and monitoring process. Confirm whether the pouch uses an integrated self-seal adhesive strip and follow its sealing instructions. Use the required internal and external chemical indicators, then document the sterilizer and load information according to facility policy. A seal that is incomplete, contaminated, or damaged is not a validated barrier.
- Check single-use status. The listed Steri-Dent/Steri-Sure pouch is identified as single use. Do not clean, reseal, or reuse it unless the product IFU specifically authorizes that practice.
- Apply the stated storage limit. That same product-specific indication documents maintenance of sterility for 30 days. If the instruments are not used within that period, its instructions call for removal, placement in a new bag, and resterilization. Do not convert that 30-day statement into a universal shelf-life rule for other pouches.
If any answer is unclear, pause the workflow and obtain the current pouch IFU, instrument IFU, and sterilizer IFU. Confirm the dry-heat mode, cycle parameters, seal validation, single-use status, and storage limits with the infection-control lead before adopting the pouch.
Recap: General guidance sets the safety framework; the specific, compatible, validated IFUs determine whether a pouch can be used and under which conditions.
Frequently Asked Questions
Can nylon pouches be used in a dry heat sterilizer?
Some nylon pouches are validated for dry heat, but compatibility is product-specific. Confirm that the pouch IFU covers your sterilizer type, temperature, exposure time, and load configuration. Packaging must allow heat penetration and must not insulate the instrument or degrade at the process temperature. The CDC also advises using packaging compatible with the selected heat method (CDC guidance).
What instruments can go in a nylon dry heat pouch?
Use the pouch only for instruments and materials identified by its manufacturer. One listed nylon pouch indication covers enclosed metal instruments processed at 160 C (320 F) for 60 minutes, but that example is not a universal setting for every pouch or sterilizer (product indication record). Clean and thoroughly dry instruments before packaging.
How should a self-sealing nylon pouch be closed?
Follow the pouch instructions for filling, clearance, and adhesive closure. Press the self-seal strip firmly across its full width, and do not substitute staples, clips, or other metal closures that could puncture the barrier. Place the required internal and external chemical indicators according to the sterilizer and pouch instructions.
How long can a dry heat pouch remain sterile?
Storage depends on the pouch IFU and facility policy. Inspect each package before use, and reject any pouch that is wet, torn, dropped, or otherwise damaged. One product indication specifies a 30-day limit and calls for repackaging and resterilization afterward; do not apply that period to other products without supporting instructions.
What should a team do if the pouch IFU conflicts with general guidance?
Pause the cycle and resolve the discrepancy with the pouch manufacturer, sterilizer manufacturer, or infection-control lead. The applicable IFUs govern time, temperature, operating parameters, indicators, and packaging use for that specific workflow.
Choose Packaging That Matches Your Validated Cycle
Dry heat sterilization nylon pouches should be selected by verified compatibility, not by appearance or by an assumption that every sterilization pouch works in every process. Review the pouch labeling, sealing method, cycle limits, and sterilizer instructions with your dental infection-control team before use.
Tags
Blog posts
-
, by SurgiMac A Clinician's Guide to Absorbable Suture Material
-
, by SurgiMac A Clinician's Guide to Dental Composite Resin Kits
-
, by SurgiMac How to Disinfect with Metrex CaviWipes Correctly
