


Instrument Sterilization: A Step-by-Step Guide
- , by SurgiMac
- 51 min reading time
Instrument sterilization is essential for patient safety and compliance in dental offices. Learn best practices to prevent infection and protect your reputation.
Your sterilization equipment is only as effective as the team operating it. A simple human error can undermine the entire instrument sterilization process, putting patients at risk. This is why building a culture of safety is so critical. It starts with clear, written protocols and hands-on training to ensure everyone is on the same page. When your team is aligned on every step, from wearing proper MacSafe PPE to correctly documenting spore tests, you create a powerful defense against cross-contamination. Here’s how to overcome common challenges and empower your team to maintain the highest standards of patient care.
Key Takeaways
- Sterilization is a non-negotiable practice: It is essential for protecting patients from infection, ensuring your practice meets CDC and OSHA standards, and building lasting professional trust.
- A successful outcome depends on a strict protocol: Every instrument requires a multi-step process, including thorough pre-cleaning, correct packaging, proper sterilizer loading, and secure storage.
- Confirm every cycle's effectiveness with quality assurance: A consistent monitoring system is crucial and should include weekly biological spore tests, chemical indicators in each pack, and meticulous documentation.

Why is Sterilization Non-Negotiable in Your Dental Practice?
In any clinical setting, sterilization is the cornerstone of patient safety and professional integrity. It’s not just a procedural step; it’s a fundamental commitment to providing the highest standard of care. Proper
Beyond protecting health, a rigorous approach to sterilization reinforces your practice's reputation for excellence and ensures you meet critical regulatory standards. It’s a non-negotiable practice that safeguards your patients, your team, and your business. From the moment a patient walks in, they place their trust in your hands, and a visible, unwavering commitment to hygiene is key to maintaining that trust. When patients feel safe, they are more likely to return for care and recommend your practice to others. Let’s explore the three core reasons why sterilization must be a top priority in your daily operations, from protecting health to preserving your professional standing.
Protecting Patients and Preventing Cross-Infection
First and foremost, sterilization is about protecting people. Every instrument used in a patient's mouth, from a simple scaler to a complex surgical tool, can become a vehicle for transmitting pathogens. Without proper sterilization, bacteria, viruses, and fungi can easily spread, exposing patients and staff to serious illnesses like hepatitis, herpes, tuberculosis, and antibiotic-resistant bacteria like MRSA. A comprehensive infection control strategy, including the use of personal protective equipment from the MacSafe line, is essential. By ensuring every instrument is properly sterilized before use, you eliminate these risks and create a safe environment for everyone in your office.
Staying Compliant with Key Regulations
Adhering to strict sterilization protocols isn't just good practice; it's the law. Regulatory bodies like the Centers for Disease Control and Prevention (CDC) and the Occupational Safety and Health Administration (OSHA) have established clear guidelines for infection control in dental settings. These standards are designed to protect public health and ensure a consistent level of safety across all practices. Failure to comply can result in significant penalties, including fines, license suspension, and legal action. Following the CDC's recommendations for instrument processing and sterilization is crucial for keeping your practice compliant, avoiding legal trouble, and upholding your professional responsibilities.
How Proper Sterilization Builds Patient Trust
Your commitment to safety is one of your practice's most valuable assets. Patients are more aware than ever of hygiene standards, and they actively look for signs that a dental office is clean and safe. When they see you unwrap sterile instrument packs or notice a well-organized sterilization area, it builds immense trust and confidence in your care. This trust translates directly into patient loyalty and positive word-of-mouth referrals. Conversely, a single infection control lapse can permanently damage your reputation. Prioritizing sterilization demonstrates a commitment to excellence that patients will notice, appreciate, and remember.
Fundamental Sterilization Concepts
To create an effective sterilization protocol, it’s important to understand that not all instruments carry the same risk of infection. The level of processing required depends entirely on how the instrument will be used. This risk-based approach, widely adopted in healthcare, helps ensure that your efforts are directed where they matter most. By categorizing instruments based on their potential to transmit pathogens, you can implement a clear, consistent, and compliant system that protects every patient. This framework simplifies decision-making and ensures that every tool, from a mirror to a surgical blade, receives the appropriate level of decontamination before its next use.
Defining Instrument Risk Levels
The Centers for Disease Control and Prevention (CDC) provides a straightforward classification system that categorizes dental instruments into three groups: critical, semi-critical, and non-critical. This system is based on the level of risk each item poses for infection transmission. Understanding these categories is the first step in building a reliable sterilization workflow. Each category has a specific minimum requirement for processing, which helps eliminate guesswork and ensures your practice consistently meets safety standards. Let's break down what each of these levels means for your daily instrument handling and processing protocols.
Critical Instruments
Critical instruments are those that "penetrate sterile body tissues," making them the highest-risk items in your practice. According to the CDC, these tools must be sterilized to kill all microorganisms, including bacterial spores. This category includes surgical instruments like forceps, periodontal scalers, and burs. Because they are used in invasive procedures, any contamination could lead to a serious systemic infection. Instruments like our Pro Series surgical tools or MacCut surgical blades fall into this category and demand meticulous sterilization after every use to ensure patient safety is never compromised.
Semi-critical Instruments
Semi-critical instruments are defined as items that "touch moist body parts (like inside the mouth) or broken skin" but do not penetrate soft tissue. Examples include mouth mirrors, reusable impression trays, and dental handpieces. While they pose a lower risk than critical items, they can still transmit infections if not handled properly. The CDC recommends that these items undergo sterilization by heat. For instruments that are heat-sensitive, high-level disinfection is the minimum acceptable standard. Consistently sterilizing semi-critical items is a best practice that provides the highest margin of safety for your patients.
Non-critical Instruments
Non-critical instruments are those that "only touch healthy skin" and do not come into contact with mucous membranes. This category includes items like X-ray heads, lead aprons, and blood pressure cuffs. Since intact skin acts as a natural barrier to most microorganisms, these items present the lowest risk of disease transmission. Non-critical instruments and surfaces require low-level disinfection between patients. Using appropriate surface disinfectants is a key part of a comprehensive infection control plan, ensuring the entire clinical environment remains safe for both patients and staff.
Understanding Sterility Assurance Level (SAL)
The ultimate goal of sterilization is to achieve a specific Sterility Assurance Level (SAL), which is a term used to describe the probability of a single microorganism surviving the process. The CDC defines SAL as a measure of sterilization effectiveness, often expressed as 10⁻ⁿ. For medical and dental instruments, the standard SAL is 10⁻⁶. This means there is only a one-in-a-million chance that a single viable microorganism remains on an instrument after it has been sterilized. This incredibly high standard ensures that instruments are safe for use in even the most invasive procedures, providing peace of mind for both you and your patients.
Achieving the required SAL isn't about a single action but the result of a perfectly executed, multi-step process. It begins with thorough pre-cleaning to remove bioburden, followed by correct packaging, proper loading of the sterilizer, and running a validated cycle according to the manufacturer’s instructions. Regular monitoring with biological indicators (spore tests) is the only way to verify that your sterilizer is consistently reaching the conditions needed to achieve a 10⁻⁶ SAL. This scientific benchmark provides the confidence that your sterilization process is effective and your instruments are truly sterile and ready for the next patient.
What are the Risks of Improper Sterilization?
Skipping or rushing sterilization protocols isn't just a minor oversight; it's a critical failure that can have severe consequences for your patients, your staff, and your practice. When instruments are not properly sterilized, you open the door to a host of preventable risks that undermine the core promise of providing safe, effective dental care. From the transmission of life-altering diseases to the potential for legal action, the stakes are incredibly high. A robust infection control strategy is your first line of defense against these dangers.
The Dangers of Bloodborne Pathogens
The most immediate danger of improper sterilization is the transmission of serious infectious diseases. When instruments are contaminated with blood or saliva, they can become vehicles for pathogens like hepatitis B and C, HIV, herpes, and tuberculosis. Even common bacteria such as E. coli and staph can be transferred, leading to severe illness. Every patient trusts that the tools used in their mouth are completely sterile. Failing to meet this standard exposes them to significant health risks and violates a fundamental principle of patient care. This is why using reliable sterilization supplies is an absolute must for every procedure.
Stopping the Spread of MRSA and Superbugs
Beyond common viruses and bacteria, inadequate sterilization can contribute to the spread of antibiotic-resistant infections, including Methicillin-resistant Staphylococcus aureus (MRSA). These "superbugs" are difficult to treat and pose a major threat to public health. A dental office can become a hotspot for transmission if instruments are not meticulously cleaned and sterilized between patients. Preventing the spread of these organisms is a shared responsibility within the healthcare community. Proper sterilization protocols are not just about following rules; they are about actively protecting your patients from infections that modern medicine struggles to fight.
How Cross-Contamination Puts Every Patient at Risk
Effective sterilization is the only way to break the chain of infection between patients. Without it, microorganisms from one patient’s mouth can easily be passed to the next person who sits in the chair. This risk of cross-contamination turns your practice from a place of healing into a potential source of illness. It also endangers your clinical team, who handle contaminated instruments daily. A consistent and verifiable sterilization process ensures that every instrument is safe for every use, protecting everyone in your office. This commitment to safety is supported by using high-quality protective gear from the MacSafe collection.
Avoiding Legal Action and Practice Shutdowns
The consequences of a sterilization failure extend far beyond the clinic. A patient who contracts an infection due to negligence can pursue legal action, resulting in costly lawsuits, damage to your professional reputation, and potential sanctions from state dental boards. In severe cases, repeated compliance failures can even lead to the closure of your practice. Maintaining meticulous sterilization records and adhering to all CDC and OSHA guidelines is essential for mitigating these legal and financial risks. It demonstrates your commitment to the highest standards of care and protects the long-term viability of your practice.
Which Dental Sterilization Methods?
Choosing the right sterilization method is crucial for maintaining a safe and compliant practice. Each technique has specific applications, benefits, and limitations depending on the type of instrument and material you're working with. Understanding these differences helps you protect your patients, your staff, and your valuable equipment. The four primary methods used in modern dentistry are steam, dry heat, chemical vapor, and gas sterilization. Each plays a distinct role in a comprehensive infection control strategy, ensuring that every tool you use is completely free of harmful microorganisms before it comes into contact with a patient.
The Gold Standard: Steam Sterilization (Autoclaving)
Steam sterilization, or autoclaving, is the most common and reliable method in dental practices. It uses pressurized steam at high temperatures (typically 121–132°C) to effectively kill all microorganisms, including resilient bacterial spores. This process is fast, efficient, and non-toxic, making it ideal for a wide range of heat-stable dental instruments. However, the moisture can cause corrosion on some carbon steel instruments. To ensure longevity, it's best to use high-quality, corrosion-resistant stainless steel tools, like those in our Hexa Series, which are built to withstand repeated autoclaving without compromising integrity. Always ensure instruments are thoroughly cleaned before placing them in the autoclave.
Gravity Displacement Autoclaves
Gravity displacement autoclaves are a common and effective choice for many dental practices. The process is straightforward: as pressurized steam fills the chamber, it displaces the cooler, denser air, forcing it out through a vent at the bottom. This method relies on the natural properties of steam to create a sterile environment. It is highly effective for sterilizing simple, non-porous, and unwrapped solid instruments, such as mirrors or solid-handled scalers. However, its reliance on gravity means it may struggle to remove air from complex instruments with lumens, hollows, or crevices, potentially leaving air pockets that prevent complete steam penetration and compromise sterility.
Pre-vacuum Autoclaves
For practices that use more complex instruments, pre-vacuum autoclaves, also known as Class B sterilizers, offer a more advanced solution. Before introducing steam, this type of autoclave uses a vacuum pump to actively remove air from the chamber. This crucial step ensures there are no trapped air pockets, allowing steam to penetrate and sterilize all surfaces of every instrument, including porous loads, wrapped cassettes, and hollow tools like dental handpieces. According to the CDC, this method is particularly effective for ensuring the sterility of complex instruments. This makes it the ideal choice for surgical instruments, such as those in our Hexa Series, ensuring the highest level of sterility assurance.
When to Use Dry Heat Sterilization
Dry heat sterilization uses hot, dry air to kill microorganisms by oxidation. Because it operates without moisture, it’s an excellent choice for instruments that are sensitive to rust or corrosion, such as dental handpieces, burs, and certain orthodontic pliers. This method is also relatively inexpensive to operate. The main drawback is that it requires higher temperatures (around 160°C) and longer cycle times compared to autoclaving. The intense heat can also damage or melt heat-sensitive materials like plastics and rubber, so it’s important to only use it for appropriate dental instruments and equipment that can tolerate these conditions.
Understanding Chemical Vapor Sterilization
For instruments that cannot tolerate the high temperatures of autoclaving or dry heat, chemical vapor sterilization offers a great alternative. This method uses a proprietary chemical solution that is heated under pressure to create a gas that sterilizes the instruments. It causes significantly less corrosion than steam, making it suitable for carbon steel and other sensitive metal tools. While effective, it's essential to handle these chemicals with care and ensure proper ventilation in your sterilization area, as the fumes can be hazardous. This method is particularly useful for maintaining the sharpness of delicate cutting instruments.
Handling Heat-Sensitive Items with Gas Sterilization
Gas sterilization using ethylene oxide (ETO) is a low-temperature process ideal for sterilizing delicate, heat-sensitive items like plastics, rubber, and some electronics. ETO gas can penetrate packaging materials, making it highly effective for pre-packaged disposables. However, this method is not typically found in private dental practices. The gas is toxic and flammable, the equipment is expensive, and the sterilization cycles are very long, often requiring an additional aeration period to remove residual gas. Due to these complexities and safety concerns, ETO sterilization is generally reserved for hospital settings or large-scale manufacturing of sterile dental disposables.
Ethylene Oxide (EtO): Risks and Aeration Requirements
Ethylene Oxide (EtO) is a low-temperature gas sterilization method that is highly effective for items sensitive to heat and moisture, such as plastics, rubber, and complex electronics. Because the gas can permeate packaging, it’s excellent for sterilizing pre-packaged dental disposables before they even reach your clinic. However, you won't typically find EtO sterilizers in a private dental practice for several key reasons. The gas itself is toxic, flammable, and requires specialized, expensive equipment. More importantly, the sterilization cycles are extremely long and must be followed by a lengthy aeration period to ensure all residual gas is removed, making it impractical for the fast-paced needs of a dental office. This method is better suited for large-scale industrial or hospital settings.
Hydrogen Peroxide Gas Plasma
For practices looking for a modern, low-temperature solution, hydrogen peroxide gas plasma sterilization is an excellent option. This process uses hydrogen peroxide vapor and plasma to sterilize instruments in about 50 minutes without the risks associated with EtO. It is particularly effective for tools that are sensitive to high heat or humidity, including metal instruments that are prone to rust. By using a gentle yet powerful method, you can extend the life of your valuable equipment. This makes it an ideal choice for protecting the investment you've made in precision tools, such as those in the Titanium Black Series, which benefit from sterilization techniques that preserve their integrity and finish.
Ozone Sterilization
Ozone sterilization is another safe and effective low-temperature method that uses ozone gas (O3) to eliminate microorganisms. One of its biggest advantages is its safety profile; it produces no toxic gases or chemical residues, breaking down into simple oxygen after the cycle. This process is compatible with a wide range of materials commonly found in a dental practice, including stainless steel, titanium, ceramics, and silicone. Its versatility makes it a reliable choice for sterilizing a variety of instruments without the risk of damage. For high-quality stainless steel instruments like those in our Pro Series, ozone sterilization helps ensure they remain in optimal condition through countless procedures.
Liquid Chemical Sterilization
Liquid chemical sterilization, sometimes referred to as "cold sterilization," involves immersing instruments in a chemical solution like glutaraldehyde or peracetic acid. This method should only be used in critical situations for heat-sensitive instruments that cannot be sterilized using other FDA-cleared methods. It is not a substitute for routine heat sterilization and requires strict adherence to the manufacturer’s guidelines for concentration, temperature, and immersion time to be effective. After immersion, instruments must be thoroughly rinsed with sterile water in an aseptic manner, which can be difficult to achieve in a typical clinical setting. Due to these challenges, liquid chemical sterilization is reserved for very specific, limited-use scenarios where no other option is viable.
Unapproved Methods to Avoid
To ensure patient safety and maintain compliance, it is essential to stick to sterilization methods that are cleared by the FDA and recommended by the CDC. Certain methods are not approved for sterilizing dental instruments because they are not reliably effective. These include bead sterilizers, microwaves, ultraviolet (UV) light, and certain liquid chemicals not classified as sterilants. For example, while UV light can disinfect surfaces, it cannot penetrate instrument crevices or packaging, leaving microorganisms behind. Relying on unproven techniques creates unacceptable risks for cross-contamination and infection. Your practice's infection control protocol should only include validated and approved systems to protect your patients and your professional reputation.
Designing an Effective Sterilization Workspace
An effective sterilization process relies heavily on the physical design of your instrument reprocessing area. A well-organized workspace isn't just about aesthetics; it's a critical component of your practice's infection control program. When your sterilization center is designed with a logical, unidirectional workflow, you significantly reduce the risk of human error and cross-contamination. This systematic approach ensures that dirty, clean, and sterile instruments are never mixed, protecting both your patients and your clinical team. A thoughtfully planned layout also improves efficiency, allowing your staff to process instruments safely and quickly, which is essential for maintaining a smooth patient schedule and a high standard of care throughout the day.
The key to a successful design is creating distinct zones for each stage of the instrument reprocessing cycle. This separation is the foundation of the guidelines set forth by the Centers for Disease Control and Prevention (CDC). By establishing a clear path from contaminated to sterile, you create a system that is easy to follow and hard to mess up. This workflow minimizes the handling of contaminated items and prevents clean instruments from being exposed to harmful aerosols or pathogens from the "dirty" side of the process. Let's walk through the CDC's recommended three-zone model to help you create a sterilization workspace that is both compliant and highly effective.
The CDC-Recommended Three-Zone Workflow
The CDC recommends a one-way workflow for instrument processing to prevent cross-contamination. This means creating a linear path where contaminated items enter at one end and sterile items exit at the other, without ever backtracking. This unidirectional flow is divided into three distinct zones: the Decontamination Area (dirty), the Packaging Area (clean), and the Sterile Storage Area. By physically separating these functions, you ensure that the aerosols and contaminants generated during cleaning do not compromise the integrity of packaged or sterilized instruments. Adopting this model is one of the most impactful steps you can take to standardize your sterilization procedures and uphold the highest safety standards in your practice.
Decontamination Area (Dirty)
This is where the sterilization process begins and is the only area where contaminated instruments should be handled. Upon arrival from the operatory, instruments are received, sorted, and pre-cleaned, either through manual scrubbing or by using an ultrasonic cleaner. Because this zone involves direct contact with bioburden, it's crucial that your team wears appropriate personal protective equipment (PPE). This includes heavy-duty utility gloves, protective eyewear, masks, and fluid-resistant gowns, like those available in the MacSafe collection, to guard against splashes and aerosols. This area should be clearly marked and physically separated from all other zones to contain contaminants effectively.
Packaging Area (Clean)
Once instruments have been thoroughly cleaned and dried in the decontamination area, they are moved to the designated Packaging Area. In this clean zone, your team can safely inspect each instrument for any remaining debris and ensure it is functioning correctly. After inspection, instruments are carefully assembled into kits or packaged individually in sterilization pouches or wraps. It is essential to place a chemical indicator inside each package and use packaging with an external indicator. This dual-indicator system provides visual confirmation that the dental instruments have been exposed to the proper sterilization conditions during the cycle.
Sterile Storage Area
The final stop in the workflow is the Sterile Storage Area, a dedicated space for holding processed instruments until they are needed for patient care. This area must be a clean, dry, enclosed environment, such as a cabinet or drawer, located away from sinks and areas of potential contamination. According to CDC guidelines, sterile packages should be stored in a way that prevents them from being crushed, bent, or punctured. It's also important to implement a "first-in, first-out" rotation system to ensure that the oldest sterile packs are used first. Proper storage is the final, critical step in maintaining sterility and ensuring every instrument is safe for use.
Your Step-by-Step Guide to Instrument Sterilization
A successful sterilization protocol is a systematic, multi-step process where every stage is as critical as the last. Skipping a step can compromise the entire chain of sterility, putting both patients and your practice at risk. Following a consistent, evidence-based workflow ensures that every instrument is properly processed every single time. Let’s walk through the four essential steps that form the foundation of effective instrument sterilization in any modern dental practice.
Step 1: Start with Proper Pre-Cleaning
Before any sterilization can begin, you must thoroughly clean your instruments. This initial step is non-negotiable because, as the CDC guidelines state, bioburden can act as a shield, preventing the sterilizing agent from killing microorganisms. Always wear appropriate personal protective equipment (PPE), including heavy-duty utility gloves and eyewear from the MacSafe line, during this process. Using an ultrasonic cleaner or an automated instrument washer is the safest and most effective way to decontaminate your dental instruments and prepare them for sterilization.
The Importance of Point-of-Use Cleaning
The sterilization process begins the moment a procedure ends. Point-of-use (POU) cleaning involves the immediate removal of gross debris from instruments right in the treatment room. This crucial first step prevents blood, saliva, and other organic materials from drying onto the instrument surfaces. Once this bioburden hardens, it can form a protective layer known as biofilm, which is incredibly difficult to remove and can shield microorganisms from the sterilant. By simply wiping instruments with a gauze pad or rinsing them promptly, you make the subsequent cleaning and sterilization steps far more effective and reliable, ensuring a safer outcome for everyone.
Using Enzymatic Detergents and Washer-Disinfectors
After initial POU cleaning, instruments must be transported to the decontamination area for a more thorough wash. Using an enzymatic detergent is essential, as these specialized cleaners break down the proteins found in blood and tissue that regular soaps cannot effectively remove. For optimal safety and efficiency, an automated washer-disinfector is the preferred method. This equipment not only cleans instruments with precision but also minimizes staff exposure to contaminated sharps. High-quality dental instruments, like those in the SurgiMac collections, are engineered to withstand the rigors of these automated cleaning cycles, ensuring both cleanliness and longevity.
Step 2: Inspect and Lubricate Instruments
Once your instruments are clean and dry, the next step is a detailed inspection. Carefully examine each tool under adequate lighting, checking for any remaining debris, stains, or damage like cracks or dull edges. Ensure that hinged instruments, such as forceps or scissors, move smoothly. If an instrument is still dirty, it must be sent back for re-cleaning. For tools with moving parts, apply a medical-grade lubricant to keep them functioning correctly and prevent corrosion. This maintenance step is vital for extending the life of your equipment and ensuring peak performance. Investing in durable, well-crafted instruments from lines like our Pro Series makes this inspection process more efficient, as they are built for reliability and easy maintenance.
Step 2: Correctly Dry and Package Instruments
Once instruments are cleaned and rinsed, they must be completely dried before packaging. Any remaining moisture can interfere with the sterilization process and may cause corrosion on your valuable tools. After drying, place the instruments into appropriate packaging, such as self-sealing pouches or wraps. These sterilization supplies are designed to maintain sterility after the cycle is complete. Be careful not to overload packages, as this can hinder sterilant penetration. Each package should be clearly labeled with the sterilizer used, the cycle number, and the date of sterilization for proper tracking.
Proper Packaging Techniques for Effective Sterilization
Think of packaging as the final shield that protects your instruments after they leave the sterilizer. The goal is to use a material that allows the sterilizing agent—like steam or chemical vapor—to penetrate and kill all microorganisms, while also creating an impermeable barrier against contaminants during storage. According to the CDC, proper packaging is essential for maintaining sterility until the point of use. Before sealing, make sure hinged instruments are open and any items with removable parts are disassembled. This allows the sterilant to reach every surface. When using sterilization pouches, choose the right size to avoid overcrowding and ensure a secure seal. This simple but critical step ensures your instruments remain sterile and ready for your next patient.
Step 3: Operating the Sterilizer Cycle Correctly
With instruments properly cleaned and packaged, it’s time to run the sterilization cycle. The most common and reliable method in dental settings is steam sterilization, or autoclaving. An autoclave uses hot, pressurized steam to kill all forms of microbial life, including resilient bacterial spores. It is critical to load the sterilizer correctly, allowing for proper steam circulation around each package. Always follow the manufacturer’s instructions for the specific sterilizer you are using. High-quality stainless steel instruments, like those in our Pro Series, are built to withstand repeated autoclaving while maintaining their precision.
Best Practices for Loading a Sterilizer
How you load your sterilizer is just as critical as the cycle itself. The primary goal is to ensure the sterilizing agent—whether it's steam, dry heat, or chemical vapor—can freely circulate and contact every surface of every instrument. Overloading or improper placement is a common cause of sterilization failure. To prevent this, arrange packages so they don't touch the chamber walls and leave adequate space between each item. Place pouches on their edge in racks, alternating paper-to-plastic sides to promote steam penetration and drying. Cassettes should be laid flat, and any non-perforated containers must be placed on their side to prevent air from getting trapped. Following these CDC-recommended practices protects your patients and the investment you've made in high-quality instruments.
The Critical Drying Phase: Why Wet Packs Are Not Sterile
The sterilization process isn't complete until the instruments are perfectly dry. A wet or damp pack at the end of a cycle is considered contaminated and must be reprocessed. The reason is a phenomenon called "wicking," where moisture acts as a bridge, drawing bacteria and microorganisms from the external environment through the microscopic pores of the packaging material. This compromises the sterility of the instruments inside. It is essential to allow packages to cool and dry completely inside the sterilizer before handling them. Proper drying not only ensures sterility but also prevents corrosion and spotting, preserving the life and performance of precision tools like our Titanium Black Series instruments.
Step 4: Aseptic Storage and Handling of Sterile Packs
The sterilization process isn't complete until the instruments are safely stored. After the cycle finishes and the packages are dry, they must be handled carefully to avoid contamination. Store sterile packs in clean, dry, closed cabinets or drawers, away from areas with high traffic or potential moisture. Before using any instrument, inspect the packaging for tears, punctures, or wetness. A compromised package means the contents are no longer sterile and must be reprocessed. Proper storage protects your investment in precision tools like the Hexa Series and ensures they are ready for patient use.
Event-Related vs. Time-Related Shelf-Life
Modern infection control has largely moved away from assigning strict expiration dates to sterile packs. Instead, the accepted standard is "event-related" shelf-life. This principle holds that a properly sealed and stored package remains sterile indefinitely until an "event" compromises its integrity. Such events include the package becoming wet, torn, or punctured, or if the seal is broken. This approach places the focus where it belongs: on the quality of your handling and storage protocols rather than an arbitrary date. As long as the packaging remains intact, dry, and sealed, the instruments inside are considered safe for use, ensuring they are ready when needed.
CDC Guidelines for Sterile Storage Environments
The sterility of your instruments is only as secure as the environment where they are stored. According to the CDC's sterilizing practices, your sterile storage area should be a dedicated space with limited access to prevent unnecessary traffic and potential contamination. Environmental conditions must be controlled, with temperatures kept at or below 75°F and humidity not exceeding 70%. To further protect sterile items, they should be stored at least 8-10 inches from the floor, 18 inches below sprinkler heads, and 2 inches from exterior walls. While closed cabinets are the preferred storage method, open shelving can be used if managed correctly. If a package is ever dropped, it must be carefully inspected for damage before use.
How to Verify Your Sterilization Process is Working
Running a sterilization cycle is one thing, but how do you know it actually worked? Verification isn't just a suggestion; it's a critical part of your infection control protocol. Without a consistent verification process, you can't be certain that your instruments are truly sterile and safe for patient use. Implementing a multi-faceted approach that combines biological, chemical, and mechanical monitoring ensures every sterilization cycle meets the highest clinical standards. This systematic checking protects your patients, your staff, and your practice's reputation by confirming that harmful microorganisms have been eliminated.
Confirming Sterility with Biological Indicators (Spore Tests)
Think of biological indicators, or spore tests, as the ultimate proof of sterilization. These tests use highly resistant bacterial spores to challenge your sterilizer. If the cycle can kill these tough spores, you can be confident it’s effective against all other microorganisms. The CDC recommends conducting a spore test at least once a week for each sterilizer in your office. This regular testing provides definitive evidence that your equipment is functioning correctly and achieving complete sterility. Integrating this step into your weekly routine is the most reliable way to ensure your instruments are safe for every single patient.
Protocol for a Positive Spore Test
A positive spore test result requires immediate and careful action, but it doesn't automatically mean every instrument needs to be recalled. If the mechanical and chemical indicators for the cycle were correct, the CDC advises against panicking over a single positive BI for non-implant loads. The first step is to take the sterilizer out of service and immediately repeat the test. If the second spore test is also positive, you must keep the sterilizer offline until it has been inspected, repaired, and re-challenged with three consecutive negative spore tests. This systematic protocol ensures you identify the root cause—whether it's operator error, a faulty gauge, or an equipment malfunction—before placing the machine back into service.
Special Monitoring Requirements for Implantable Devices
When it comes to implantable devices, the standard for sterility assurance is even more stringent. According to the CDC, every sterilization load containing an implantable item must be monitored with a biological indicator. More importantly, these items must be quarantined and should not be used until the BI result is confirmed to be negative. There is no room for error in these high-stakes procedures. This heightened level of verification ensures that every surgical instrument, from those in our Hexa Series to the implant itself, meets the highest standard of sterility before it comes into contact with the patient. Meticulous record-keeping for these specific loads is also essential for patient safety and regulatory compliance.
Using Chemical and Mechanical Monitors Daily
While spore tests are the gold standard, chemical and mechanical monitoring provide immediate, cycle-by-cycle feedback. Mechanical monitoring is as simple as checking the sterilizer’s gauges, printouts, or digital displays to confirm the cycle reached the correct time, temperature, and pressure. Chemical indicators, like strips or tape, change color when exposed to specific sterilization conditions. You should use an external indicator on every package and an internal indicator inside each package. This gives you a quick visual confirmation that the sterilizing agent penetrated the packaging and reached the instruments inside.
Why Regular Maintenance and Calibration Matter
Your sterilizer is one of the hardest-working machines in your practice, and it needs regular care to perform reliably. Consistent maintenance and calibration are essential for preventing malfunctions that could compromise sterility. Always follow the manufacturer’s guidelines for daily, weekly, and monthly check-ups. This includes cleaning chambers, checking gaskets, and scheduling professional service as recommended. Proactive maintenance not only ensures your sterilization equipment functions correctly but also extends its lifespan, making it a smart investment in your practice’s safety and efficiency.
The Importance of Keeping Detailed Sterilization Records
If you didn't document it, it didn't happen. Keeping detailed sterilization records is crucial for accountability and compliance. Your logbook should include the date, cycle number, temperature, pressure, and duration for every load. You should also document the results of all biological and chemical indicator tests, along with any maintenance or repairs performed on the equipment. This meticulous record-keeping creates a verifiable history of your sterilization practices. In the event of an audit or an instrument recall, these records will be your proof of due diligence and commitment to patient safety.
Record Retention: How Long to Keep Your Logs
So, you’ve meticulously documented every sterilization cycle. Now what? The next critical question is how long you need to hold onto those records. While there isn't a single federal mandate that specifies a universal retention period for sterilization logs, requirements often vary by state dental boards or local health departments. It's essential to check the specific regulations for your jurisdiction. As a general rule of thumb and a strong best practice, many dental professionals choose to keep their sterilization logs for at least three to seven years. This timeframe ensures you have a comprehensive and verifiable history of your infection control practices. These logs serve as your definitive proof of compliance during an audit and can be invaluable in the unlikely event of a patient-related incident or instrument recall.
Which Dental Instruments and Surfaces Need Sterilization?
Understanding which items in your practice require sterilization versus disinfection is fundamental to a successful infection control plan. The CDC categorizes patient-care items as critical, semicritical, or noncritical based on their potential risk of infection. This classification determines the minimum level of processing required for each item, from heat sterilization for tools that contact sterile tissue to disinfection for surfaces that only touch intact skin. Properly identifying and processing every instrument and surface is the only way to guarantee patient and staff safety.
Critical Instruments: Surgical and Periodontal Tools
Surgical instruments that penetrate soft tissue or bone are considered critical items. According to the CDC, these tools have the highest risk of spreading infection and must always be sterilized using heat. This includes everything from scalpels and forceps to bone chisels and periodontal probes. Investing in durable, high-quality tools from collections like our Hexa Series ensures your instruments can withstand the rigors of repeated heat sterilization without compromising performance. Similarly, single-use critical items like our sterile MacCut surgical blades must be disposed of properly after one use to eliminate any risk of cross-contamination.
Sterilizing Dental Handpieces and Rotary Instruments
Dental handpieces and their associated attachments, such as burs and drills, are also classified as critical items. Because they enter the patient's mouth and can become contaminated with blood and saliva, the CDC states they must always be heat sterilized between patients. It’s not enough to simply wipe down the exterior, as bioburden can be retracted into the internal components of the handpiece. Proper sterilization of handpieces and burs is a non-negotiable step in preventing the spread of pathogens from one patient to the next. Following manufacturer instructions for cleaning and lubrication before sterilization is key to maintaining their function and longevity.
Handling Impression Trays and Prosthetics
Items that contact mucous membranes but do not penetrate tissue, such as impression trays, are categorized as semicritical. These items require, at a minimum, high-level disinfection. However, the CDC recommends that heat-tolerant semicritical items should always be sterilized to provide the highest margin of safety. If an item is heat-sensitive, it should be processed using a high-level disinfectant according to the manufacturer’s instructions. When taking impressions with materials like AlgiMac, ensuring the reusable tray is properly sterilized beforehand is a critical part of the overall infection control process.
Don't Forget: Disinfecting Clinical Surfaces
While not sterilized in the same way as instruments, clinical contact surfaces must be properly managed to prevent cross-contamination. These are surfaces that are frequently touched during patient care, including light handles, chair switches, countertops, and computer equipment. The CDC advises that these surfaces should be protected with barriers that are changed between patients or thoroughly cleaned and disinfected using an EPA-registered hospital disinfectant. Using reliable infection control supplies from our MacSafe line helps ensure your treatment areas remain safe for every patient who walks through your door.
Avoid These Common Sterilization Mistakes
A solid sterilization protocol is the backbone of patient safety, but even the most diligent teams can fall into habits that compromise its effectiveness. These common mistakes are often subtle and can easily become part of a routine if not actively monitored. Recognizing and correcting these missteps is essential for maintaining compliance, protecting your patients, and upholding your practice's reputation. Let's walk through four of the most frequent errors in instrument processing and discuss how to ensure your workflow is consistently safe and effective.
Mistake 1: Skipping Thorough Pre-Cleaning
Failing to properly clean instruments before sterilization is one of the most critical errors. Bioburden, which includes blood, saliva, and other organic materials, can act as a shield, preventing the sterilant from reaching the instrument's surface. This leaves microorganisms alive and ready to cause infection. The pre-cleaning step is non-negotiable. Instruments must be thoroughly scrubbed, either manually or using an ultrasonic cleaner with an enzymatic solution, to remove all visible debris. This ensures that every tool, from a delicate Air Series scaler to a robust Hexa Series elevator, is perfectly prepared for effective sterilization and safe for patient use.
The Hidden Danger of Biofilm and Microscopic Debris
What you can't see can absolutely hurt your patients. Even when an instrument appears spotless to the naked eye, it can be covered in microscopic bioburden. In fact, one study found that while 91% of instruments looked clean, 84% still had tiny bits of debris when viewed under a microscope. This invisible layer of blood, saliva, and biofilm is incredibly dangerous because it acts as a shield, preventing heat or chemical sterilants from reaching the instrument’s surface. If this bioburden isn't completely removed, the sterilization cycle will fail, leaving behind viable microorganisms that can cause cross-contamination and serious infections. This is why meticulous, mechanical cleaning is a non-negotiable prerequisite for any successful sterilization protocol.
Mistake 2: Overcrowding Your Sterilizer
It can be tempting to fit as many instruments as possible into the autoclave to save time, but overloading the sterilizer is a recipe for failure. When packs are crammed together, steam or chemical vapor cannot circulate freely and reach every surface. This creates cool spots where the temperature never reaches the required level for sterilization, rendering the entire cycle ineffective. Always follow the manufacturer’s guidelines for load capacity. Arrange pouches and cassettes on their edges, ensuring there is adequate space between them for proper penetration. Proper loading is a simple but crucial step in your overall sterilization process that guarantees every instrument is ready for clinical use.
Mistake 3: Neglecting Regular Monitoring and Spore Tests
Assuming a sterilization cycle ran correctly without verification is a significant risk. Effective quality assurance depends on consistent monitoring and testing. Every pack should include a chemical indicator on the inside and outside to confirm it was exposed to the sterilant. However, these indicators don't prove sterility. The gold standard is weekly biological indicator testing, or spore testing, which uses highly resistant spores to confirm your autoclave is actively killing microorganisms. Meticulous record-keeping of these tests, along with mechanical monitoring of cycle parameters, provides the necessary documentation to ensure your infection control protocols meet regulatory standards and keep patients safe.
Mistake 4: Storing Sterile Packs the Wrong Way
The sterilization process doesn't end when the autoclave door opens. Improper storage can quickly re-contaminate freshly sterilized instruments. Sterile packs must be handled carefully and stored in a clean, dry, and protected environment, such as a closed cabinet or covered drawer. Storing them in the open, near sinks, or in high-traffic areas exposes them to moisture, dust, and aerosols that can compromise the packaging. Always ensure your hands are clean and dry before handling sterile packs, and consider using MacSafe gloves for an added layer of protection. A well-organized and designated sterile storage area is essential for maintaining the integrity of your instruments until they are needed.
How to Overcome Common Sterilization Challenges
Even the most diligent dental practices can face hurdles in maintaining a flawless sterilization process. From budget limitations to human error, these challenges require proactive strategies to ensure patient and staff safety. By addressing these issues head-on, you can reinforce your infection control protocols and operate with confidence. The key is to combine reliable equipment, clear procedures, and a well-trained team.
Finding Budget-Friendly Sterilization Equipment
Managing a budget is a reality for every dental office, but it should never force a compromise on safety. High-quality sterilization doesn't have to come with a high price tag. Partner with a trusted supplier that offers reliable and affordable sterilization products. Look for durable sterilization pouches, cassettes, and chemical indicators that meet industry standards without straining your finances. Smart purchasing decisions allow you to equip your practice with the necessary tools to maintain compliance and ensure excellent patient care.
Creating Effective Protocols and Training Your Team
Your sterilization equipment is only as effective as the team operating it. Establishing clear, written protocols is essential for consistency. Create a step-by-step guide covering everything from pre-cleaning to documentation, and invest in regular, hands-on training for your staff. This ensures everyone understands not just what to do, but why each step is critical for preventing cross-contamination. When your team is aligned on procedures, you build a powerful culture of safety that protects everyone.
How to Prevent Environmental Contamination
A sterile instrument can be compromised if the surrounding environment isn't properly managed. Minimize this risk by designing your sterilization area with clear "contaminated" and "clean" zones to prevent accidental contact. Ensure your team uses the right personal protective equipment (PPE) during instrument processing. High-quality MacSafe gloves and lab coats are crucial for protecting staff and preventing them from inadvertently contaminating sterile packs. An organized workspace is a simple yet powerful way to uphold your infection control standards.
Setting Up a Sterilization Quality Assurance Program
How do you know your sterilizer is working correctly every time? A quality assurance program provides the answer. This system is crucial for verifying the effectiveness of your sterilization process. It should include regular biological monitoring (spore testing) to confirm the equipment is killing resistant organisms, plus chemical indicators in every pack. Maintaining detailed logs and performing regular equipment maintenance are also key. This proactive approach helps you identify potential issues before they become critical problems, ensuring your practice consistently meets safety standards.
The Role of Single-Use Disposables in Infection Control
While a robust sterilization protocol for reusable instruments is the foundation of infection control, single-use disposables play an equally vital role in creating a safe clinical environment. These items are designed to be used on a single patient and then discarded, offering a straightforward way to break the chain of infection. By incorporating high-quality disposables into your daily workflow, you not only enhance patient safety by eliminating cross-contamination risks but also improve your practice's overall efficiency. This approach complements your instrument reprocessing efforts, creating a comprehensive strategy that protects both patients and your team from potential pathogens.
Reducing Risk with Sterile, Disposable Supplies
The primary advantage of single-use items is the guaranteed sterility they provide right out of the package. For critical instruments that penetrate tissue, this is a game-changer. Items like sterile MacCut surgical blades, needles, and suture materials are used once and then properly disposed of, completely eliminating any risk of being a vehicle for cross-contamination. This strategy bypasses the entire reprocessing cycle, which removes the potential for human error during cleaning, packaging, or sterilization. By integrating sterile disposables into your procedures, you ensure that the most critical tools meet the highest standard of safety every single time, providing peace of mind for both you and your patient.
Improving Efficiency and Workflow
Beyond the clear safety benefits, incorporating dental disposables significantly streamlines your practice's workflow. Think of all the time and labor spent on cleaning, sorting, and sterilizing reusable items. When you use disposables like prophy angles, impression trays, or saliva ejectors, you reclaim that time, allowing your team to focus more on direct patient care and less on reprocessing tasks. This also reduces the daily load on your sterilization equipment, potentially extending its lifespan. Having a ready supply of sterile, single-use items prevents procedural delays that can happen when a necessary reusable instrument is still in the autoclave, ensuring your schedule runs smoothly and efficiently.
Understanding Key Sterilization Standards and Guidelines
Understanding sterilization means staying on top of key guidelines from the organizations that set the standards for safety. Think of them as your playbook for creating a secure clinical environment. Following the recommendations from the CDC, OSHA, and your state dental board isn't just about compliance; it’s about building a foundation of trust and safety that protects your patients, your team, and your practice's reputation. Let's look at what each of these bodies requires.
CDC Recommendations for Infection Control
The Centers for Disease Control and Prevention (CDC) provides the foundational guidelines for infection control in dental settings. The CDC makes it clear that sterilization is a precise, multi-stage process where every step counts. It starts with meticulous pre-cleaning to remove debris, followed by disinfection, and finally, sterilization. They also stress that only properly trained team members should manage this process. To ensure staff safety, wearing the right personal protective equipment (PPE) is mandatory. High-quality gear, like the gloves and lab coats in our MacSafe collection, provides the necessary barrier against contaminants during instrument handling and reprocessing, ensuring everyone stays protected.
Meeting the OSHA Bloodborne Pathogens Standard
The Occupational Safety and Health Administration (OSHA) focuses on protecting you and your team. Because dental professionals work so closely with patients, the risk of exposure to bloodborne pathogens is a serious concern. OSHA’s Bloodborne Pathogens Standard is not just a set of suggestions; it's a federal rule that requires your practice to have a clear, written protocol for handling contaminated instruments and preventing exposure incidents. Adhering to these standards is fundamental to workplace safety. It ensures every team member knows exactly how to handle potentially infectious materials, safeguarding their own health while contributing to a safer infection prevention environment for everyone in the office.
The Roles of the FDA and EPA in Sterilization Oversight
While the CDC and OSHA set the standards for your daily practice, the Food and Drug Administration (FDA) and the Environmental Protection Agency (EPA) play crucial oversight roles behind the scenes. The FDA's primary job is to ensure that medical devices, including the dental instruments you use every day, are safe and effective. They review how manufacturers plan to sterilize devices before they even reach the market and inspect the facilities where this happens. The EPA, on the other hand, focuses on environmental safety. They regulate industrial sterilization facilities that use chemicals like ethylene oxide (EtO) to make sure harmful emissions don't pollute the air. Together, these agencies create a framework that ensures the tools and supplies you purchase for your sterilization process are safe from production to patient use.
Following Your State Dental Board's Rules
While the CDC and OSHA set the national stage, your state dental board directs the show locally. These boards enforce specific sterilization regulations that your practice must follow to maintain licensure and protect public health. Requirements often get very specific, detailing everything from how to package instruments to documentation procedures. For instance, many boards mandate that instruments are placed in sterilization pouches with chemical indicators, then properly sealed, labeled, and dated. Since these rules can differ from one state to another, it's essential to stay current with your local board’s requirements to ensure your practice remains fully compliant and operates at the highest standard of care.
How to Build a Strong Infection Control Program
An effective infection control program is the backbone of a safe dental practice. It’s more than just owning an autoclave; it’s a systematic approach that integrates the right equipment, consistent monitoring, and a commitment to ongoing improvement. Building this framework protects your patients, your team, and your reputation. A successful program relies on clear protocols and high-quality infection control supplies that you can depend on every single day. By treating infection control as a core pillar of your practice, you create an environment where safety is second nature and patient trust is built into every procedure. This proactive strategy ensures you are always prepared, compliant, and operating at the highest standard of care.
Choosing and Maintaining the Right Equipment
The first step is choosing the right tools for the job and keeping them in top condition. Your practice must have clear, written protocols for handling contaminated instruments, always adhering to the manufacturer’s instructions for use (IFUs) for cleaning and sterilization. While manual scrubbing is an option, the CDC notes that using automated equipment like ultrasonic cleaners and instrument washers provides a more reliable and thorough cleaning process. After cleaning, ensure all instruments are properly packaged before being placed in the sterilizer. Regular maintenance, as outlined by the equipment manufacturer, is not optional; it’s essential for consistent performance and preventing unexpected failures. Investing in reliable sterilization equipment is a foundational part of this process.
Setting Up Your Monitoring and Documentation System
How do you know your sterilizer is actually working? Verification is critical. According to the CDC, a robust monitoring system includes three key components. First, use biological indicators, or spore tests, at least weekly to confirm the process is killing highly resistant microorganisms. Second, perform chemical monitoring by placing indicators inside and outside each instrument pack to show it has been exposed to sterilization conditions. Finally, conduct mechanical monitoring by checking the sterilizer’s gauges and readouts for every cycle to ensure it meets the correct time, temperature, and pressure parameters. Meticulous documentation of these checks is just as important, providing a crucial record for quality assurance and patient safety.
Developing a Plan for Continuous Improvement
Infection control is not a "set it and forget it" task. It requires a commitment to continuous improvement through regular training, evaluation, and updates. Schedule routine staff meetings to review protocols, discuss challenges, and reinforce best practices, including the proper use of PPE from trusted lines like MacSafe. Keep your team informed about any new guidelines or technologies. While budget constraints can be a challenge, finding cost-effective yet high-quality supplies can make a significant difference. Regularly maintaining your equipment according to the manufacturer’s schedule prevents costly breakdowns and ensures your practice is always ready to provide the safest possible care. This ongoing effort fosters a culture of safety that benefits everyone.
Frequently Asked Questions
Q: What's the real difference between sterilization and disinfection?
A: Think of it this way: disinfection reduces the number of harmful microorganisms, but sterilization eliminates all of them, including tough bacterial spores. Disinfection is appropriate for surfaces like countertops, but for any instrument that will contact sterile tissue or the bloodstream, sterilization is the only acceptable standard. It’s an absolute process; an item is either sterile or it is not.
Q: How often do I need to spore test my sterilizer, and is it really necessary?
A: Yes, it is absolutely necessary. The CDC recommends spore testing each sterilizer in your practice at least once a week. This is the only way to verify that your machine is actually killing the most resistant microorganisms out there. Chemical indicators on pouches show that conditions for sterilization were met, but a spore test proves the process was successful. Consistent testing is your ultimate proof of safety and compliance.
Q: Why are my instruments rusting in the autoclave?
A: Rust is often a sign of a process issue or lower-quality instruments. The most common causes are inadequate drying before packaging, using tap water with high mineral content in the sterilizer, or using instruments made from lower-grade steel. To prevent this, ensure instruments are bone-dry before bagging and use distilled water in your autoclave. Investing in high-quality, corrosion-resistant tools, like those in our Hexa Series, also makes a significant difference in longevity.
Q: Can I sterilize and reuse items labeled as "single-use"?
A: No, you should never attempt to sterilize and reuse items designated for single use. Products like our MacCut surgical blades are designed and validated for one procedure only. Reprocessing can damage the material, compromise its sharpness or integrity, and there is no way to guarantee it will be completely free of bioburden, making it unsafe for the next patient.
Q: What's the single biggest mistake practices make with sterilization?
A: The most common and dangerous mistake is improper pre-cleaning. If an instrument isn't thoroughly cleaned of all blood, saliva, and debris before it goes into the sterilizer, the bioburden can shield microorganisms from the steam or chemical vapor. This means the instrument will come out of the cycle non-sterile. Always wear proper PPE, like MacSafe gloves, and ensure every instrument is meticulously cleaned before it's packaged for sterilization.
Read More
- Disinfection & Sterilization Guide - SurgiMac Dental Supply
-
How to Choose the Right Dental Glove for Your Team
Related Articles
Tags
Blog posts
-
, by SurgiMac A Clinician's Guide to Absorbable Suture Material
-

, by SurgiMac A Clinician's Guide to Dental Composite Resin Kits
-
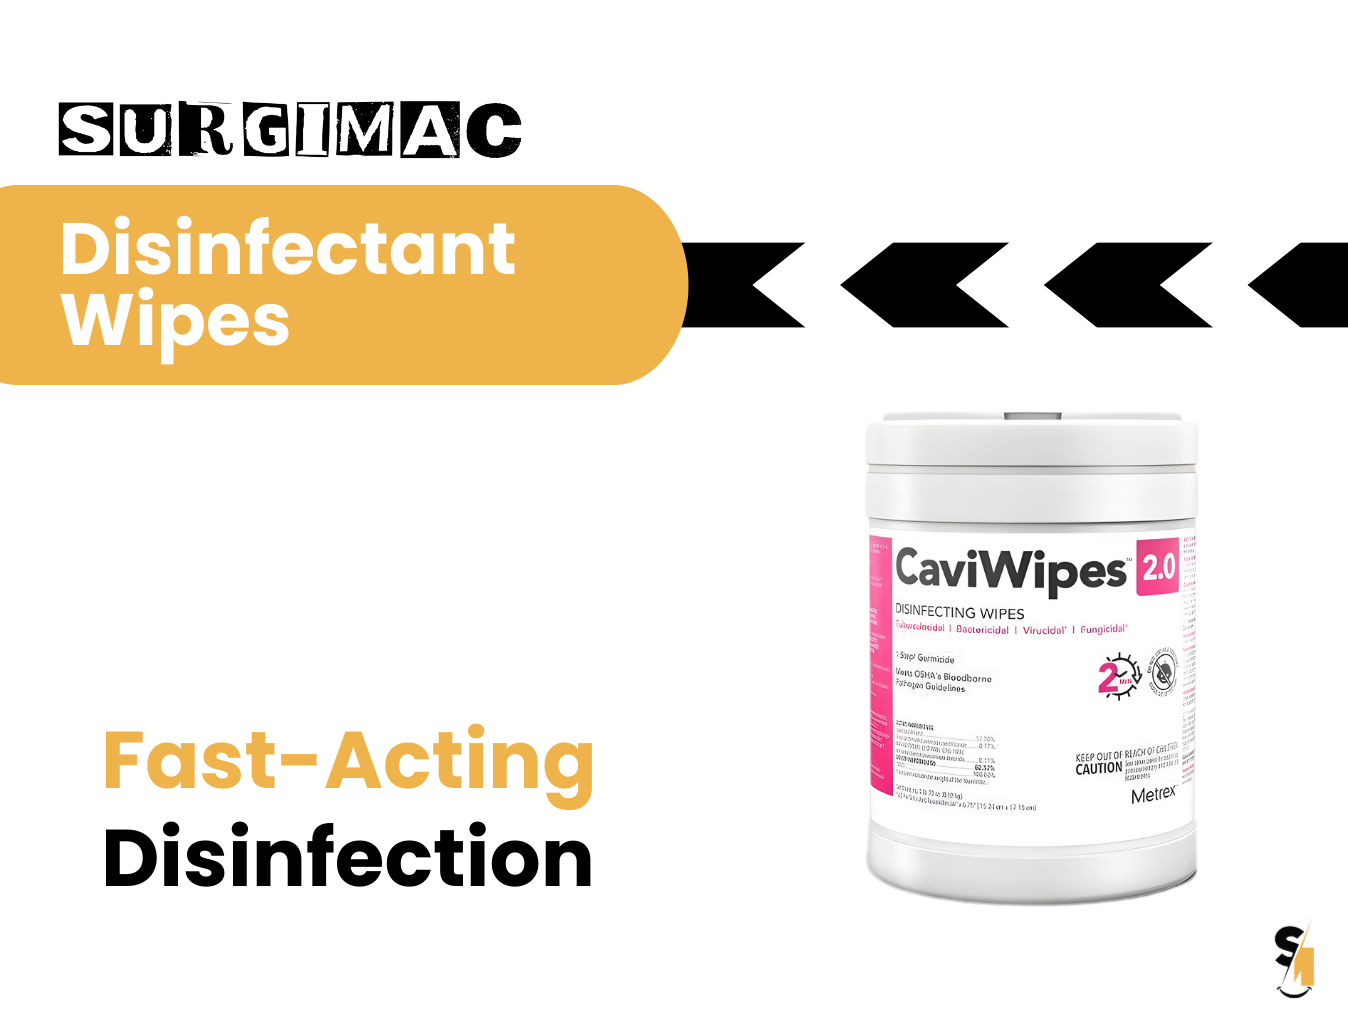
, by SurgiMac How to Disinfect with Metrex CaviWipes Correctly


