


Why Sterile Dental Burs Are Critical for Your Practice
- , by Talha Azeem
- 21 min reading time
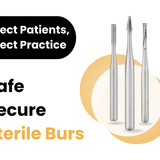
Sterile dental burs help prevent cross-contamination, protect patient safety, and simplify infection control in every dental practice.
As a dental professional, you balance clinical excellence with the operational demands of running a practice. Instrument reprocessing is a critical but time-consuming part of that workflow. The multi-step process for cleaning and sterilizing reusable burs requires meticulous attention to detail, and any error can have serious consequences. This is where single-use sterile dental burs offer a clear advantage, streamlining your workflow while guaranteeing perfect sterility for every patient. By eliminating the reprocessing cycle, you save valuable staff time and remove any doubt about instrument safety. Let's examine the clinical and operational benefits of integrating sterile, single-use burs and diamonds into your practice.
Understanding the Fundamentals of Dental Burs
Dental burs are the unsung heroes of restorative and surgical dentistry. These small, precise rotary instruments are essential for cutting, grinding, and shaping hard tissues like enamel, dentin, and bone. Think of them as the artist's brush for a dentist—each one is designed for a specific task, from preparing a cavity for a filling to refining the margin for a crown. Understanding the different types of burs, their materials, and their shapes is fundamental to performing efficient and effective dental procedures. The right bur not only makes the job easier but also contributes to a better clinical outcome and a more comfortable patient experience. Let's break down the key characteristics you need to know.
Types of Dental Burs by Material
The material a bur is made from dictates its cutting properties, durability, and ideal use. While all burs are designed to cut, some are better suited for slicing through tough enamel, while others excel at removing softer carious dentin. The four primary materials you'll encounter are diamond, carbide, ceramic, and steel. Each has a distinct advantage, and most dental practices keep a variety on hand to tackle different procedures. Choosing the right material is the first step in ensuring you have the best tool for the task, whether it's bulk reduction for a crown prep or delicate caries excavation.
Diamond Burs
Diamond burs are constructed with a stainless steel shank and a head coated in fine diamond particles, making them one of the hardest and most effective cutting instruments available. According to Dental Avenue, they are primarily used for "cutting very hard surfaces like tooth enamel, crowns, and bone" and can effectively manage modern restorative materials like zirconia and lithium disilicate. Their abrasive grinding action is perfect for creating smooth, precise preparations for crowns and veneers. Diamond burs come in a wide range of grits, from super-coarse for rapid bulk reduction to extra-fine for polishing and finishing, giving you complete control over the final surface texture. You can explore a full range of high-quality burs and diamonds to find the perfect grit and shape for any procedure.
Carbide Burs
Made from tungsten carbide, these burs are exceptionally strong, sharp, and durable. Dental Avenue notes that carbide burs are "three times stronger than stainless steel burs" and can withstand high temperatures without dulling. Unlike the grinding action of diamond burs, carbide burs cut by milling, with flutes that chip away at the tooth structure. This makes them highly efficient for tasks like cavity preparation, sectioning teeth for extraction, and removing old metallic restorations. Their longevity and effective cutting ability make them a cost-effective and reliable choice for everyday operative procedures in any busy dental practice.
Ceramic (Smart) Burs
Ceramic burs represent a more conservative approach to caries removal. These instruments are unique because they are "self-limiting," meaning they are designed to selectively remove only soft, decayed tooth material. As Dental Avenue explains, they "will not cut healthy tooth enamel, healthy dentin, or existing fillings." This property makes them an invaluable tool for minimally invasive dentistry, as they help preserve as much healthy tooth structure as possible. By using a ceramic bur for final caries excavation, you can reduce the risk of accidentally exposing the pulp and ensure that you are only removing tissue that is truly compromised, leading to better long-term outcomes for your patients.
Steel Burs
Steel burs are a more traditional and economical option. While they are not as hard or durable as their carbide or diamond counterparts, they still have a place in the modern dental operatory. Dental Avenue points out that steel burs are "typically used for less demanding tasks" and are less expensive, though they "do not last as long." They are most effective at lower speeds for removing soft carious dentin or for making initial preparations in dentin. Because they dull more quickly, especially when cutting enamel, they are often considered a single-use item, but their affordability makes them a practical choice for specific, low-intensity applications.
Common Dental Bur Shapes and Their Functions
Beyond the material, the shape of the bur's head is critical to its function. Each shape is engineered to perform a specific action, such as creating access, forming internal walls, or producing undercuts for retention. A clinician's ability to select the right shape for each step of a procedure is key to achieving predictable and precise results. From the universally recognized round bur to the highly specialized finishing bur, understanding the geometry of these instruments allows you to work more efficiently and create restorations that are both functional and esthetic. Let's review some of the most common shapes and their primary roles.
Round Burs
The round bur is one of the most versatile and widely used shapes in dentistry. As described by Dental Avenue, round burs are used for "digging out tissue, preparing cavities, and opening access to the tooth." Their spherical shape is ideal for creating the initial entry point through enamel during a cavity preparation. Once inside the tooth, they are highly effective at removing carious dentin due to their ability to reach into small areas. They are also used to create retentive features and are essential for performing endodontic access preparations, making them a fundamental tool in any restorative or surgical setup.
Pear-Shaped Burs
Pear-shaped burs are another versatile option, often favored for their ability to both excavate and shape a cavity preparation simultaneously. Dental Avenue notes they are used for "removing decay, trimming, and finishing." The unique shape, which combines a slightly tapered cone with a rounded end, is ideal for creating conservative Class I, II, and III preparations. It allows for the removal of caries while simultaneously forming cavity walls with a slight undercut, which is perfect for amalgam restorations, or smooth, flowing walls suitable for composite fillings. This all-in-one functionality makes it a go-to for many clinicians.
Flat End Tapered Burs
When it comes to crown and bridge work, the flat end tapered bur is indispensable. Its primary function, as stated by Dental Avenue, is "for preparing teeth for crowns and bridges." The tapered sides of the bur create the ideal axial wall convergence, ensuring that the final restoration will have a clear path of insertion without any undercuts. The flat tip is used to create a distinct shoulder margin, which provides excellent support for all-ceramic crowns. This shape gives clinicians the control needed to produce precise margins and smooth preparations, which are critical for the longevity and fit of indirect restorations.
Inverted Cone Burs
The inverted cone bur is specifically designed for creating mechanical retention in cavity preparations. Its distinct shape, with a narrow neck and a wider cutting base, makes it "very useful in dental surgery for creating undercuts and shaping biting surfaces," according to Dental Avenue. These undercuts are essential for locking traditional restorative materials like amalgam into place. In addition to creating retentive features, inverted cone burs are also effective for flattening the pulpal floor of a cavity preparation and for delineating the occlusal anatomy during the finishing stages of a restoration.
Straight Fissure Burs
A straight fissure bur is characterized by its long, parallel sides and flat end, making it an excellent choice for creating smooth, straight lines. Dental Avenue explains that these burs are "used for flattening the bottom of cavities or shaping the edges." They are ideal for forming the internal walls of a cavity preparation, ensuring there are no irregularities that could create stress points in the final restoration. Additionally, straight fissure burs are commonly used in surgical procedures for sectioning multi-rooted teeth prior to extraction, as their shape allows for a clean, precise cut through the tooth structure.
How to Choose the Right Dental Bur
Selecting the perfect dental bur for a procedure involves more than just grabbing the first one you see. It’s a decision that balances the material you need to cut, the specific task at hand, and the equipment you’re using. A thoughtful choice ensures procedural efficiency, preserves healthy tooth structure, and ultimately leads to a higher quality of care. Key factors to consider include matching the bur’s shank to your handpiece, selecting the appropriate grit or blade design for the desired cutting action, and choosing a head shape that is engineered for the specific clinical objective. Mastering this selection process is a hallmark of a skilled and precise clinician.
Matching the Shank to the Handpiece
One of the most fundamental aspects of bur selection is ensuring compatibility with your dental handpiece. As noted by Henry Schein, you must "make sure the shank type fits your dental handpiece (high-speed, slow-speed, or lab/surgical)." The three main shank types are Friction Grip (FG) for high-speed handpieces, Latch-Type (RA) for slow-speed contra-angle handpieces, and Handpiece (HP) for slow-speed straight attachments. Using the wrong shank can not only damage the chuck mechanism in your handpiece but also pose a significant safety risk if the bur is not securely held. Always double-check that the shank and handpiece are a match before beginning any procedure.
Selecting the Right Grit and Blade Design
The aggressiveness of a bur's cutting action is determined by its grit or blade design. According to Henry Schein, "choosing the right grit size or blade design affects how aggressively the bur cuts." For diamond burs, this is determined by the size of the embedded diamond particles, often indicated by a color-coded band on the shank (e.g., green for coarse, red for fine). For carbide burs, the number of flutes on the head dictates its function; fewer flutes provide a more aggressive cut for bulk removal, while a higher number of flutes (12-30) creates a smoother surface ideal for finishing and polishing restorations.
Choosing a Head Shape for the Task
Finally, the head shape of the bur must align with the clinical task. As Henry Schein advises, you should "choose the shape based on the specific task you need to do, such as preparing cavities or crowns." As we've discussed, a round bur is perfect for initial access, while a tapered fissure bur is designed for crown preparations. Having a clear understanding of how each shape functions allows you to work with greater precision and efficiency. Selecting the correct head shape minimizes unnecessary removal of tooth structure and helps you achieve the ideal form for a durable and functional restoration. A well-organized inventory of dental instruments and burs ensures you always have the right tool ready.
Why Are Sterile Dental Burs Essential for Clinical Safety?
Sterile dental burs prevent cross-contamination between patients and eliminate the risk of bloodborne pathogen transmission during procedures. Using sterile instruments protects both patients and staff from serious infections.
Many dental offices still struggle with proper bur sterilization protocols. This creates unnecessary risks that can lead to patient infections and legal problems.
After 10 years of working with infection control protocols, I've seen how proper sterilization saves practices from devastating contamination incidents. Read this complete guide to understand why sterile burs are non-negotiable for patient safety.
How Do Contaminated Burs Spread Infections?
Contaminated burs carry bacteria, viruses, and blood particles from previous patients. These pathogens can survive on instrument surfaces for hours or days.
Unsterilized dental instruments can transmit hepatitis B, hepatitis C, and HIV between patients. Even microscopic amounts of contaminated material pose serious risks.
Cross-contamination prevention starts with understanding how pathogens survive on cutting instruments. Blood and saliva create perfect environments for bacterial growth.
What Are Single-Use Burs and Their Benefits?
Single-use burs come pre-sterilized and get discarded after each patient. This eliminates reprocessing time and guarantees sterility for every procedure.
Single-use burs reduce infection risk by 100% compared to reprocessed instruments. There's no chance of sterilization failure or cross-contamination.
These sterile packaging burs also save staff time and reduce sterilization costs. You eliminate the cleaning, packaging, and sterilization steps completely.
Meeting Quality and Safety Standards
Meeting quality and safety standards is fundamental to upholding your commitment to patient care. Regulatory bodies like the CDC provide clear guidelines on instrument reprocessing to prevent cross-contamination. When a practice struggles with proper bur sterilization, it creates a significant risk that can lead to patient harm and legal repercussions. Integrating single-use sterile burs into your workflow is one of the most straightforward ways to ensure you meet these critical standards, protecting your patients, your staff, and your practice's reputation.
Beyond sterility, the quality of the bur itself plays a huge role in safety. A poorly manufactured bur can break mid-procedure, harming the patient and complicating the treatment. Sourcing your instruments from a reliable supplier is essential. At SurgiMac, we provide a wide range of high-performance burs and diamonds designed for precision and durability. Choosing dependable tools ensures your focus remains on the procedure, not your equipment. This commitment to quality is a key part of a comprehensive infection control strategy that safeguards everyone in your clinic.
How Do OSHA Compliant Dental Tools Protect Practices?
OSHA requires dental practices to follow specific protocols for instrument sterilization. Non-compliance can result in fines and practice shutdowns.
OSHA compliant dental tools meet federal safety standards for bloodborne pathogen control. Using certified sterile instruments protects your practice legally.
These regulations exist because improper sterilization has caused disease outbreaks in dental offices. Following OSHA guidelines prevents regulatory problems.
What Are the Risks of Improper Bur Sterilization?
Improper sterilization can leave viable pathogens on instruments. Heat-resistant bacteria and viruses survive inadequate sterilization cycles.
Failed sterilization processes allow dangerous pathogens to survive and infect subsequent patients. This creates liability risks and threatens patient health.
Sterilization monitoring helps identify equipment failures before they cause problems. Regular spore testing ensures your sterilization works properly.
The Full Reprocessing Cycle for Reusable Burs
To ensure reusable burs are safe for the next patient, they must go through a complete reprocessing cycle. This isn't just a quick rinse and into the sterilizer; it's a meticulous, multi-step process where every stage is critical. Skipping or rushing any part of the cycle can compromise the entire effort, leaving patients and staff vulnerable to cross-contamination. A solid reprocessing protocol is the backbone of your practice’s infection control strategy. It involves two distinct and equally important phases: thorough cleaning followed by effective sterilization. Let's walk through what each step entails to ensure your instruments are always clinically safe and ready for use.
Step 1: Meticulous Cleaning
Before any sterilization can occur, every bur must be meticulously cleaned. As Public Health Ontario notes, "Cleaning and Sterilization are two distinct steps of reprocessing and both steps are of equal importance." The goal of cleaning is to remove all visible bioburden—blood, saliva, and tissue debris. If this organic material remains, it can act as a shield, preventing the sterilant from reaching and killing the microorganisms underneath. This is why simply placing a used bur directly into a sterilizer is a critical error. Use an ultrasonic cleaner or a dedicated instrument washer to dislodge debris from the bur's intricate surfaces. If manual scrubbing is necessary, always wear heavy-duty utility gloves and protective eyewear from a reliable line like MacSafe to prevent sharps injuries.
Step 2: Proper Sterilization
Once the burs are clean, dry, and free of debris, the next step is sterilization. This process is designed to eliminate all forms of microbial life, including bacteria, viruses, fungi, and resilient bacterial spores. The clean instruments should be packaged in appropriate sterilization pouches or cassettes that allow the sterilizing agent (like steam) to penetrate effectively. It's crucial to choose a sterilization method that is proven to be effective for dental instruments. Not all methods achieve the same level of sterility, and using a subpar technique can create a false sense of security while leaving dangerous pathogens behind. The chosen method must be monitored regularly to verify it is functioning correctly and achieving complete sterilization every time.
Comparing Sterilization Methods and Efficacy
When it comes to sterilization, not all methods deliver the same results. Choosing the right one is a critical decision that directly impacts patient safety. While several options exist, their effectiveness varies significantly, especially when dealing with the complex shapes of dental burs. Research helps us understand which techniques consistently achieve 100% sterility and which ones can fall short. An in-vitro study published by the National Center for Biotechnology Information compared four different methods, providing clear data on their ability to prevent cross-infection. Understanding these differences will help you implement the most reliable and evidence-based protocols in your practice, ensuring every instrument you use is completely sterile.
Autoclave (Steam Under Pressure)
The autoclave is widely considered the gold standard for dental instrument sterilization, and for good reason. It uses steam under high pressure and temperature to kill all microorganisms, including tough bacterial spores. The research is clear: the study on sterilizing endodontic files found that the "autoclave...method was the best at killing all the bacteria...They made the files 100% sterile." This method is highly reliable, efficient, and recommended by both the CDC and the American Dental Association for sterilizing critical and semi-critical dental instruments. Its consistent performance and ability to penetrate instrument packaging make it an essential piece of equipment for any dental practice committed to the highest standards of infection control.
CO2 Laser Sterilization
Alongside the autoclave, the same study found that CO2 laser sterilization was also 100% effective at eliminating bacteria on dental files. This method uses a concentrated beam of light to generate intense heat, which rapidly destroys microorganisms on the surface of an instrument. While its efficacy is impressive and on par with autoclaving, CO2 laser sterilization is not a common method used in most dental practices for routine instrument reprocessing. The equipment is specialized, expensive, and typically used for clinical procedures rather than sterilization protocols. Therefore, while it stands as a scientifically proven method, its practical application for sterilizing burs in a typical clinic setting is limited.
Glass-Bead and Chemical Sterilization
In contrast to autoclaves and CO2 lasers, some older or less common methods have been shown to be significantly less reliable. The same comparative study found that both the glass-bead sterilizer and glutaraldehyde-based chemical solutions were not as effective. The results showed these methods "left some bacteria on the files," failing to achieve complete sterility. Glass-bead sterilizers, which use high heat on small glass beads, may not sterilize the entire instrument uniformly. Likewise, cold chemical sterilization requires precise contact time and can be easily inactivated by organic debris, making it a less dependable option for critical instruments like burs and diamonds. For these reasons, these methods are not recommended for routine bur sterilization.
How Do Sterilized Dental Instruments Reduce Liability?
Proper sterilization documentation protects practices from malpractice claims. Records prove you followed accepted safety standards.
Documented sterilization procedures reduce malpractice insurance costs by up to 15%. Insurance companies recognize proper infection control as risk reduction.
These records also help during regulatory inspections. OSHA and state dental boards require sterilization documentation for compliance.
What Makes Sterile Packaging Systems Effective?
Sterile packaging maintains instrument sterility until use. Proper packaging prevents contamination during storage and transport.
Sealed sterile packaging keeps instruments sterile for up to 5 years when stored properly. The barrier materials prevent bacterial penetration.
Quality packaging also provides tamper evidence. You can see if packages have been compromised before use.
How Does Infection Control Save Money Long-Term?
Proper infection control prevents expensive contamination incidents. Patient infections can cost practices hundreds of thousands in settlements.
Practices with documented infection control save 40% on malpractice insurance premiums. Prevention costs far less than contamination consequences.
Good infection control also protects staff health. Fewer sick days and workers' compensation claims reduce operating costs.
FAQs about Why Sterile Dental Burs Improve Clinical Safety
Q: Are single-use burs more expensive than reusable ones?
Initial cost is higher, but single-use burs eliminate sterilization labor costs and reduce infection liability, making them cost-effective long-term.
Q: How long do sterile burs stay sterile in packaging?
Properly packaged sterile burs remain sterile for up to 5 years when stored in clean, dry conditions away from direct sunlight.
Q: What happens if sterilization equipment fails?
Equipment failure can leave instruments contaminated. Regular spore testing and maintenance prevent sterilization failures that risk patient safety.
Q: Do all dental burs require sterilization?
Yes, all dental burs that contact patient tissues or fluids must be sterilized or disposed of after each use according to OSHA requirements.
Q: How often should I test my sterilization equipment?
Test sterilization equipment weekly with biological indicators and daily with chemical indicators to ensure proper function and safety.
Conclusion
Sterile dental burs are essential for preventing cross-contamination and protecting patient health. Single-use options eliminate sterilization risks while meeting OSHA compliance requirements.
Proper infection control protects your practice from liability and reduces long-term costs. The investment in sterile instruments pays for itself through reduced risks and insurance savings.
Ready to upgrade your infection control protocols? Browse our complete selection of sterile Burs and Diamonds designed for maximum safety and OSHA compliance.
Key Takeaways
- Master bur selection for better outcomes: Match the bur's material, like diamond or carbide, and its specific shape to the clinical task to achieve greater precision and procedural efficiency.
- Understand the risks of reusable burs: Proper reprocessing requires two distinct steps, meticulous cleaning followed by effective sterilization, and failure at either stage can lead to dangerous cross-contamination.
- Prioritize safety with single-use sterile burs: Integrating pre-sterilized, disposable burs into your workflow eliminates reprocessing errors, guarantees sterility for every patient, and simplifies compliance with infection control standards.
Related Articles
Blog posts
-
, by SurgiMac A Clinician's Guide to Absorbable Suture Material
-

, by SurgiMac A Clinician's Guide to Dental Composite Resin Kits
-
, by SurgiMac How to Disinfect with Metrex CaviWipes Correctly


