





Dental Matrix Bands and Wedges: Selection Guide
- , by SurgiMac
- 23 min reading time
Compare dental matrix bands and wedges for Class II restorations. Choose the right systems and materials for tight, predictable proximal contacts.
Dental matrix bands and wedges help clinicians rebuild missing proximal walls, create tight contacts, and seal gingival margins during Class II and other restorative procedures. The best choice depends on preparation size, tooth anatomy, restorative material, and the amount of separation needed.
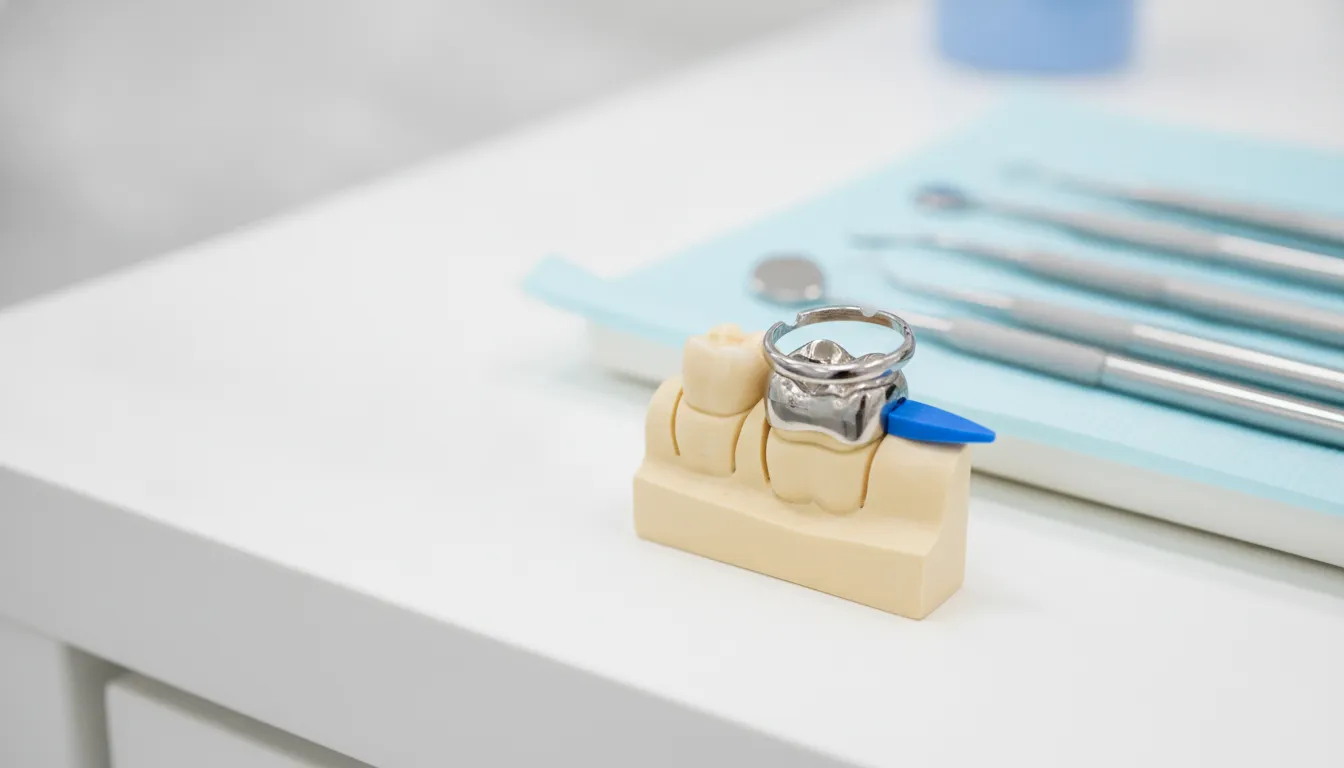
For most posterior Class II composite restorations, a precontoured sectional band, stable separation ring, and correctly sized wedge support a natural contour and firm proximal contact. Circumferential bands remain useful for extensive preparations and amalgam. In every case, confirm the wedge seals the gingival margin without distorting the band.
This practical selection guide compares common system types, explains wedge selection, and outlines a repeatable chairside workflow.
Dental matrix bands and wedges: what each component does
Good Class II dental work depends on a stable matrix system. This setup makes the natural form of a tooth when a side wall is missing. The system uses two main parts: a band and a wedge. Each piece has a clear job to do. Together, they help you build a filling that lasts and keeps the gums healthy. Choosing the proper selection of dental matrix bands and wedges is the first step toward a good result.
The role of the matrix band
A matrix band acts as a short-term wall for your filling. When a tooth has a cavity on a side wall, it lacks the structure to hold a soft filling in place. The band wraps around the tooth to create a form. This lets you press the filling in without it leaking out. It also helps you copy the natural proximal contour of the tooth.
Beyond acting as a mold, the band keeps the filling from flowing into the gum gap. This extra material is often called "flash." If flash stays on the tooth, it can hurt the gums. The band keeps the filling where it belongs during the work. Using restorative matrix supplies makes sure the band is thin enough to fit but strong enough to hold its shape.
Purpose of the dental wedge
The wedge is a small but vital tool in the matrix system. Its first job is to seal the band against the tooth at the gum line. A tight seal stops the filling from bulging out over the edge of the tooth. These bulges are a major cause of gum disease and bone loss. The wedge gives the pressure needed to keep the band tight against the tooth.
Wedges also create a tiny bit of space between the teeth. This is known as tooth separation. Since the matrix band has its own thickness, you must push the teeth apart a little to make room for it. When you remove the band after the filling is set, the teeth move back. This creates a tight contact point that stops food from getting stuck.
Working together for success
The band and wedge must work as a team to get the best results. While the band provides the shape, the wedge provides the seal and hold. If the wedge is too small, it will not seal the band. If it is too large, it might bend the band and ruin the shape. Good placement makes sure the band stays in place even when you press hard on the filling.
Modern sectional systems often use a ring to add even more space. This helps dental pros reach tighter proximal contacts than older bands. By knowing what each part does, you can avoid common mistakes. This leads to fillings that look and feel like real teeth.
Compare matrix band, retainer, sectional system, and wedge options
Picking the right tools is key for every filling you do. You need a setup that builds a tight contact and a natural tooth shape. The proper selection of dental matrix bands and wedges depends on the cavity class and where the tooth is. Each choice plays a part in making sure the final filling is strong and lasts a long time.
Traditional circumferential bands
These systems use a metal band that goes all the way around the tooth. A tool called a retainer holds the band tight. The Tofflemire is the most used type of retainer today. These are good when a tooth has lost many walls. They are easy to set up and do not cost much. But, they have some cons for modern fillings. These bands are flat and do not match the curve of a natural tooth well.
Because the band is flat, it can be hard to make a good contact point. You may end up with a gap where food can get stuck. Also, the band can pull the tooth in a way that makes the filling too thin in some spots. While they work well for amalgam, they are often not the best pick for composite fillings. Most dental pros now use them just for large preps or when other systems will not fit.
Sectional matrix systems
Sectional systems use small, curved bands and a spring ring. These are the gold standard for Class II posterior composite fillings. They help you build a natural shape and a very tight contact. Tests show that sectional matrix systems provide tighter contacts than old circular bands. The ring gives the force needed to push the teeth apart just enough to fit the band. When you remove the ring and band, the teeth snap back together for a perfect fit.
These systems also help stop big gaps and thin spots. The pre-shaped bands match the natural curves of the tooth. This means you spend less time grinding and shaping the filling after it is hard. Using a good system can make these tasks much faster. It gives you all the parts you need to get a great outcome in less time.
Effective use of wedges
Wedges play a key role in every proximal filling. They do more than just hold the band in place. Their main job is to seal the bottom edge of the band against the tooth. This stops extra material from leaking out and forming an overhang. Test data shows that overhanging margins are a major cause of gum disease and bone loss. A good wedge stops this damage by creating a tight seal at the gum line.
Wedges also help with tooth separation. They push the teeth apart to make room for the thickness of the band. You should choose a wedge based on the size of the space between the teeth. It should fit snug but not cause pain or hurt the gum. Using the wrong size can lead to gaps or poor seals at the base of the filling.
Different types offer some pros. Wood wedges swell when wet, which helps them stay put. Plastic wedges can bend, which lets them mold to the tooth shape better. You should have a wide range of matrix bands and wedge options in your office. This makes sure you can find the right fit for every patient.
| System Type | Primary Use | Key Benefit | Limitation |
|---|---|---|---|
| Circumferential | Large preps, Amalgam | Strong and low cost | Flat proximal shape |
| Sectional System | Class II Composite | Tight, natural contacts | Higher cost per use |
| Plastic Wedges | Small spaces | Flex for better seal | Less separation force |
| Wooden Wedges | Moderate gaps | Expand when wet | Can splinter or break |
How do you choose a matrix for a Class II restoration?
Choosing the right tool is a key step for Class II success. You must pick a system that fits the tooth shape and the depth of the prep. The main goal is to build a tight contact and avoid gaps at the gum line. Your choice of clinical matrix materials will directly affect the health of the patient's gums. Faulty use of these tools can cause gum disease over time (NIH).
Sectional matrix systems for composite
Most dental pros use sectional matrix systems for posterior composite work. These systems use a small thin band and a metal ring. The ring pushes the teeth apart just enough to make up for the band's thickness (SurgiMac). This method helps you get a tighter contact point than old-style bands (NIH). You should look for rings with high grip strength to keep them from slipping during the procedure.
A good sectional system like the iMatrix dental matrix system mimics the natural curve of the tooth. This helps you avoid flat walls that can trap food. Some systems even show less than 100 μm of change in the tooth's shape (NIH). Always check the band's fit against the tooth before you add the filling material.
Role of dental matrix bands and wedges
The proper selection of dental matrix bands and wedges is vital to seal the floor of the cavity. The wedge must sit tight against the band to stop the filling from leaking out. This leak, or "flash," can irritate the gums and lead to bone loss if left alone (NIH). You need to have many sizes of wedges on hand to fit different gaps between teeth.
You should pick a wedge that is large enough to seal the margin but not so big that it warps the band. A wedge that is too small won't provide the seal you need (SurgiMac). Check the seal once the wedge is in place. If you see a gap at the floor of the prep, you may need a larger wedge or a different band type.
Amalgam and large cavity needs
For amalgam fillings or very large preps, you might still need a full-circle band. These bands wrap all the way around the tooth. They give a strong wall when you need to pack the metal filling with force. But these bands can be harder to shape than thin sectional ones. You must burnish the metal against the next tooth to ensure a good contact (SurgiMac).
How should you select and place a dental wedge?
The success of a dental filling depends on the proper selection of dental matrix bands and wedges. Wedges serve two main roles during the work. First, they press the matrix band against the tooth to create a tight seal at the base. Second, they push the teeth slightly apart. This gap makes room for the thickness of the band. This helps you get a firm contact point once you remove the band.
Choose the best wedge material
You should keep several types of matrix and wedge collection in your office. Having a mix of options allows you to treat more cases with ease. Common types include:
- Wooden wedges: These swell when they touch saliva, which helps them grip the tooth.
- Plastic wedges: These are flexible and often have a shape that mimics the natural tooth.
- Elastic wedges: These stretch to fit tight spots and then expand to hold the band.
Plastic wedges help you recreate the curve of the tooth near the gum line. Dentists often use elastic types when they need a soft touch to avoid tissue hurt. Wood is stiff and may not fit the curves of every tooth, but it stays in place well.
Find the right size for the space
Wedges come in many sizes, often marked by colors. You must pick a size that fills the gap between the teeth with light pressure. If a wedge is too small, it will not seal the band or move the teeth. This can lead to a weak contact or a leaky margin. If it is too large, it may sit too high and squash the band. This ruins the shape of the filling. Research in periodontal health shows that poor wedge use can lead to gum issues over time. You should always test the fit to make sure the wedge is stable. A good fit will hold the band tight against the gingival margin. This seal is the only way to prevent excess material from flashing into the gum area.
Place the wedge with care
In most cases, you should insert the wedge from the lingual side. This is because the gap between teeth is usually wider on the tongue side. Use cotton pliers to push the wedge in firmly. Once it is in, check the band for any gaps at the base. The wedge must stay below the contact point so it does not ruin the final shape. If you use a sectional system, place the wedge before you set the ring. This keeps the band from moving when the ring pulls on it. Always look at the contour one last time before you add the composite. If the band looks flat, you may need to swap the wedge for a better size. A common error is "black triangles" caused by a wedge that is too thick at the top. This can push the band away from the next tooth. Pushing a wedge too hard can also bruise the gum or cause bleeding. This makes it hard to keep the site dry for the bonding step. Proper care during placement leads to a better result for the patient.
A chairside workflow for predictable proximal contacts
Every dentist knows the stress of a weak contact point. A loose gap can lead to food packing, gum disease, and unhappy patients. By following a clear path, you can get tight, natural results every time. This process starts before you even pick up a handpiece.
Choosing the right tools for the job
The success of your filling depends on the tools you pick. You must check the size and shape of the tooth and the hole you made. This involves the proper selection of dental matrix bands and wedges based on the case. A good fit helps the wall of your filling act like the natural curve of the tooth. Picking matrix materials and wedges is the first step toward a result that lasts.
Sectional systems, like the iMatrix dental matrix system, are often better than old styles for back teeth. They help you get a tighter fit and a better shape. You should have a few sizes of rings and bands ready. This helps you handle any tooth shape you might see. Once you have your tools, you can start the steps to build a strong wall.
- Check the tooth before you start. Look at the shape of the next tooth and the space you need to fill to pick the best tools.
- Place the matrix band. Slide the band into the gap so it sits slightly below the gum line to act as a solid wall.
- Insert the wedge firmly. Put the wedge in to seal the bottom of the band and push the teeth apart to make up for the band thickness.
- Burnish the band. Rub the band against the next tooth to set a solid spot where the teeth will touch.
- Check the fit once more. Look for any gaps at the bottom and use a larger wedge if the seal is not tight.
- Place the ring and fill. Set the ring to hold the teeth apart while you pack the filling material into the tooth.
- Finish and floss. Pull the tools out and trim any extra material before testing the contact with dental floss.
Achieving a tight gingival seal
The seal at the bottom of your filling is vital. If the wedge is too small, material can leak into the gums. This creates a shelf that traps food and germs. Research shows that bad wedge use is a big cause of gum problems. You must ensure the wedge fits the space fully to stop this from happening.
A good wedge does two things at once. It stops the leak and creates space. This space is just enough for the band to sit in. When you pull the band out, the teeth move back together. This creates the tight "snap" you want to feel when you floss. Different systems have different levels of contour variation, so pick one you trust.
Final checks for success
Do not finish the job without a final check. Once the material is set, pull the wedge and band out. Use a sharp tool to trim any small bits of extra material. Then, use floss to test the contact point. You should feel a clear snap as the floss passes between the teeth.
If the floss shreds or slides too easily, the contact may be poor. You might need to redo the wall to ensure it stays healthy. A solid contact keeps the teeth stable and the gums clean. By sticking to these steps, you give your patients a better result and a longer-lasting smile.
What common matrixing mistakes compromise a restoration?
Creating a good dental restoration takes skill and the right tools. Even small errors with dental matrix bands and wedges can lead to big problems. If the matrix system is not set up well, the filling may fail. This can cause pain for the patient and extra work for the dentist. Learning about these common slips helps you get better results in your clinic.
Failing to achieve tight contacts
One of the most common issues in dental work is a loose contact point. A tight contact is vital to keep food from getting stuck between teeth. When food traps form, they often lead to new cavities or gum pain. This mistake often happens if the separator ring does not give enough force. The ring must push the teeth apart just enough to make up for the width of the band. If the teeth do not move a tiny bit, the contact will be loose once you take out the band.
Another error is forgetting to burnish the metal. You should rub the band against the next tooth to create a thin, curved wall. Without this step, the wall stays flat. A flat wall makes it hard to get a snug fit. Some dentists try to fix this by adding more resin, but that often leads to a bulky shape. Using a modern iMatrix dental matrix system can make this task easier. These kits are built to give you the right tension and shape for every Class II case. They help you reach the goal of a tight, natural fit every time.
Creating gingival overhangs and flash
An overhang occurs when the filling resin flows past the tooth edge at the gum line. This extra resin is hard to clean and irritates the gums. Studies show that the misuse of wedges is a top cause of gum health issues. If the wedge is too small or placed poorly, it will not seal the band. This leaves a gap where the resin can leak out. Overhangs are a big reason why patients come back with bleeding gums after a filling.
Gingival flash is a similar problem. It happens when the band is not tight against the bottom of the prep. To avoid this, you must pick the right wedge size. The wedge should feel firm and stay in place. It needs to close the gap between the band and the tooth edge completely. You should always look down into the prep to check the seal. If you see light or a gap, you need a larger wedge or a better angle. Checking this seal is a key part of the proper selection of dental matrix bands and wedges for your work.
Bending the band and wedge slips
Dental matrix bands are very thin and can warp if handled roughly. A bent band will not create the natural curve the tooth needs. This poor shape can lead to food traps and weak spots in the filling. You must slide the band into place with care to keep its shape. If the band looks dented, it is best to start over with a new one. A smooth, round curve is the only way to match the shape of a real tooth.
Wedge slipping is another common headache. If a wedge moves, the band will lose its seal. This often happens if the wedge is too smooth or if the teeth are shaped oddly. Some wedges can pop out if the pressure is not even. You can use a bit of dental glue or a different wedge style to keep it steady. Also, be careful when you remove the separator ring. If you pull it off too fast, you might tug on the band. This can hurt the filling before it is fully set. Buying restorative matrix supplies ensures your tools stay where you put them until the job is done.
How to stock dental matrix bands and wedges efficiently
A well-stocked kit helps dental teams handle Class II or Class IV cases without delay. To keep high standards, clinics must have a steady supply of matrix bands and wedge options ready. Good stocking is more than just having enough parts. It needs a smart mix of sizes and types that match how many people the office sees.
Organize by size and system type
New dental matrix tools work best when teams group them by how often they use them. Keep common sizes of matrix bands for dentistry in the main trays to save time. For back teeth, having a set Pro Matrix tool or a kit like the iMatrix dental matrix system helps doctors choose the right fit fast. Storing wedges in bins by color and size also stops mistakes during the preparation phase of restorative procedures.
Ensure clinical safety with proper wedges
Buying the right wedges is key for health and good results. Studies show that using the wrong wedge size is a known cause of periodontal pathology. A good wedge must seal the band to the gum edge to stop extra material from leaking. By keeping a full range of sizes, doctors can ensure the proper selection of dental matrix bands and wedges for each patient.
Simplify the replenishment process
Staff should track what they use to avoid running out of parts. Many offices find that some band shapes or wedge sizes sell out faster than others. Setting up a regular matrix systems restock plan keeps rings, bands, and wedges ready. This plan lets the team focus on fast work rather than looking for missing tools during a live visit.
Compare Dental Matrix Systems →
Frequently Asked Questions
Why are wedges used with matrix bands?
Wedges serve two main roles in dental work. They seal the matrix band at the gum line to stop extra material from leaking. They also push the teeth apart just enough to make up for the band's thin wall. According to clinical matrix materials, this helps ensure the teeth touch well after the band is gone. Good use helps prevent gaps where food and germs could get trapped.
What are common mistakes when using matrix bands and wedges?
One big mistake is picking a wedge that is too small for the gap. This fails to seal the edge and can cause extra material to hang over the gum. Other errors include putting the wedge too high or failing to rub the band against the next tooth. Research from PubMed shows that these errors can lead to gum disease over time if they are not fixed.
How to choose the right matrix band for a Class II restoration?
You should pick a band based on the tooth size and where the hole is. Sectional matrix systems are often best for back tooth repairs. These systems help match the natural shape of the tooth better than older styles. They also help create a very tight touch between teeth. A study on PubMed shows that sectional tools work best for these specific types of tooth fillings.
What are the different types of dental matrix wedges?
Wedges come in many sizes and shapes to fit the gaps between teeth. Most are made from wood or plastic. Some are soft and can bend to fit the tooth's curve, while others are stiff to provide more force. Dentists should keep many types on hand to handle different cases. Having the right size is key to preventing overhangs and making sure the filling stays in place.
Ready to get better results with the right dental filling tools?
Using the wrong bands or wedges can lead to weak contacts and food traps. These small errors often cause patient pain and hurt your clinic name. Such mistakes lead to costly re-dos that waste your chair time. You can avoid these issues by choosing good tools that ensure tight seals. Waiting to update your kit means more lost time and fewer happy patients. You can request the best supplies today to make your work fast and sure. Having the right tools on hand lets you focus on your patients.
Ready to contact our team today about your dental supply list? matrix and wedge collection to find the best tools for your next case and ensure every patient leaves your office happy with their results.
Tags
Blog posts
-

, by SurgiMac A Clinician's Guide to Absorbable Suture Material
-

, by SurgiMac A Clinician's Guide to Dental Composite Resin Kits
-

, by SurgiMac How to Disinfect with Metrex CaviWipes Correctly
