


Periodontal Curette Types: A Clinician's Guide
- , by SurgiMac
- 42 min reading time
Find out how to choose and use different periodontal curette types for effective scaling, root planing, and improved patient comfort in your dental practice.
Gracey 1/2, Universal, After Five—sound familiar? Choosing the right curette from a sea of options can feel overwhelming. But picking the wrong one leads to real problems: burnished calculus, patient discomfort, and that all-too-familiar hand strain. Mastering the different periodontal curette types is your key to better clinical outcomes and less physical fatigue. It’s about working smarter, not harder. Whether you need the lightweight design of our Air Series to reduce strain or a specific Gracey for a deep pocket, the right tool changes everything. This guide demystifies the options, helping you build a versatile toolkit for confident, precise work on every single patient.
Key Takeaways
- Understand the fundamental difference: Universal curettes are your all-purpose tools for the entire mouth with two cutting edges, while area-specific Gracey curettes offer precision for specific tooth surfaces with a single, angled edge.
- Select the right instrument for the job: Use universal curettes for general scaling, standard Graceys for detailed subgingival work, and specialized designs like After Fives for effectively treating deep pockets and complex root anatomy.
- Prioritize quality and maintenance: Investing in ergonomic, high-grade instruments reduces hand fatigue and improves clinical outcomes, while consistent sharpening ensures your tools perform safely and effectively.

What Are Periodontal Curettes and Why Are They Essential?
Periodontal curettes are the workhorses of every dental hygienist's toolkit. These specialized instruments are meticulously designed for the critical task of removing plaque and calculus from tooth surfaces, especially below the gumline. Unlike scalers, which are meant for supragingival (above the gumline) cleaning, curettes have a unique design with a rounded toe and back. This specific anatomy makes them the ideal choice for safely accessing and cleaning subgingival areas without causing trauma to the delicate soft tissues of the gingiva. They are the go-to instruments for scaling and root planing, forming the backbone of non-surgical periodontal treatment.
Their primary function is to support periodontal health, making them indispensable for both preventative care and active periodontal therapy. For any practice dedicated to comprehensive patient care, a well-maintained set of high-quality curettes is non-negotiable. They are the frontline tools in the fight against gingivitis and periodontitis, directly contributing to better patient outcomes and long-term oral wellness. Having the right instrument for the job not only improves clinical efficiency but also enhances patient comfort during procedures. This is why investing in durable and ergonomically designed dental instruments is a cornerstone of modern dental practice, ensuring you can perform at your best.
How Curettes Drive Effective Periodontal Therapy
Periodontal curettes are fundamental to effective periodontal therapy. Their main job is to debride the root surfaces by meticulously removing calculus deposits and plaque biofilm from below the gumline. This process, known as scaling and root planing, is crucial for treating and managing gum disease. By creating a clean and smooth tooth surface, curettes disrupt the bacterial colonies that cause inflammation and tissue destruction. This helps the gingival tissue to heal and reattach to the tooth, reducing pocket depths and preventing further disease progression. Ultimately, these instruments are essential for halting the advancement of periodontitis and helping patients maintain healthy teeth and gums for a lifetime.
The Mechanics of Removing Plaque and Calculus
The effectiveness of a curette lies in its design. Each instrument features a rounded toe and back, which allows you to adapt it closely to the curved surfaces of the tooth root within a periodontal pocket. This design minimizes the risk of gouging the root or damaging the surrounding soft tissue, a common concern with sharper-tipped instruments. When the correct working angulation is applied, the cutting edge of the curette blade efficiently shaves away calculus deposits. High-quality instruments, like those in our Air Series, provide superior tactile sensitivity, allowing you to feel the deposits and ensure complete removal. Whether using a universal curette for the whole mouth or a site-specific Gracey curette, the goal is the same: to leave behind a smooth, clean surface that promotes healing.
Universal Curettes: Your All-in-One Scaling Tool
Think of the universal curette as the indispensable multi-tool in your dental hygiene toolkit. Its incredible versatility makes it a go-to instrument for a wide range of scaling tasks. Unlike area-specific Gracey curettes, a single universal curette can be adapted for use on nearly every tooth surface in the entire mouth. This adaptability not only streamlines your workflow but also makes it an essential instrument for both routine cleanings and more involved periodontal care. For clinicians building a reliable set of everyday tools, high-quality universal curettes are a foundational investment.
Breaking Down the Dual-Edged Design
The genius of the universal curette lies in its design. Each working end features a rounded toe and back with two parallel cutting edges on a single blade. The face of the blade is positioned at a 90-degree angle to the terminal shank. This perpendicular design is key, as it allows you to use both cutting edges simply by tilting the instrument toward the tooth. This means you can efficiently scale both mesial and distal surfaces of the same tooth without having to switch instruments, saving valuable time. The quality of these edges is paramount, which is why instruments from collections like the SurgiMac Pro Series are crafted from premium stainless steel to maintain sharpness and durability.
The Efficiency of Dual-Edged, Mirror-Image Ends
The true power of the universal curette comes from its mirror-image working ends. This design means that one end of the instrument is perfectly suited for certain surfaces in a quadrant, while the other end is designed for the opposing surfaces. For example, you can use one end to scale the facial surfaces of the maxillary right quadrant and simply flip to the other end to address the lingual surfaces, all without putting the instrument down. This seamless transition is a massive time-saver, allowing you to move methodically through the mouth with fewer instrument exchanges. This streamlined approach not only makes procedures faster but also significantly reduces hand fatigue. When you pair this efficient design with an ergonomic instrument, like those in the SurgiMac Slim Series, you get a tool that works with you, not against you, promoting better posture and reducing strain throughout the day.
Clinical Applications for the Whole Mouth
As the name suggests, universal curettes are designed for use throughout the mouth. They are highly effective for removing small to medium-sized calculus deposits from all teeth, including anteriors and posteriors. This makes them ideal for routine prophylaxis and general debridement cases where you need a reliable tool that can handle multiple tasks. Whether you're working in the maxillary right or mandibular left quadrant, a universal curette adapts with ease. This all-in-one functionality makes it one of the most frequently used dental instruments in any clinical setting, providing consistent and predictable results across a variety of patient needs.
Popular Universal Curette Patterns: Columbia and Barnhart
While all universal curettes share a core design, a few patterns have become staples in dental hygiene for their specific strengths. The Columbia curette, for instance, is a widely recognized workhorse. Its shorter, curved blade is perfect for removing light to moderate calculus from the entire mouth, making it a go-to for routine cleanings. Its sturdy design provides excellent control, while the rounded toe ensures patient comfort by minimizing tissue trauma. On the other hand, the Barnhart curette is favored for its longer shank and blade. This design provides enhanced access to posterior regions and deeper periodontal pockets, making it an invaluable tool for more involved scaling procedures. Both patterns exemplify the versatility of universal curettes. Choosing a pattern crafted with ergonomics in mind, such as those in our lightweight Air Series, helps reduce hand fatigue and allows you to work comfortably and efficiently all day long.
Supragingival and Subgingival Scaling with One Tool
One of the biggest advantages of the universal curette is its ability to work both supragingivally and subgingivally. While sickle scalers are limited to removing calculus above the gumline, the rounded toe and back of a universal curette allow for safe and effective subgingival scaling. This design minimizes the risk of gouging the root surface or causing trauma to the soft tissue. These instruments are essential for effective root planing and periodontal maintenance, allowing you to clean thoroughly below the gumline. For these delicate procedures, an ergonomic handle, like those found in the Air Series, can also help reduce hand fatigue and improve tactile sensitivity.
Gracey Curettes: Precision Tools for Specific Surfaces
While universal curettes are the versatile workhorses of your toolkit, Gracey curettes are the specialists. These area-specific instruments are designed to adapt perfectly to the unique anatomy of different tooth surfaces, allowing for more effective and less traumatic subgingival scaling and root planing. Think of them as a set of precision keys, with each one crafted to fit a specific lock. This design allows you to reach deep into periodontal pockets and access complex root contours that a universal curette might miss.
The effectiveness of a Gracey curette depends heavily on its craftsmanship. A well-designed instrument provides the tactile sensitivity needed to detect calculus beneath the gumline and the sharpness required for efficient removal. Collections like the SurgiMac Air Series feature lightweight, ergonomic handles that reduce hand fatigue, giving you the control needed to perform these detailed procedures. Using a Gracey curette correctly means you can achieve a cleaner, smoother root surface, which is essential for tissue healing and successful periodontal therapy. While it requires switching between instruments, the superior clinical outcome is well worth the effort.
What Do the Gracey Numbers Mean?
At first glance, the Gracey numbering system can seem a bit complex, but it’s actually quite logical. Each number corresponds to a specific area of the mouth, ensuring you have the right tool for every surface. The curettes are typically paired in double-ended instruments to treat mirror-image surfaces.
Here’s a quick breakdown of the traditional pairings:
- Gracey 1/2 and 3/4: Used for all surfaces of anterior teeth.
- Gracey 5/6: Designed for anterior teeth and premolars.
- Gracey 7/8 and 9/10: For the buccal and lingual surfaces of posterior teeth.
- Gracey 11/12 and 15/16: For the mesial surfaces of posterior teeth.
- Gracey 13/14 and 17/18: For the distal surfaces of posterior teeth.
Having a complete set of periodontal instruments ensures you can provide comprehensive care for every patient, no matter their specific needs.
Quick Identification with Color-Coding Systems
With so many area-specific designs, quickly grabbing the right Gracey curette mid-procedure is crucial for maintaining your workflow. This is where color-coding systems become a clinician's best friend. Many instrument manufacturers assign specific colors to the handles of different Gracey curettes, allowing for at-a-glance identification. For example, you might learn that yellow handles are for your anterior teeth (like the Gracey 1/2) and gray handles are for posterior mesial surfaces (like the Gracey 11/12). This simple visual cue eliminates guesswork, reduces the chance of selecting the wrong instrument, and helps you work more efficiently. Investing in a color-coded set, like the ergonomic instruments in our Slim Series, can streamline your setup and let you focus on the patient, not on deciphering numbers.
The Power of a Single Cutting Edge and 70° Blade
Two key features make Gracey curettes unique: their single cutting edge and their offset blade. Unlike universal curettes, which have two parallel cutting edges, a Gracey curette has only one. This is the lower, longer edge of the blade, and it’s the only one used for scaling. This design minimizes the risk of injuring the gingival tissue on the back-stroke.
Furthermore, the blade is angled at approximately 70 degrees to the terminal shank. This built-in angle is what makes the instrument self-angulating. It means the blade is already perfectly positioned for calculus removal when the terminal shank is held parallel to the tooth surface. This feature allows for precise, effective scaling with a more standardized technique. For enhanced accuracy, instruments from the Titanium Black Series can reduce glare and improve your visibility of the working area.
A Quick Guide to Matching Graceys to Tooth Surfaces
The true power of Gracey curettes lies in their area-specific design. Using the correct instrument for the intended surface is crucial for effective periodontal debridement. For example, you would select a Gracey 1/2 to adapt to the narrow curvature of a lower incisor, while a Gracey 13/14 is specifically shaped to reach the challenging distal surfaces of the molars.
This specialization allows the cutting edge to maintain optimal contact with the root surface, ensuring thorough calculus removal from the base of the pocket. When you match the right curette to the right surface, you can work more efficiently and effectively, leading to better patient outcomes. To maintain control during these precise movements, consider instruments from the SurgiMac Slim Series, which offer compact, ergonomic handles designed for comfort and reduced fatigue.
Tips for Selecting the Right Gracey for Posterior Teeth
Working on posterior teeth requires precision, and choosing the right Gracey curette is half the battle. Remember that specific pairings are designed for specific jobs: the Gracey 11/12 is your go-to for mesial surfaces, while the 13/14 is built to access tricky distal surfaces. This targeted approach is essential because it allows the self-angulating blade to adapt perfectly to the root's anatomy, ensuring thorough debridement without causing tissue trauma. To make the process even smoother, prioritize ergonomics. Instruments with lightweight, comfortable handles, like those in our Air Series, can significantly reduce hand fatigue and give you the control needed for those hard-to-reach areas, ultimately improving both your efficiency and patient comfort.
Gracey vs. Universal: What’s the Difference?
At first glance, Gracey and universal curettes might seem similar, but their subtle design differences create distinct advantages in clinical practice. Understanding these distinctions is key to performing efficient and effective periodontal therapy. A universal curette is your versatile workhorse, adaptable to nearly any area of the mouth. In contrast, a Gracey curette is a specialist, engineered for precision on specific tooth surfaces. Choosing the right instrument depends entirely on the task at hand, from routine scaling to deep root planing in complex periodontal cases. Let's break down what sets them apart.
Comparing Blade Design: One Edge or Two?
The most fundamental difference lies in the blade. A universal curette features two parallel cutting edges on a blade that is curved in one plane. The face of the blade is positioned at a 90-degree angle to the terminal shank, allowing you to use both sides for scaling. Gracey curettes, however, have a single cutting edge, which is the lower one. The blade is offset, angled at approximately 70 degrees to the terminal shank. This specific angulation ensures the blade is perfectly positioned for subgingival scaling and root planing when the terminal shank is parallel to the tooth surface, minimizing tissue trauma. High-quality dental instruments are crucial for maintaining these precise angles.
Working Ends: Angulation and Area Specificity
Because of their design, universal curettes are true to their name. A single instrument can be adapted to scale all tooth surfaces in the mouth, including mesial and distal surfaces in both anterior and posterior regions. This makes them highly efficient for general debridement. Gracey curettes are area-specific, meaning you need a set of them to treat the entire mouth. For example, the Gracey 1/2 is designed for anterior teeth, while the Gracey 13/14 is intended for the distal surfaces of posterior teeth. This specialization allows for superior adaptation to root contours, making them the ideal choice for thorough calculus removal in deep pockets.
How to Choose the Right Tool for the Job
Selecting the right curette is crucial for effective and gentle patient care. Universal curettes are excellent for routine prophylaxis, removing moderate supragingival and subgingival calculus, and for the initial debridement phase of periodontal therapy. When you need to perform definitive scaling and root planing, especially in pockets deeper than 4mm, a Gracey curette is the superior instrument. Its design provides better access and adaptation to complex root anatomy. For clinicians focused on ergonomics, choosing instruments from collections like the lightweight Air Series can reduce hand fatigue during these precise and demanding procedures, allowing you to work with greater control and comfort.
Shank Design: Flexible vs. Rigid Shanks
The shank of a curette plays a huge role in its performance, acting as the bridge between the handle and the working end. Shanks come in two main types: flexible and rigid. A flexible shank is thinner and provides enhanced tactile sensitivity, allowing you to feel subtle textures and detect fine, granular calculus deposits beneath the gumline. It’s the perfect choice for finishing procedures and for exploring the root surface. On the other hand, a rigid shank is thicker and more robust, providing the strength needed to remove moderate to heavy, tenacious calculus. It allows you to apply greater lateral pressure without the shank flexing, ensuring efficient and powerful working strokes. Your choice between the two will depend entirely on the clinical task at hand, which is why many clinicians keep both types in their procedural setup.
Mastering Core Curette Technique for Optimal Results
Having a tray full of high-quality curettes is a great start, but the instruments themselves are only half of the equation. True clinical excellence comes from mastering the techniques that bring these tools to life. Proper technique is what ensures complete calculus removal, prevents tissue trauma, and ultimately leads to successful patient outcomes. It’s the difference between simply going through the motions and performing precise, effective periodontal therapy. The core components of this technique—establishing a stable fulcrum, achieving the correct working angulation, and applying appropriate pressure with deliberate strokes—are foundational skills that every dental hygienist must perfect. When you combine these skills with an ergonomic, well-designed instrument, you can work with confidence, control, and efficiency.
Think of these techniques as a system where each element supports the others. A stable fulcrum provides the control needed to maintain a precise working angulation. The correct angulation ensures the cutting edge engages the calculus effectively, allowing you to remove it with firm, controlled pressure. The type of stroke you use—vertical, oblique, or horizontal—is then adapted to the specific tooth surface you’re treating. Mastering this interplay is what allows you to debride root surfaces thoroughly and smoothly, creating an environment where the gingival tissue can heal. It also minimizes hand fatigue and reduces the risk of burnishing calculus, making your work more effective and comfortable for both you and your patient.
The Importance of a Stable Fulcrum
Before you even place the curette on the tooth, the first step is to establish a solid fulcrum. A fulcrum is the finger rest you use to stabilize your hand during instrumentation. Typically, you’ll use your ring finger to rest on a solid surface, like an adjacent tooth in the same arch, creating a pivot point for your hand to move with precision. This is absolutely essential for controlling the instrument. A stable fulcrum prevents the curette from slipping, which could injure the patient’s gingiva, cheek, or tongue. It also provides the leverage needed to apply controlled lateral pressure for effective calculus removal. Without a secure fulcrum, your movements will be less precise, and you’ll find yourself using more muscle force from your arm, leading to fatigue and a loss of tactile sensitivity.
Achieving the Correct Working Angulation
Once you have a stable fulcrum, the next critical step is achieving the correct working angulation—the angle between the face of the curette blade and the tooth surface. For effective calculus removal, this angle should be between 70 and 80 degrees. If the angle is too closed (less than 60 degrees), the cutting edge won't bite into the calculus; instead, it will just slide over the deposit, burnishing it and making it even harder to remove later. If the angle is too open (90 degrees or more), the cutting edge can gouge the root surface and traumatize the soft tissue lining the periodontal pocket. Mastering this angulation is key, and it’s where the design of Gracey curettes shines, as their offset blade is self-angulating when the terminal shank is parallel to the tooth surface.
The 70-80 Degree Rule for Universal Curettes
While Gracey curettes are designed with a built-in 70-degree angle, universal curettes are not. The blade of a universal curette is positioned at a 90-degree angle to the terminal shank. This means it’s up to you, the clinician, to create the correct 70- to 80-degree working angulation by tilting the instrument slightly toward the tooth surface. To do this, you’ll insert the blade with a closed angle (near 0 degrees), position it at the base of the pocket, and then open the angle by tilting the lower shank toward the tooth. This technique requires practice, but it’s what makes the universal curette so versatile. A reliable instrument from the SurgiMac Pro Series can provide the balance and feel needed to master this essential skill.
Applying Appropriate Pressure and Strokes
With your fulcrum and angulation set, it’s time to activate the instrument. The pressure and type of stroke you use will vary depending on your goal. An initial exploratory stroke to detect calculus requires very light, feather-like pressure to maximize your tactile sensitivity. Once you’ve located a deposit, you’ll switch to a firm, controlled working stroke to fracture and remove it. Finally, for root planing, you’ll use lighter, shaving strokes to smooth the root surface. The key is to use a combination of vertical, oblique, and horizontal strokes to ensure every square millimeter of the subgingival tooth surface is debrided. This methodical approach, combined with a sharp instrument, is what leads to a truly clean and smooth surface ready for healing.
Scaling vs. Root Planing: Adjusting Your Pressure
The ability to modulate your pressure is a hallmark of a skilled clinician. For scaling—the removal of calculus deposits—you need to apply firm lateral pressure against the tooth surface. This pressure engages the cutting edge, allowing it to bite into and fracture the deposit. For root planing, the goal is different. Here, you are smoothing the root surface to remove residual deposits and endotoxins. This requires much lighter, shaving strokes. Using an instrument with a sharp cutting edge, like a well-maintained curette from our Titanium Black Series, is crucial because it requires less pressure to be effective. This not only reduces your hand fatigue but also increases patient comfort and prevents unnecessary removal of cementum.
Utilizing Vertical, Oblique, and Horizontal Strokes
To thoroughly clean a curved root surface, you need to use a combination of stroke directions. Vertical and oblique strokes are the most common. Vertical strokes are ideal for the proximal surfaces of anterior teeth and the mesial and distal surfaces of posterior teeth. Oblique strokes are highly effective on the facial and lingual surfaces, as they allow you to adapt the blade as the tooth contour changes. Horizontal strokes are used more selectively, often around line angles or in deep, narrow pockets where vertical strokes are less effective. Executing these different strokes with confidence requires an instrument that feels like an extension of your hand. The non-slip grips on our Hexa Series instruments provide the stability needed to perform these precise, multi-directional movements with complete control.
Exploring Specialized Periodontal Curette Types
While Universal and Gracey curettes are the trusted mainstays of any periodontal toolkit, certain clinical situations call for a more specialized approach. When you encounter deep pockets, narrow root anatomy, or challenging furcations, standard instruments may not provide the access you need for effective debridement. This is where specialized curette designs come into play. These instruments are modified versions of the classic Gracey curettes, engineered with specific features to help you work more efficiently and effectively in complex areas.
Think of them as your problem-solvers for tough cases. By understanding their unique characteristics, you can confidently select the right tool to achieve thorough calculus removal while minimizing tissue trauma. These designs often feature longer shanks, smaller blades, or different handle configurations to address the limitations of standard instruments. Adding a few specialized curettes to your collection can make a significant difference in your clinical outcomes and reduce the physical strain of treating advanced periodontal disease. Let's explore some of the most common and useful variations you'll find.
Tackling Deep Pockets? Try After Five Curettes
When you’re treating periodontal pockets deeper than 5 mm, reaching the base of the pocket with a standard Gracey curette can be difficult. After Five curettes are specifically engineered for this challenge. They feature a terminal shank that is 3 mm longer than a standard Gracey, which gives you the extra reach needed to access the pocket floor. Additionally, their blades are thinned by 10%, allowing for smoother subgingival insertion with less tissue distention. This combination of an extended shank and a thinner blade provides superior access and adaptation for effective root planing in deep, hard-to-reach areas, ensuring no calculus is left behind.
For Tight Spaces and Narrow Roots: Mini Five Curettes
For those particularly tight and tricky spots, Mini Five curettes are an excellent choice. These instruments combine the extended terminal shank of an After Five curette with a blade that is 50% shorter and 10% thinner than a standard Gracey. This compact blade design is perfect for adapting to narrow root surfaces, furcations, and developmental concavities. The shorter blade length allows for greater precision and control in confined spaces, minimizing the risk of tissue trauma while ensuring thorough debridement. Mini Fives are ideal for fine scaling and finishing in areas where a standard or even an After Five curette would be too bulky to maneuver effectively.
Micro-Mini and Nano Curettes for Fine Detailing
When even a Mini Five curette feels too large for the task, it’s time to turn to micro-mini and nano designs. These instruments take precision to the next level, featuring blades that are even shorter and thinner than their mini counterparts. Their ultra-slim profile is perfect for navigating the tightest interproximal spaces, deep and narrow pockets, and the complex curves of roots without causing damage to soft tissues. Nano curettes, in particular, have exceptionally short blades designed for getting into the smallest irregularities on root surfaces, making them ideal for gentle, final debridement after initial scaling. For this level of detailed work, an instrument that feels like an extension of your hand is essential. The ergonomic design of our Slim Series instruments provides the comfort and control needed to handle these delicate tasks with confidence.
Gracey Access Curettes for Improved Adaptation
Gracey Access curettes are another excellent modification designed to solve common access challenges. These instruments feature a terminal shank that is 3 mm longer, similar to an After Five, but pair it with a blade that is shorter than a standard Gracey. This unique combination is engineered to help the entire cutting edge adapt to the root surface, especially in very tight spots and tricky areas like line angles and furcations. The extended shank provides the reach needed for deep pockets, while the shorter blade offers superior maneuverability. This design ensures you can maintain proper adaptation and control, achieving thorough debridement where a longer blade might not fit. When working in these confined areas, the enhanced visibility offered by our Titanium Black Series can be a game-changer, reducing glare and helping you see every detail.
Diamond-Coated Curettes for Final Root Polishing
Unlike traditional curettes designed for calculus removal, diamond-coated curettes serve a very specific purpose: final root polishing. These instruments do not have a cutting edge. Instead, they are coated with a very fine diamond grit and are used after scaling and root planing is complete. Their function is to gently polish the root surface, removing any residual microscopic calculus and smoothing out the surface to a glass-like finish. This final polishing step helps gum tissue reattach more effectively and creates a surface that is less likely to attract new bacterial plaque. They are the perfect finishing tool for achieving the smoothest possible root surface, supporting optimal healing and long-term periodontal health. Exploring these specialized periodontal instruments can significantly refine your treatment outcomes.
Why Shank Rigidity and Handle Design Matter
Beyond blade and shank length, the design of the instrument handle and the rigidity of the shank play a crucial role in both clinical effectiveness and your own comfort. Ergonomic handles are essential for reducing hand fatigue and preventing long-term musculoskeletal issues. SurgiMac’s Air Series instruments, for example, are crafted to be exceptionally lightweight, while the Slim Series offers a smaller diameter for enhanced tactile sensitivity. Shank rigidity also matters: a more rigid shank provides greater leverage for removing heavy, tenacious calculus, while a flexible shank offers better tactile feedback for detecting and removing fine deposits during root planing. Choosing the right combination of handle and shank will make your procedures more efficient and comfortable.
Solving Common Challenges with Periodontal Curettes
While periodontal curettes are fundamental to clinical practice, mastering their use involves overcoming several daily challenges. From the physical strain of repetitive motions to the mental focus required for complex cases, hygienists operate in a demanding landscape. Understanding these common hurdles is the first step toward finding effective solutions. The right instruments and techniques can transform these challenges into opportunities for providing exceptional patient care, making your work more efficient, comfortable, and rewarding. By addressing these issues head-on, you can protect your long-term health and refine your clinical skills.
How to Reduce Hand Fatigue During Scaling
The physical demands of dental hygiene are significant, with some reports indicating that musculoskeletal disorders affect a large percentage of clinicians. Repetitive scaling motions and maintaining a firm grasp on instruments for hours can lead to considerable hand, wrist, and shoulder fatigue. This isn't just a matter of comfort; it can impact your career longevity. Investing in ergonomic instruments is one of the most effective ways to combat this. Our Air Series instruments, for example, are crafted to be exceptionally lightweight and balanced, reducing the strain on your muscles. Similarly, the Slim Series features compact, ergonomic handles that provide superior control and comfort, helping you work through a long day of appointments with less physical stress.
Tips for Adapting to Different Curette Designs
Most hygienists learn to scale with a specific set of curettes, but clinical practice requires proficiency with a wide variety of designs. As some experts note, adapting to different curettes can be "a bit tricky." Each type, from Universal to Gracey, has a unique blade angle, shank design, and intended use. Switching between them requires a subtle shift in technique and muscle memory. Building a consistent and reliable instrument kit can help ease this transition. When your tools share similar high-quality characteristics in balance, weight, and grip, your hands can adapt more quickly. Having a full range of dependable dental instruments allows you to build confidence and work seamlessly, no matter what the procedure calls for.
Strategies for Scaling Complex Root Anatomy
Navigating complex tooth anatomy is a constant challenge. Areas like maxillary and mandibular furcations, deep pockets, and root concavities demand incredible precision. Standard curettes may not provide adequate access, making it difficult to remove calculus thoroughly. This is where specialized instruments and advanced designs become critical. For enhanced visibility in these hard-to-reach spots, the Titanium Black Series features a non-reflective coating that reduces glare, allowing you to see more clearly. For procedures requiring a firm, confident grip, the Hexa Series offers ergonomic hollow handles and a non-slip texture, ensuring you maintain precise control even in the most demanding conditions.
How to Scale Efficiently Without Sacrificing Quality
Treating patients with advanced periodontal disease adds another layer of complexity and pressure to your workday. These cases often involve attachment loss and increased tooth mobility, requiring meticulous care under tight time constraints. Working efficiently without compromising the quality of care is essential. A dull or poorly designed instrument will only slow you down, requiring more strokes and increasing patient discomfort. High-performance tools are a necessity. The Pro Series is engineered to meet the highest standards of clinical excellence, offering the reliability and sharpness you need to work confidently and effectively. When you can trust your instruments, you can focus entirely on providing the best possible care for your patient.
How to Maintain and Sharpen Your Curettes
Your periodontal curettes are an investment in both your practice and your patient outcomes. Proper care not only extends the life of your instruments but also ensures they perform effectively and safely. A dull or damaged curette can lead to burnished calculus, increased chair time, and discomfort for both you and your patient. By establishing a consistent maintenance routine that includes sharpening, cleaning, and proper sterilization, you can keep your high-quality instruments in optimal condition for every procedure. This ensures every scaling and root planing procedure is as efficient and precise as possible.
A Step-by-Step Guide to Proper Sharpening
Keeping your curettes effective requires frequent sharpening. The key is maintaining the original design angle of the blade to avoid damaging the cutting edge. For Gracey curettes, this means positioning the blade on a sharpening stone so the angle between the lower shank and the stone is between 30 and 40 degrees. To begin, sit comfortably with your elbows supported and hold the sharpening stone steady. Place the curette blade flat against the stone at the correct angle, then move the instrument back and forth along the blade while gently turning the handle. This preserves the rounded toe and sharpens the entire cutting edge, ensuring your tools, like the precision-crafted SurgiMac Pro Series, are always ready for use.
Using Sharpening Guides for Angle Consistency
Maintaining the correct sharpening angle freehand takes a lot of practice and skill. It's easy to accidentally alter the blade's original design, which can reduce its effectiveness and even damage the instrument. This is where sharpening guides become an invaluable tool for any practice. These devices are designed to hold your curette securely at the precise angle required for sharpening, taking the guesswork out of the process. By ensuring a consistent angle every time, you preserve the integrity of the cutting edge and extend the life of your instruments. This consistency is key to keeping your tools performing at their best, ensuring every procedure is safe and effective. For a full overview of instrument care, you can explore best practices in sterilization and maintenance.
Your Go-To Checklist for Cleaning and Inspection
Before and after every use, your curettes need a thorough cleaning and inspection. This initial step is fundamental to any effective infection control protocol. Start by removing all visible debris from the instrument immediately after the procedure. Next, run the curettes through an ultrasonic cleaner before sterilization. Once clean, perform a careful visual inspection. Check the cutting edges for sharpness and look for any signs of wear, nicks, or damage to the blade or shank. A dull or compromised instrument won't perform correctly and should be sharpened or replaced. Finally, ensure your instruments are stored in protective cases or cassettes to prevent accidental damage between uses.
Proper Sterilization and Storage for Instrument Longevity
Proper sterilization is non-negotiable for patient safety and instrument longevity. Always follow standard clinical protocols for sterilization, whether using an autoclave or another approved method. High-quality instruments, such as those in the SurgiMac Eco Series, are crafted from durable stainless steel designed to withstand repeated sterilization cycles without degrading. After sterilization, proper storage is just as important. Keep your curettes in a dry, clean environment, preferably within sterilization cassettes. This not only maintains their sterility but also protects the fine, delicate cutting edges from becoming chipped or dulled by contact with other instruments, ensuring they are in perfect condition for your next patient.
Knowing When It's Time for a Replacement
Even with meticulous care, every curette has a finite lifespan. Over time, repeated sharpening will gradually wear down the blade, altering its original shape and reducing its effectiveness. If an instrument shows significant wear, such as a thinned blade, a pointed toe, or a cutting edge that no longer holds its sharpness, it’s time for a replacement. Using a worn-out curette can burnish calculus instead of removing it, leading to poor clinical outcomes and increased hand fatigue. When your instruments reach the end of their life, consider upgrading to an ergonomic and durable option like the SurgiMac Air Series to ensure continued precision and comfort.
What's New in Curette Design and Materials?
The basic design of a curette has been a clinical staple for decades, but that doesn't mean it hasn't evolved. Modern instrument design focuses on improving both clinical effectiveness and clinician well-being. Today’s innovations in handle ergonomics, material coatings, and metal quality make a significant difference in how you perform your work, reducing physical strain and enhancing precision. These advancements aren't just minor upgrades; they are thoughtful improvements that help you provide better patient care with greater comfort and confidence. By choosing instruments that incorporate these features, you are investing in your career longevity and the quality of your clinical outcomes.
How Ergonomic Handles Reduce Strain and Improve Control
Spending hours performing meticulous scaling and root planing can take a toll on your hands and wrists. That’s why ergonomic handle design is one of the most important innovations in modern curettes. Instruments with lightweight, wider-diameter handles reduce muscle strain and lessen the tight grip required to maintain control, which helps prevent fatigue and long-term musculoskeletal issues. SurgiMac’s Air Series instruments, for example, are crafted to be exceptionally light and balanced, providing excellent tactile feedback without the extra weight. Similarly, the Slim Series offers a sleek, ergonomic design that fits comfortably in your hand, allowing for precise movements and better control during intricate procedures.
Do Advanced Coatings Really Improve Visibility?
Working in the oral cavity means constantly dealing with challenges like moisture, limited space, and bright overhead lighting. Glare reflecting off traditional polished steel instruments can strain your eyes and obscure your view of the treatment area. To address this, advanced instrument coatings have been developed to enhance visibility. The SurgiMac Titanium Black Series features a non-reflective finish that absorbs light instead of reflecting it. This dark coating creates a sharp contrast against tooth structures and calculus, making deposits easier to identify and remove. The improved visibility allows you to work with greater accuracy and confidence, especially when scaling deep periodontal pockets or navigating complex anatomy.
Why Premium Stainless Steel Matters
The foundation of any high-performing curette is the quality of its material. Premium-grade stainless steel is essential for creating an instrument that is both durable and effective. High-quality steel ensures the working end can be sharpened to a fine edge and will retain that sharpness through repeated use. It also offers superior resistance to corrosion and can withstand the rigors of daily cleaning and sterilization without degrading. Investing in well-crafted dental instruments made from superior materials means fewer replacements and more consistent clinical performance. This commitment to quality ensures that your tools remain reliable, providing the precision you need for every patient, every day.
How to Choose the Right Curettes for Your Practice
Selecting the right curettes for your practice is about more than just filling your cassette. It’s about building a toolkit that allows you to work efficiently, comfortably, and effectively for every patient who sits in your chair. The ideal instrument setup is highly personal and depends on your specific clinical needs and the patient population you serve. A well-chosen collection of curettes can significantly reduce hand fatigue, improve your tactile sensitivity, and lead to superior clinical outcomes.
Having a versatile range of instruments ensures you’re prepared for any scenario, whether it’s routine prophylaxis or complex non-surgical periodontal therapy. Instead of trying to make one tool fit every job, the goal is to have the perfect instrument for each specific task. This approach not only makes your work easier but also enhances patient comfort by ensuring procedures are as minimally invasive as possible. To build your ideal kit, you need to consider a few key factors, including the unique anatomy of your patients, the clinical demands of each case, and the long-term value of investing in high-quality tools. By carefully evaluating these elements, you can curate a collection of periodontal instruments that supports your skills and elevates your standard of care.
First, Consider Your Patient's Needs
Every patient presents a unique set of anatomical challenges, from tooth alignment and root morphology to arch size and tissue tone. A curette that works perfectly in one patient’s mouth may be completely ineffective in another’s. For instance, patients with significant crowding or rotated teeth require instruments with slender, contra-angled shanks to access tight interproximal areas. Similarly, reaching the distal surfaces of posterior molars on a patient with limited opening requires a specific shank design. Paying attention to handle shape and diameter is also crucial for ergonomics. A lightweight, textured handle can provide a more secure grip and reduce muscle strain during long appointments. The SurgiMac Slim Series is designed with these challenges in mind, offering ergonomic instruments for precision work.
Next, Evaluate Pocket Depth and Access
The depth and shape of periodontal pockets are primary factors in curette selection. While universal curettes are excellent for supragingival scaling and shallow pockets, effective subgingival debridement requires area-specific Gracey curettes. For pockets of 4mm or less, standard Gracey designs are typically sufficient. However, as pocket depths increase beyond 5mm, you’ll need instruments with modified shanks and blades to reach the base of the pocket without causing tissue trauma. Specialized designs like After Five curettes, which have a longer terminal shank, or Mini Five curettes, which also feature a shorter blade, are essential for deep, narrow pockets and furcation areas. Having a variety of these dental instruments ensures you can thoroughly debride any root surface you encounter.
Build a Versatile Kit with a Quality Instrument Collection
While it can be tempting to opt for lower-cost instruments, investing in a high-quality curette collection pays dividends in the long run. Premium instruments are crafted from superior materials, which means they hold a sharp edge longer, resist corrosion, and provide enhanced tactile feedback. A sharper blade requires less lateral pressure to remove calculus, which translates to greater efficiency, reduced hand and wrist fatigue, and improved patient comfort. Collections like the SurgiMac Air Series are known for their exceptional sharpness and lightweight, ergonomic design. By choosing well-made instruments, you’re not just buying a tool; you’re investing in your clinical performance, your physical well-being, and the quality of care you provide to your patients.
Frequently Asked Questions
What's the real difference between a scaler and a curette?
The main difference comes down to the design of the tip and where you can safely use the instrument. Scalers have sharp, pointed tips and are designed exclusively for removing calculus above the gumline. Using a scaler subgingivally is risky because its sharp point can easily damage the soft gingival tissue. Curettes, on the other hand, have a rounded toe and back, which allows them to slide gently below the gumline to remove calculus from the root surface without causing trauma.
Do I really need a full set of both Universal and Gracey curettes?
For a practice focused on comprehensive periodontal care, the answer is yes. A universal curette is fantastic for general debridement and routine cleanings because a single instrument can be used throughout the mouth. However, for definitive scaling and root planing, especially in deeper pockets, Gracey curettes are essential. Their area-specific design allows for superior adaptation to complex root anatomy, ensuring you can thoroughly clean every surface. Think of universals as your versatile daily drivers and Graceys as the precision tools you need for more complex jobs.
When is it time to use a specialized curette like an After Five or Mini Five?
You should reach for a specialized curette when a standard Gracey can no longer do the job effectively. The most common scenario is when you encounter periodontal pockets deeper than 5mm. A standard Gracey may not have the shank length to reach the base of the pocket. An After Five curette, with its extended shank, gives you that necessary reach. If you're also dealing with a narrow root surface or a tight furcation within that deep pocket, a Mini Five curette is the ideal choice because its shorter blade allows for better adaptation in confined spaces.
How can I tell if my curettes are dull?
There are a couple of simple tests you can perform. First is the visual test: a sharp cutting edge is a fine line that does not reflect light. If you hold the curette under your overhead light and see a glare reflecting back from the cutting edge, it's a sign that the edge has become rounded and dull. Another reliable method is to use a plastic sharpening test stick. A sharp curette will grab or bite into the plastic with light pressure, while a dull one will slide right over the surface.
With so many options, what should I prioritize when buying new curettes?
Your priority should be a balance between clinical effectiveness and personal comfort. First, consider the quality of the material; premium stainless steel, like that used in the Pro Series, holds a sharp edge longer, which means more efficient scaling and less frequent sharpening. Second, focus on ergonomics. A lightweight, well-balanced handle, like those in our Air Series, can significantly reduce hand fatigue and prevent long-term strain. Finally, match the instrument to your needs. If you frequently work in deep pockets with limited visibility, an instrument from the Titanium Black Series could be a great investment to reduce glare.
Related Articles
Tags
Blog posts
-
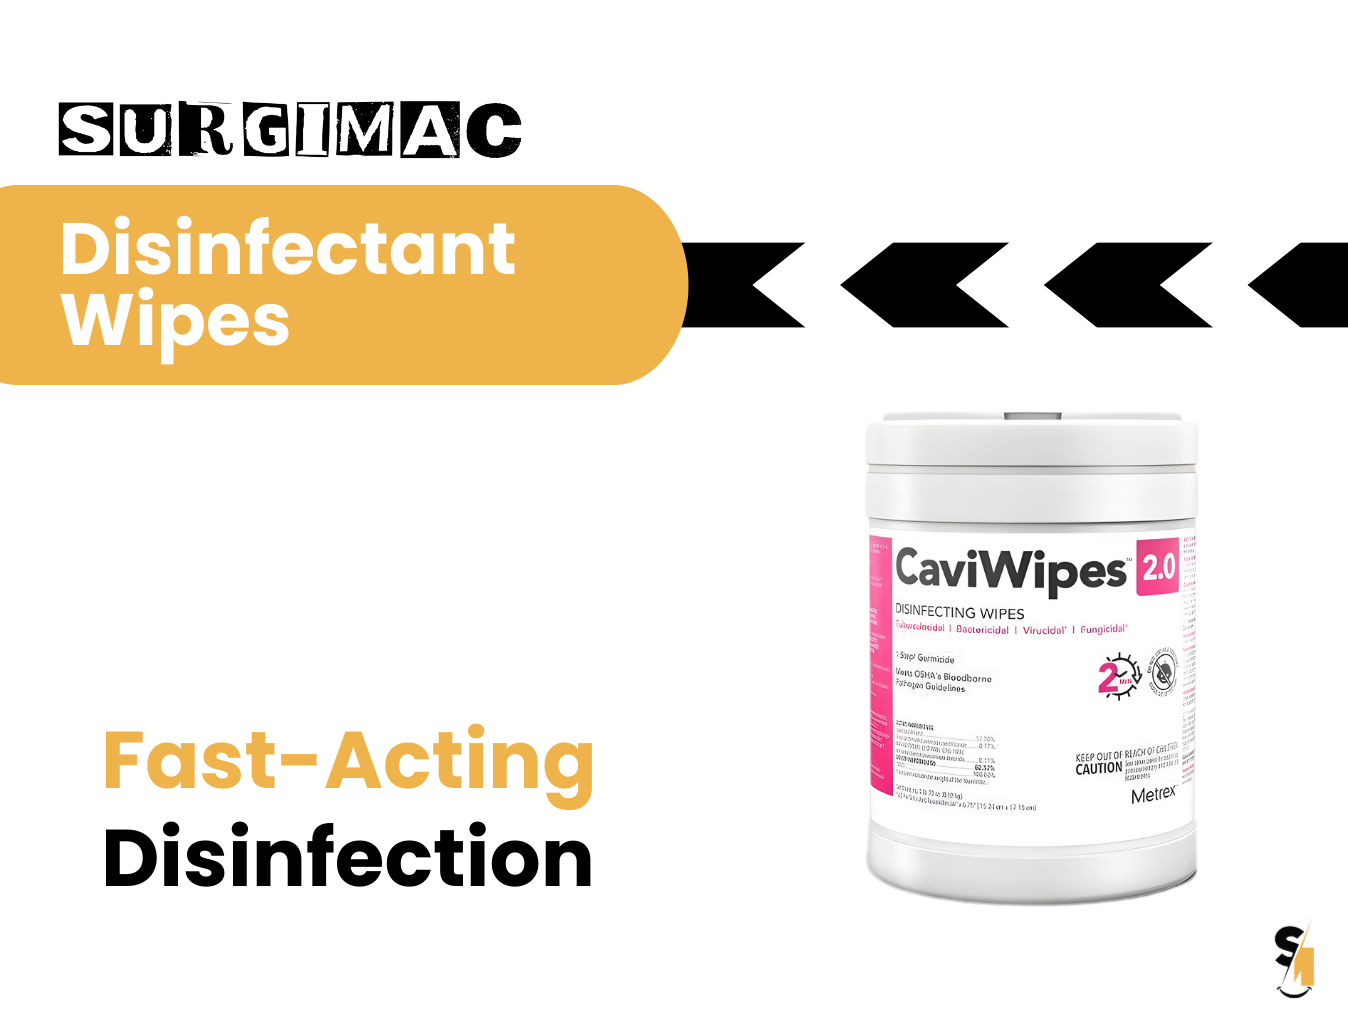
, by SurgiMac How to Disinfect with Metrex CaviWipes Correctly
-
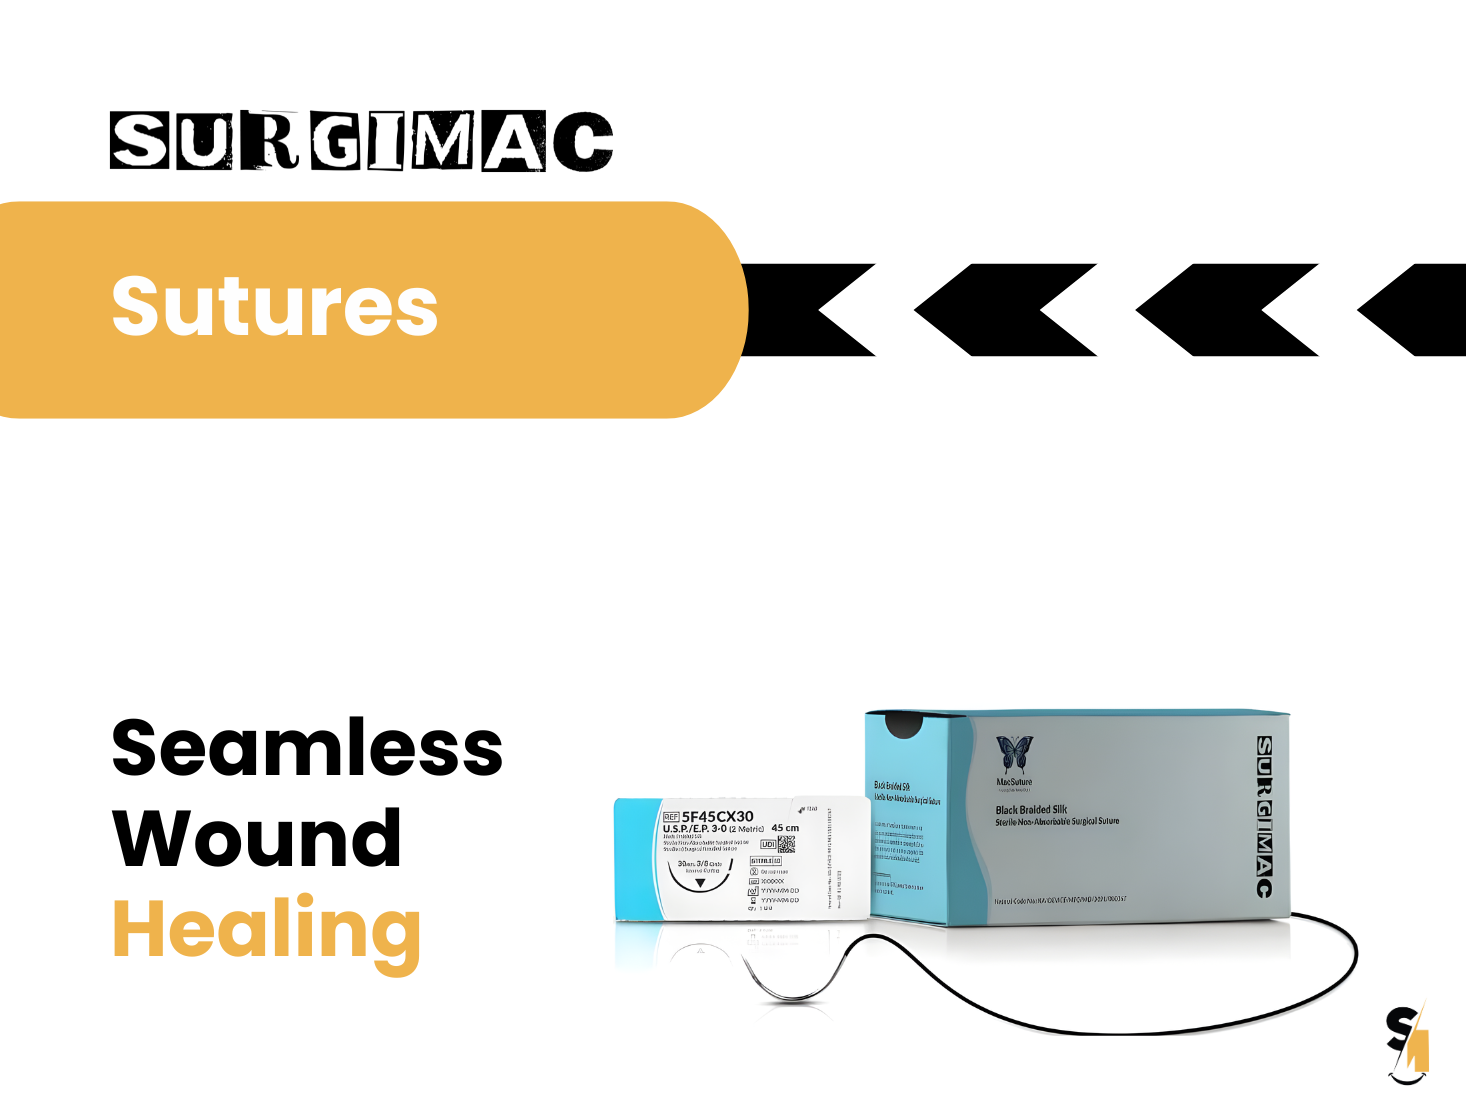
, by SurgiMac Suture Sizes From Smallest to Largest: A Complete Guide
-

, by Marketing SurgiMac Stop the Bleeding: 5 Procurement Leaks Draining DSO Margins in 2026


