


The Ultimate Extraction Tray Setup Checklist
- , by SurgiMac
- 34 min reading time
Get expert tips on extraction tray setup for dental procedures. Learn how to organize, sterilize, and select the right instruments for safe, efficient care.
You choose high-quality instruments, like our ergonomic Hexa Series, for their precision and performance. But even the best tools get lost in a chaotic workflow. The real key to efficiency is the system that supports them. A standardized dental extraction tray setup acts as your roadmap, ensuring every instrument is sterile, organized, and exactly where you need it. This guide will help you build a consistent setup that supports your clinical skill, streamlines your workflow, and makes every procedure run more smoothly.
Key Takeaways
- Organize for Efficiency: Arrange your tray based on the order of use, grouping instruments by function. This simple system creates a predictable workflow, reduces chair time, and allows you and your assistant to work in perfect sync.
- Prioritize Safety with Aseptic Technique: A clean tray is not enough; it must be sterile. Follow a strict protocol for pre-cleaning, autoclaving, and maintaining an aseptic field to prevent cross-contamination and protect your patients.
- Match Your Instruments to the Procedure: Customize your tray for simple versus surgical extractions. Using reliable, procedure-specific tools like those in the SurgiMac Hexa or Titanium Black Series ensures you have the right grip, control, and visibility for any clinical challenge.

When is a Tooth Extraction Necessary?
While preserving natural dentition is always the primary goal in dentistry, a tooth extraction sometimes becomes the most responsible clinical decision for a patient's long-term health. The choice to remove a tooth is never made lightly. It follows a thorough diagnostic process, including clinical evaluation and radiographic imaging, to determine if a tooth is truly non-restorable or poses a significant risk to the patient’s oral wellness. An extraction is indicated when the long-term prognosis is poor and alternative treatments like endodontic therapy or periodontal procedures are unlikely to succeed. Communicating this rationale clearly is key to helping patients understand that the procedure is a necessary step toward eliminating pain, stopping the spread of infection, and creating a healthy foundation for future restorative solutions like implants or bridges. Ultimately, a strategic extraction protects the integrity of the surrounding teeth and bone structure, contributing to overall systemic health.
Common Reasons for Tooth Removal
One of the most frequent drivers for extraction is severe tooth decay that has compromised the tooth beyond repair. When extensive caries leads to a non-restorable tooth, or when a root canal is not a viable option, removal is often the only way to definitively prevent the spread of infection and resolve pain. Similarly, significant dental trauma can cause fractures that extend below the gumline, rendering the tooth unsalvageable. In these instances, extraction is a critical intervention to manage acute symptoms and prevent chronic complications like abscess formation, clearing the path for a predictable and successful restoration in the future.
Advanced periodontal disease is another primary reason for tooth removal. When the supporting bone and ligaments have deteriorated significantly, the resulting tooth mobility can make it non-functional and a reservoir for bacteria. Extractions are also standard for impacted teeth, particularly third molars, which can cause pain, cysts, and damage to adjacent teeth. Safely managing these surgical extractions requires instruments that deliver both strength and precision. The ergonomic, non-slip grip of our Hexa Series instruments ensures optimal control, while the sharpness of a MacCut surgical blade allows for clean, precise incisions, facilitating a smoother procedure and better healing outcome.
How Your Extraction Tray Setup Impacts Every Procedure
A well-prepared extraction tray is the foundation of a smooth and successful procedure. It’s more than just a convenient place to put your tools; it’s a system that directly impacts your clinical efficiency, patient safety, and overall stress levels. When every instrument is clean, sterile, and exactly where you expect it to be, you can dedicate your full attention to the patient. This level of preparation not only streamlines the extraction process but also communicates a high standard of care and professionalism that patients can feel.
Think of it as setting the stage for a flawless performance. A disorganized tray can lead to procedural delays, increased chair time, and a higher risk of error. Fumbling for the right elevator or forcep breaks your concentration and can heighten patient anxiety. In contrast, a thoughtfully organized setup ensures a seamless transition between each step of the extraction. It supports aseptic technique and allows your dental assistant to anticipate your needs, creating a synchronized workflow that makes even complex procedures feel more manageable. Ultimately, mastering your tray setup is a simple yet powerful way to refine your practice.
Create a Smoother, More Efficient Workflow
An organized tray is your best tool for a predictable and efficient workflow. When instruments are arranged logically, you eliminate the mental energy spent searching for the next tool. This allows you to maintain focus on the operative site and perform with greater confidence and precision. A standardized setup, where tools are always in the same place for every extraction, builds muscle memory for both you and your assistant. This creates a rhythm that reduces chair time and minimizes procedural stress. Having reliable, high-performance instruments ready to go means you can work smoothly without interruption, ensuring a better experience for everyone involved.
Guarantee Patient Safety and Asepsis
Beyond efficiency, a meticulous tray setup is fundamental to patient safety. Each extraction carries the risk of infection, and your tray is the first line of defense. A structured process for organizing sterilized instruments helps prevent cross-contamination and ensures you are adhering to strict infection control protocols. This includes everything from using appropriate PPE, like MacSafe gloves, to maintaining an aseptic field throughout the procedure. Following established guidelines from the CDC and OSHA for instrument reprocessing isn't just about compliance; it’s about building a foundation of trust with your patients and guaranteeing that their health is always the top priority in your practice.
What Belongs on Your Dental Extraction Tray?
A well-prepared extraction tray is the foundation of a smooth and successful procedure. While the exact contents may vary depending on whether you’re performing a simple or surgical extraction, every setup should include a core group of instruments and supplies. Organizing these items logically not only streamlines your workflow but also reinforces patient safety and aseptic protocols. From initial diagnosis and anesthesia to the final post-operative steps, having every necessary tool within reach allows you to focus entirely on the patient and the procedure at hand. Let's break down the essential components you’ll need to build a comprehensive and efficient extraction tray.
First Things First: Diagnostic and Anesthetic Essentials
Before any procedure begins, you need to properly diagnose the patient and administer anesthesia. Your tray should start with basic examination instruments: a dental mirror, an explorer, and cotton pliers. Next, you’ll need your anesthetic supplies. This includes a topical anesthetic to numb the injection site, an aspirating syringe, and a sterile needle. When selecting an anesthetic, a solution containing epinephrine, such as articaine HCl 4% with epinephrine 1:100,000, is often preferred for surgical extractions. The epinephrine acts as a vasoconstrictor, which helps control bleeding and provides a clearer operative field. Having a full range of anesthetic products on hand ensures you’re prepared for any clinical scenario.
Examination Instruments: Probes and Explorers
The first step in any extraction is a thorough examination, and your tray should reflect that. This initial group of instruments helps you assess the tooth and surrounding tissues. You’ll need a mouth mirror for indirect vision and retraction, a periodontal probe to measure pocket depths, and a dental explorer, often a Shepherd’s hook, to evaluate the tooth’s integrity and detect any subgingival calculus or caries. These tools provide the critical information needed to plan your approach. Having high-quality, reliable dental instruments at this stage is essential for an accurate diagnosis. For instance, the tactile sensitivity offered by our Slim Series instruments can make a significant difference in what you feel, ensuring no detail is missed before you proceed.
Anesthetic Delivery: Syringes, Needles, and Cartridges
Patient comfort is paramount, which makes effective anesthetic delivery the next critical step. Your setup should include a cotton swab for applying topical anesthetic to numb the injection site. Following this, you’ll need an aspirating syringe, which is essential for preventing intravascular injection. This syringe will be loaded with the appropriate anesthetic cartridge and a sterile needle. The needle choice typically depends on the injection site—long needles are generally used for mandibular blocks, while short needles are suitable for maxillary infiltrations. Ensuring you have a consistent and reliable stock of anesthetic supplies is key to managing patient pain and anxiety, creating a calm environment for both you and your patient from the very start.
The Core Workhorses: Elevators and Forceps
The workhorses of any extraction are the elevators and forceps. A periosteal elevator, like a Molt elevator, is used first to gently separate the gingival tissue from the tooth. Following this, various dental elevators are used to luxate the tooth and expand the alveolar bone. Finally, forceps are used to grasp and remove the tooth from its socket. For anterior teeth, a #150 universal forceps is standard for the maxilla, while a #151 is used for the mandible. For more demanding surgical procedures, instruments from the SurgiMac Hexa Series provide exceptional grip and control, while the Pro Series offers uncompromising reliability.
Distinguishing Between Surgical and Luxating Elevators
While they often work in tandem, surgical elevators and luxating elevators are designed for different tasks. A surgical elevator, such as a Molt periosteal, acts primarily as a lever. Its main purpose is to lift and pry the gingival tissue away from the tooth and bone, creating the initial access needed for the extraction. In contrast, a luxating elevator is fundamentally a cutting instrument. Its fine, sharp tip is engineered to slide into the periodontal ligament space, severing the ligament fibers and gently rocking the tooth to begin mobilization. Using the correct elevator at the right stage minimizes trauma to the surrounding bone. For delicate work where clear visibility is paramount, instruments from the Titanium Black Series can reduce glare and improve precision.
Selecting the Right Forceps for the Job
Once the tooth is sufficiently mobile, selecting the appropriate forceps is critical for a clean lift. This is not a one-size-fits-all decision. For simple anterior extractions, universal forceps are often sufficient; a #150 universal forceps is standard for upper teeth, while a #151 is used for the lower arch. However, as you move to posterior teeth with their complex root anatomy, you need forceps with specific beak designs that securely conform to the tooth’s shape. Using the wrong forceps can lead to slippage or root fracture. Having a comprehensive set of high-quality forceps, like those in our reliable Pro Series, ensures you have the right tool to grip any tooth securely and complete the extraction efficiently.
Essentials for Suturing and Post-Op Care
For surgical extractions or cases requiring incisions, additional items are essential. Precision-engineered surgical blades are necessary for creating clean flaps. After the extraction, a surgical curette is used to debride the socket and remove any pathological tissue. To manage bleeding and facilitate healing, you’ll need sterile gauze and sutures. High-quality, absorbable sutures are ideal for patient comfort and convenience. The MacSuture line offers reliable options like Plain Gut and Polyglycolic Acid that provide excellent tensile strength and biocompatibility, ensuring predictable wound closure. These materials support optimal healing and reduce the need for a follow-up removal appointment.
Suture Materials and Scissors
Proper wound closure is critical for hemostasis and promoting optimal healing. Your choice of suture material plays a big role in patient comfort and clinical outcomes. For most extractions, absorbable sutures are the preferred choice, as they eliminate the need for a follow-up removal appointment. Our MacSuture line offers sterile, reliable options like Polyglycolic Acid (PGA) and Plain Gut, which provide excellent tensile strength while being biocompatible. To place these sutures accurately, you’ll need a high-quality needle holder for controlled handling and a pair of sharp suture scissors for clean cuts. Having dependable instruments ensures the final step of your procedure is as precise as the first.
Post-Extraction Socket Management
Once the tooth is removed, your focus shifts to managing the socket to prevent complications and support healing. The first step is to thoroughly debride the socket with a surgical curette, removing any granulation tissue or debris. This ensures a clean environment for clot formation. Next, achieve hemostasis by placing a sterile gauze sponge over the socket and having the patient bite down firmly. For cases where socket preservation is planned for a future implant, this is the time to place bone grafting material. Using precise instruments from a collection like the Pro Series ensures you can perform these delicate tasks with confidence and control, setting the stage for successful long-term healing.
Your Checklist for Disposables and PPE
Maintaining a sterile environment is non-negotiable. Your tray setup must include all necessary personal protective equipment (PPE) and disposables to prevent cross-contamination. This starts with high-quality exam gloves, face masks, and protective eyewear for the entire clinical team. The MacSafe collection provides reliable disposable gloves and other protective apparel designed for safety and comfort. Other essential disposables include sterile gauze, cotton rolls, surgical suction tips, and a patient bib. Properly managing these single-use items is a critical component of your overall infection control protocol, safeguarding both you and your patient throughout the procedure.
Essential Disposables for Patient Comfort and Care
While disposables are fundamental for infection control, they also play a significant role in ensuring your patient remains comfortable and at ease throughout the extraction. A comfortable patient is often a more cooperative one, which makes the procedure smoother for everyone. Items like patient bibs protect clothing and provide a clean barrier, while high-volume surgical suction tips and saliva ejectors efficiently manage fluids to prevent gagging. Cotton rolls and sterile gauze are not just for hemostasis; they also keep the operative area isolated and dry, improving the patient’s overall experience. Stocking a complete range of high-quality dental disposables ensures you can provide this level of care consistently, reinforcing the patient’s trust in your practice.
How to Organize Your Extraction Tray Setup
A well-organized extraction tray is more than just a tidy workspace; it’s a critical component of a safe and efficient procedure. By implementing a consistent, logical setup, your team can move seamlessly through each step of the extraction, minimizing delays and keeping the focus where it belongs: on the patient. An intuitive layout reduces cognitive load, allowing you to perform at your best without fumbling for the right tool. This not only improves procedural speed but also reinforces patient safety by ensuring every instrument is accounted for and easily accessible. Think of your tray setup as the choreography for your procedure. When every instrument has its place, the entire workflow becomes smoother, more predictable, and less stressful for both you and your dental assistant. This level of organization directly translates to better clinical outcomes and a more professional patient experience. It also plays a key role in infection control, as a methodical arrangement helps prevent cross-contamination between sterile and non-sterile items. Before you even begin, having a standardized system in place means less time spent on setup and more time focused on pre-operative patient care. Let’s walk through three core principles for organizing your tray for success, turning a simple tray into a high-performance command center for every extraction.
Set Up Your Tray in Order of Use
Think of your tray as a timeline of the procedure, with instruments arranged from left to right or top to bottom in the sequence they will be used. This intuitive flow allows you and your assistant to work in sync, reducing the time spent searching for the next tool. A standard setup begins with diagnostic instruments like the mirror and probe, followed by the anesthetic syringe. Next, arrange the elevators, then the forceps. Finally, place post-extraction instruments like curettes and gauze. This methodical arrangement ensures all your essential dental instruments are exactly where you need them, right when you need them, creating a predictable and efficient rhythm for the entire procedure.
Group Like with Like: Organize by Function
Another effective strategy is to create functional zones on your tray. Grouping instruments by their purpose helps your dental assistant anticipate your next move and allows for quick, intuitive access. For example, you can create a dedicated area for all your elevators, another for your forceps, and a separate section for suturing materials. This approach is especially helpful in complex cases where multiple instruments may be needed. Using high-quality, ergonomic tools like those in the SurgiMac Hexa Series can further streamline your workflow, as their distinct non-slip grips and balanced design make them easy to identify and handle during demanding procedures, ensuring you maintain complete control.
Keeping Your Operative Field Clear and Organized
Proper instrument placement is key to maintaining a stable and safe operative field. To prevent the tray from tipping, always place heavier instruments, like forceps or elevators, on the side or bottom of the tray. This simple step can prevent a costly and disruptive spill. It’s also crucial to manage your sharps carefully. Keep surgical blades, such as our precision MacCut blades, in a secure position until they are needed to avoid accidental contact. By thoughtfully managing the weight and placement of every item, you ensure the tray remains balanced and your procedure runs smoothly from start to finish, minimizing risks and maximizing focus on the patient.
Sterilization Protocols for a Safe Extraction Tray Setup
An organized tray is a great start, but its true value lies in its sterility. Proper sterilization is the foundation of patient safety, preventing cross-contamination and protecting both your patients and your practice from healthcare-associated infections. Following a strict, repeatable protocol ensures every instrument is free from harmful microorganisms before it ever enters the operative field. This isn't just about meeting regulatory standards from bodies like the CDC; it's about upholding the highest level of patient care.
From the moment an instrument is used to the second it's unwrapped for the next procedure, every step in the sterilization workflow counts. A breakdown at any point can compromise the entire process, putting patients at risk. Think of these protocols as your practice's commitment to safety, ensuring that high-performance tools like your elevators and forceps are always delivered in a sterile state. Let's walk through the essential protocols that keep your extraction tray safe, compliant, and ready for any clinical challenge.
Start with Proper Pre-Cleaning and Decontamination
Sterilization begins with meticulous cleaning. You cannot sterilize a dirty instrument, as bioburden like blood and tissue can shield microorganisms from heat or chemical sterilants. Immediately after a procedure, transport your instruments to the processing area. While wearing appropriate PPE, such as MacSafe nitrile gloves, carefully remove all visible debris. This step is critical, as a complete sterilization process depends on thorough pre-cleaning. After manual or ultrasonic cleaning, rinse the instruments completely and ensure they are fully dry before packaging them for the next stage. This prevents corrosion and ensures the sterilant can reach every surface.
Perfecting Your Autoclave Process
Once your instruments are clean and dry, they must be packaged and sterilized using a validated method. Place them in appropriate sterilization pouches or cassettes, ensuring you don't overpack them. The next step is to use an FDA-cleared sterilizer, like an autoclave, and run a validated cycle according to the manufacturer’s instructions. To ensure the cycle was successful, a robust dental sterilization protocol includes using mechanical monitoring, chemical indicators on each package, and periodic biological indicators (spore tests). This multi-layered approach verifies that sterilization conditions were met, giving you confidence that your instruments are ready for patient use.
Maintaining an Aseptic Field from Start to Finish
Sterility doesn't stop once the autoclave cycle is finished. Maintaining an aseptic field during tray setup is just as important. A properly organized tray supports aseptic technique by minimizing the risk of recontamination. When setting up, handle sterile packages with clean hands and only touch the instruments themselves with sterile gloves or sterile forceps. Place them on a sterile tray cover or drape, creating a designated clean zone. This ensures that meticulously sterilized instruments, like those from the SurgiMac Pro Series, remain pristine until the moment you need them. Every touchpoint matters in preserving the sterile chain from the sterilizer to the patient.
Understanding Sterile Field Boundaries
Your sterile field is more than just the surface of the tray cover; it’s a controlled three-dimensional space. Think of it as a protected zone where only sterile items are allowed. The fundamental rule is simple: sterile only touches sterile. This means once you’ve donned your sterile gloves, you can handle the instruments, but you must avoid touching anything outside this zone. The edges of your sterile drape are considered non-sterile, and you should never reach over the field with non-sterile items or allow anything to compromise the space above the tray. Adhering to these boundaries is crucial for maintaining sterility from the moment you unwrap your instruments to the final suture. This discipline ensures that the tools you rely on remain free from contaminants, directly protecting your patient from infection.
Simple vs. Surgical: Adapting Your Extraction Tray Setup
Not all extractions are created equal. A routine extraction of an anterior tooth requires a different set of tools than a complex surgical removal of an impacted third molar. Adapting your tray setup for the specific procedure is crucial for maintaining efficiency and ensuring you have everything you need at your fingertips. A well-prepared tray prevents mid-procedure scrambling for instruments, which can disrupt your workflow and extend chair time.
The key is to start with a foundational setup for simple extractions and then build upon it for more complex surgical cases. This modular approach ensures consistency while allowing for the flexibility needed to handle diverse clinical scenarios. By anticipating the demands of the procedure, you can prepare a tray that supports a smooth, predictable, and successful outcome for both you and your patient. This foresight not only streamlines the extraction itself but also reinforces a standard of care that prioritizes preparedness and patient safety.
The Essential Setup for Simple Extractions
For a straightforward extraction, your tray should be organized and contain only the essentials to avoid clutter. A standard setup, typically arranged from left to right in order of use, begins with diagnostic and anesthetic supplies. This includes a mirror, explorer, and cotton pliers, followed by topical anesthetic and a syringe with the appropriate needle and anesthetic carpule.
Next, you’ll have your elevators and forceps. For anterior teeth, a universal forceps is often sufficient; the 150 universal forceps is standard for upper teeth, while the 151 is used for lower teeth. Having these core dental instruments ready allows you to work efficiently from initial examination and anesthesia through to the final extraction, ensuring a seamless workflow for routine procedures.
Scaling Up: What to Add for Surgical Extractions
When an extraction shifts from simple to surgical, your tray must expand to include tools for managing hard and soft tissue. This means adding a surgical handpiece with burs, like a 557 bur, for sectioning teeth or removing bone. You will also need a scalpel for making incisions, which is why having sharp, reliable MacCut surgical blades is essential.
For these more demanding procedures, specialized instruments are key. The ergonomic grips of our Hexa Series instruments provide superior control during challenging extractions. Additionally, a surgical aspirating tip is necessary for maintaining a clear field of view. Once the procedure is complete, a suture kit with high-quality MacSuture materials will be needed for proper wound closure.
Scalpels and Blades for Precise Incisions
When a surgical flap is necessary for access and visibility, the quality of your incision matters. A clean cut minimizes tissue trauma, which leads to faster healing and less post-operative discomfort for your patient. This is where a sharp, reliable blade becomes indispensable. For creating precise flaps, your tray should include a scalpel handle and a sterile blade. Having dependable MacCut surgical blades ensures you can perform with confidence, knowing each blade is engineered for sharpness and consistency. Common choices for oral surgery include the #15 blade for general incisions and the #12 blade for its curved shape, which is ideal for working in posterior areas.
Instruments for Bone and Tissue Management
Managing hard and soft tissue is a key part of any surgical extraction. This often requires more than just elevators and forceps. Your surgical tray should include instruments designed for bone removal or tooth sectioning, such as a surgical handpiece and burs. For the instruments that do the heavy lifting, ergonomics and control are paramount. During a challenging procedure, you need tools that feel like an extension of your hand, reducing fatigue and improving precision. The Hexa Series instruments are designed for exactly these moments, featuring ergonomic, non-slip grips that provide superior control and balance when you need it most.
Common Extraction Tray Setup Mistakes to Avoid
Even the most experienced dental teams can fall into habits that compromise efficiency and safety. A well-organized tray is your command center during an extraction, and small missteps can lead to significant disruptions. By recognizing and correcting these common mistakes, you can refine your workflow, reduce procedural time, and ensure every patient receives the highest standard of care. Let’s walk through the most frequent errors and how to sidestep them for a smoother, safer, and more predictable extraction process.
Are You Choosing the Right Instruments for the Job?
Choosing inappropriate or low-quality instruments for the procedure at hand is a critical error. Using a tool that isn't designed for a specific task can lead to iatrogenic damage, instrument failure, or prolonged procedure times. For example, using elevators that are too large or forceps that don't properly adapt to the tooth root can complicate what should be a straightforward extraction. It’s also important to consider instrument placement; heavier tools should be positioned on the bottom or side of the tray to prevent it from becoming unstable. Investing in reliable, procedure-specific instruments, like the ergonomic tools found in the SurgiMac Hexa Series, ensures you have the right tool with the right grip for demanding surgical extractions.
The High Cost of a Disorganized Tray
A disorganized tray forces you to hunt for instruments, breaking your concentration and disrupting the procedural flow. The most effective setups arrange instruments in their anticipated order of use, typically from left to right. This logical sequence allows you or your assistant to retrieve the next tool almost by muscle memory, without looking away from the operative field. For instance, the dental mirror is almost always used first for visualization and should be placed accordingly. By standardizing this setup across your practice, you create a predictable system that minimizes wasted motion and keeps the focus entirely on the patient.
Ignoring Critical Cross-Contamination Risks
A lapse in infection control is one of the most serious mistakes a practice can make. Failing to maintain an aseptic field or using improperly sterilized instruments exposes patients to significant health risks. Every clinic must adhere to a strict sterilization protocol that aligns with CDC and OSHA standards. This includes everything from pre-cleaning and autoclaving instruments to using appropriate personal protective equipment. Utilizing high-quality disposables and protective gear from a trusted line like MacSafe is fundamental to preventing cross-contamination. Consistent and verifiable sterilization practices are not just about compliance; they are the foundation of patient trust and safety.
Your Post-Procedure Protocol for Instrument Care
After the procedure wraps up, your attention turns to the final, critical step: breaking down the tray and caring for your instruments. This is more than just cleanup; it’s a systematic process that protects your patients, your team, and the investment you've made in quality surgical tools. A consistent protocol for handling and maintenance ensures your instruments perform reliably for years. It’s about creating a safe, compliant environment while preserving the integrity of the tools you depend on every day.
Safely Handling Contaminated Instruments Post-Procedure
The moment a procedure ends, every item on your tray should be considered contaminated. Safe handling starts with wearing appropriate personal protective equipment, including heavy-duty utility gloves from a trusted line like MacSafe. The goal is to move instruments from the point of use to the reprocessing area without risking injury or cross-contamination. Following a structured workflow is key. This ensures that instruments flow from highly contaminated zones to clean and sterile areas in a one-way path. The initial step involves carefully removing visible debris at the chairside before transporting the instruments. This pre-cleaning step is crucial for effective sterilization and helps maintain a safe clinical environment for everyone.
Cleaning and Maintenance Tips for Instrument Longevity
Proper cleaning is the foundation of any effective sterilization protocol and is essential for extending the life of your instruments. Meticulous cleaning and validated sterilization methods create a robust, CDC-aligned dental sterilization protocol that ensures every tool is safe for reuse. This careful maintenance preserves the precision and balance of high-performance tools, from the durable Pro Series elevators to the glare-reducing forceps in the Titanium Black Series. By implementing a consistent process for cleaning, rinsing, drying, and sterilizing, you not only support compliance but also protect your instruments from corrosion and damage, ensuring they deliver reliable performance every time.
Choosing High-Performance Instruments for Better Extractions
The success of a dental extraction doesn’t just depend on your technique; it’s also heavily influenced by the quality of the instruments in your hand. Investing in high-performance tools is a direct investment in your clinical efficiency, patient outcomes, and practice reputation. When every movement counts, the right instruments provide the control, strength, and reliability you need to perform procedures smoothly and safely. From simple extractions to complex surgical cases, your tools should work as a seamless extension of your skills, allowing you to focus entirely on the patient. Choosing instruments designed for specific challenges ensures you’re prepared for any scenario, minimizing chair time and maximizing positive results.
Why Precision and Durability Are Non-Negotiable
High-quality equipment helps power the most successful dental practices. Extraction instruments, in particular, must withstand significant force while offering the precision needed to work in delicate areas. Durable tools crafted from premium-grade stainless steel maintain their integrity through countless sterilization cycles, which is fundamental for effective infection control. Precision-engineered tips and edges allow for cleaner work, reducing trauma to surrounding bone and soft tissue and promoting faster healing for your patients. When your instruments perform predictably every time, you can work with greater confidence, knowing they won’t fail under pressure. This reliability is the cornerstone of both patient safety and clinical excellence.
Meeting Surgical Demands with SurgiMac's Hexa and Pro Series
For procedures that demand exceptional strength and control, you need instruments built for the task. The SurgiMac Hexa Series is engineered specifically for advanced surgical and periodontal work. Featuring ergonomic hollow handles and non-slip grips, these instruments provide superior handling and leverage during tooth extractions and implant preparations. For clinicians seeking uncompromising reliability, the Pro Series offers high-performance instruments made from premium-grade stainless steel, ensuring flawless balance and accuracy. Both collections are designed to meet the highest standards of clinical excellence, giving you the confidence to manage even the most demanding surgical cases with precision and ease.
Reduce Glare and Improve Visibility with the Titanium Black Series
A clear view of the operative field is non-negotiable during an extraction. Glare from overhead lighting can easily obscure fine details, leading to uncertainty and potential complications. The SurgiMac Titanium Black Series directly addresses this challenge. These instruments feature a non-reflective, matte black finish that absorbs light, reducing glare and enhancing the contrast between the instrument and the oral tissues. This improved visibility allows for more precise and confident movements, supporting a smoother workflow and upholding patient safety. The advanced coating also improves tactile sensitivity, giving you a better feel for the task at hand during delicate surgical work.
Framing the Procedure: Patient Communication and Care
Your clinical expertise is only one part of a successful extraction; the other is your ability to guide the patient through the experience with confidence and compassion. A well-organized tray setup is your silent partner in this effort. When your instruments are logically arranged and your workflow is seamless, you project an aura of calm control that patients can sense. This frees you from the mental clutter of searching for tools, allowing you to focus entirely on communicating with your patient, managing their anxiety, and ensuring they feel safe and informed from start to finish. This patient-centric approach begins long before the first instrument is picked up and continues well after the procedure is complete.
Think of it this way: every moment you spend searching for a misplaced elevator is a moment your attention is pulled away from the patient. A predictable system eliminates these disruptions, allowing you to maintain a steady dialogue, explain what you're doing, and respond to their needs in real-time. This continuous engagement transforms the procedure from a purely technical task into a well-managed experience. It builds a foundation of trust that not only improves the immediate appointment but also strengthens the long-term patient-provider relationship, reinforcing the high standard of care in your practice.
Pre-Procedure Patient Guidance
A patient’s anxiety often stems from the unknown. You can alleviate much of this by clearly explaining the procedure in simple terms and setting realistic expectations. Your calm demeanor, supported by a meticulously organized tray, is a powerful non-verbal cue that they are in capable hands. Fumbling for an instrument or appearing disorganized can instantly undermine that trust and heighten patient anxiety. By ensuring every tool is in its place and your team is prepared with proper protective gear, you create an environment of professionalism and safety. This allows you to guide the conversation with confidence, answer questions thoughtfully, and build the rapport needed for a positive patient experience.
Discussing Post-Extraction Restoration Options
A successful extraction is often the first step in a larger restorative treatment plan. The moments following the procedure, when the patient is relieved and receptive, provide a perfect opportunity to discuss their future options. A clean, atraumatic extraction, achieved with precise instruments, creates an ideal foundation for future restorations like implants or bridges. You can use this time to explain the importance of replacing the missing tooth and walk them through the next steps. This might include planning for future diagnostic records, for which high-quality impression materials are essential for capturing the necessary detail to ensure a perfect fit for the final restoration.
Frequently Asked Questions
Q: How many different prophy paste flavors should I realistically keep in my office?
A: You don’t need a huge range to keep patients happy. Stocking three to five flavors is usually ideal. A balanced mix—like a classic mint, one or two fruit options (cherry or strawberry), and a kid-friendly flavor such as bubblegum—covers most preferences without overcomplicating inventory.
Q: Besides flavor, what is the most important clinical factor to consider when choosing a prophy paste?
A: The grit level is the most important factor. It determines how abrasive the paste is and how effectively it removes stains and plaque. Keeping a range from fine to coarse allows you to customize treatment for each patient, ensuring effective cleaning without unnecessary enamel wear.
Q: Are the sweeteners and flavorings in prophy paste safe for teeth?
A: Yes, they are designed to be safe. Most professional prophy pastes use non-cariogenic sweeteners like xylitol, which do not promote tooth decay and may even help reduce harmful bacteria in the mouth.
Q: What's the best way to manage inventory for multiple prophy paste flavors?
A: Start with a variety pack to identify patient preferences. Once you know which flavors are most popular, order those in bulk to reduce costs. Streamlining purchases through a single supplier can also simplify restocking and inventory management.
Q: Can offering flavor choices really make a difference for adult patients, or is it just for kids?
A: It absolutely makes a difference for all patients. While kids enjoy fun flavors, adults also appreciate having a choice. It adds a small element of comfort and personalization, helping the experience feel less clinical and more patient-centered.
Related Articles
Tags
Blog posts
-
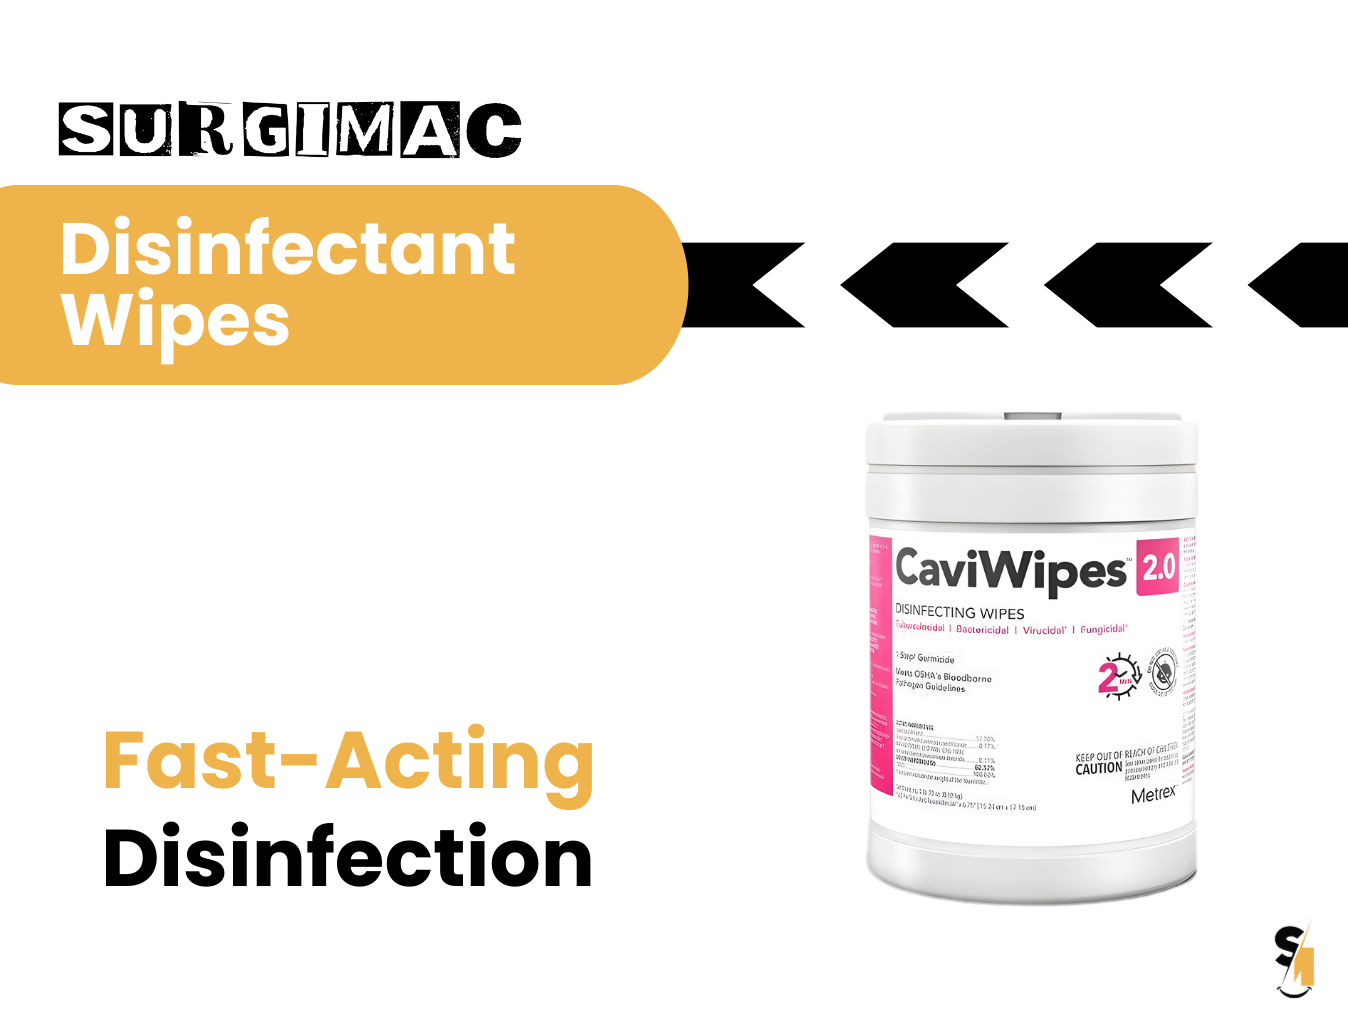
, by SurgiMac How to Disinfect with Metrex CaviWipes Correctly
-
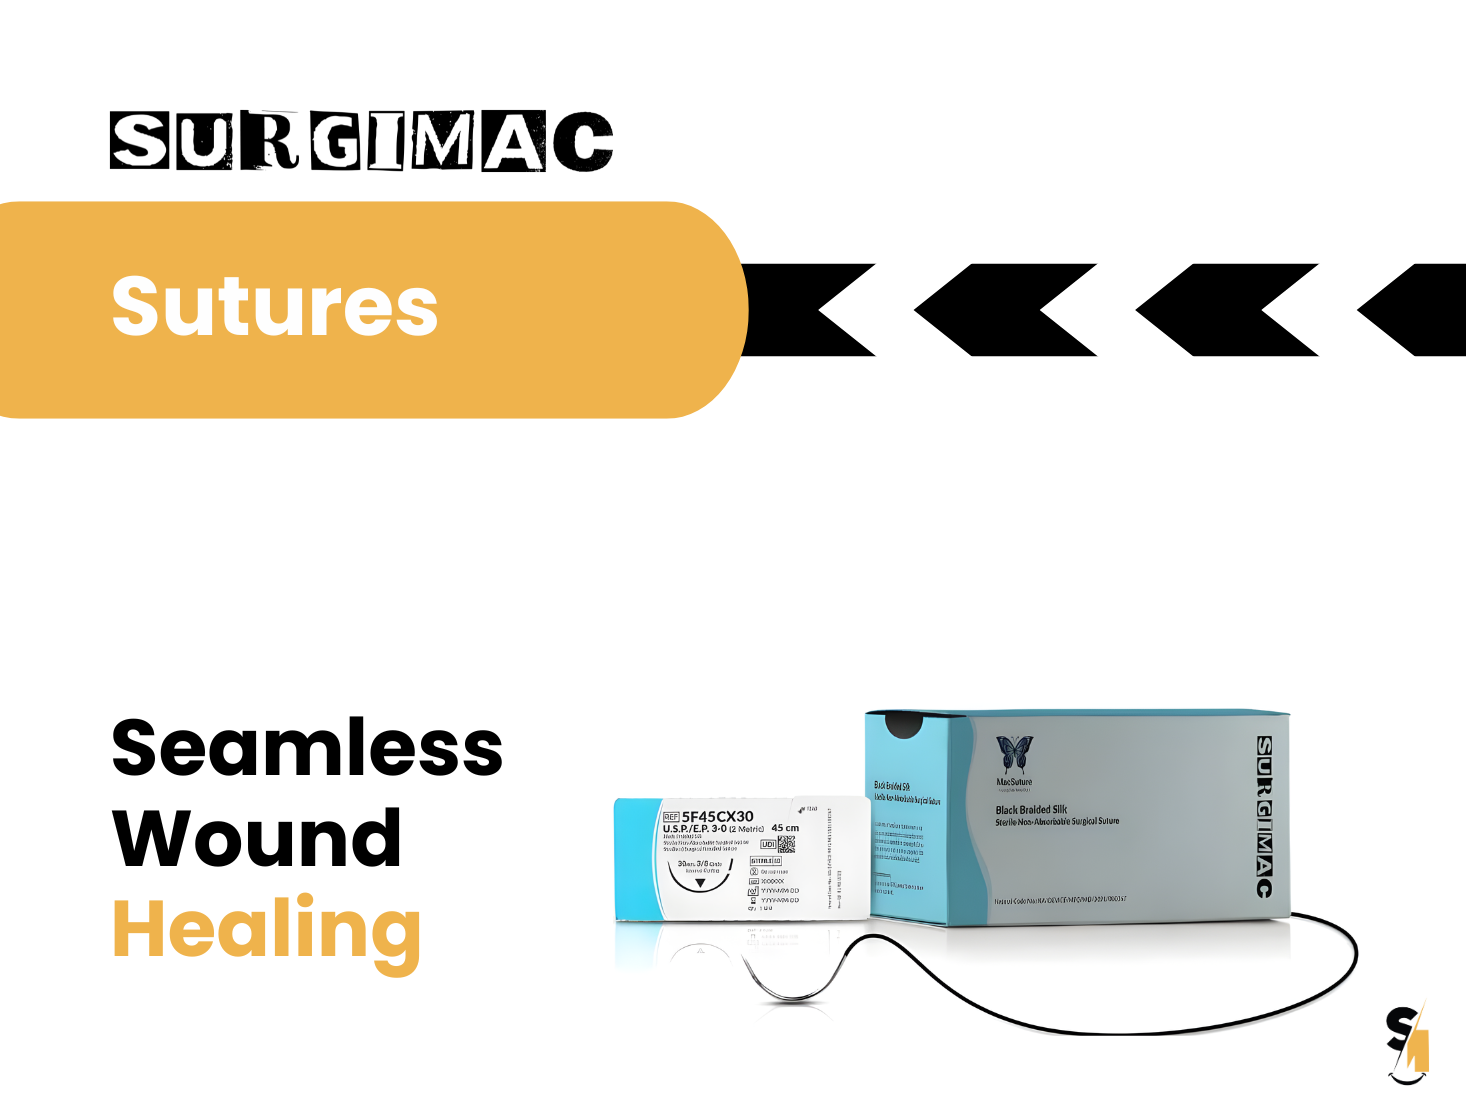
, by SurgiMac Suture Sizes From Smallest to Largest: A Complete Guide
-

, by Marketing SurgiMac Stop the Bleeding: 5 Procurement Leaks Draining DSO Margins in 2026


