


Maxillary Molar Forceps: Types & Technique Guide
- , by SurgiMac
- 37 min reading time
Maxillary Molar Forceps are designed for precision. Learn how to choose and use right and left forceps for safe, efficient upper molar extractions.
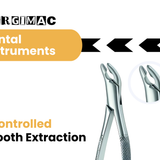
The anatomy of maxillary molars presents a unique clinical challenge. With their trifurcated roots and proximity to the sinus, these teeth demand instruments designed with absolute precision. This is where specialized Maxillary Molar Forceps come in. They aren't universal tools; they are purpose-built for right and left sides. The pointed beak is crafted to engage the buccal bifurcation, while the rounded beak cradles the palatal root. This anatomical fit is essential for a stable grip and applying controlled, effective force. This guide explores how high-quality instruments, like our Titanium Black Series, work with the anatomy, not against it.
Key Takeaways
- Master the Right vs. Left Distinction: Maxillary molar forceps are not universal. Always confirm you have the correct instrument for the quadrant by identifying the pointed beak, which is designed to fit the buccal root bifurcation for a secure grip.
- Apply Deliberate, Controlled Pressure: Successful extractions depend on finesse, not force. Use slow, steady buccal pressure to expand the socket before applying gentle palatal and rotational movements to luxate the tooth with minimal trauma.
- Assess the Tooth Before Choosing the Tool: A thorough clinical and radiographic evaluation is essential. The tooth's condition, such as crown integrity or root anatomy, will determine whether a standard forcep or a specialized instrument is the most appropriate choice for the procedure.

What Are Maxillary Molar Forceps?
Maxillary molar forceps are essential tools in any dental practice, specifically engineered for the extraction of upper molars. Unlike universal forceps, these instruments are designed with the unique anatomy of the maxillary arch in mind. Their specific shapes and angles allow you to gain a secure grip on the tooth, providing the necessary leverage to perform extractions smoothly and efficiently. Using the correct forceps not only makes the procedure more manageable for you but also minimizes trauma to the surrounding bone and soft tissue, which is crucial for patient comfort and a smooth recovery. Think of them as the key that perfectly fits the lock, designed for a very specific and important job.
How Do They Function in Dental Extractions?
The primary role of maxillary molar forceps is to securely grasp and remove maxillary molars. During an extraction, these specialized dental instruments give you the control and leverage needed to luxate the tooth and extract it from the alveolar bone. A clean, efficient extraction reduces the risk of root fractures and other postoperative complications. By engaging the tooth at the cementoenamel junction (CEJ), the forceps allow you to apply firm, controlled pressure. This targeted force transmission is what makes them so effective, ensuring the tooth is removed with minimal disruption to adjacent structures. Proper use of these forceps is a cornerstone of successful exodontia, leading to better patient outcomes.
Why Molar Anatomy Shapes Forceps Design
The design of maxillary molar forceps is a masterclass in anatomical precision. Each pair is crafted to conform to the distinct contours of the maxillary molars. The beaks are curved and shaped to fit snugly around the crown, engaging the tooth below the height of contour for a firm grip. For example, forceps designed for trifurcated upper molars often have one pointed beak to fit into the buccal bifurcation, while the other beak is rounded to adapt to the palatal root. This anatomy-specific design ensures the force is distributed evenly, preventing slippage or tooth fracture. High-quality instruments, like those in the SurgiMac Hexa Series, are built to provide this level of precision for demanding surgical procedures.
Why Specialized Forceps Matter in Your Practice
Improving Procedural Efficiency and Outcomes
Maxillary molar forceps are essential tools in any dental practice, specifically engineered for the extraction of upper molars. Unlike universal forceps, these instruments are designed with the unique anatomy of the maxillary arch in mind. Their specific shapes and angles allow you to gain a secure grip on the tooth, providing the necessary leverage to perform extractions smoothly and efficiently. When you use a tool that’s purpose-built for the task, you eliminate guesswork and improve your workflow. This means less time spent adjusting your grip and more time applying effective, controlled force, leading to cleaner extractions and better clinical outcomes with less chair time.
Enhancing Patient Comfort and Safety
Using the correct forceps not only makes the procedure more manageable for you but also minimizes trauma to the surrounding bone and soft tissue, which is crucial for patient comfort and a smooth recovery. A smoother, quicker extraction means less discomfort and anxiety for the patient. Specialized forceps allow you to luxate the tooth with finesse rather than brute force, preserving the integrity of the alveolar bone and reducing damage to the gingiva. Instruments like our Titanium Black Series forceps, with their glare-reducing finish, further enhance visibility, allowing for precise application of force and helping you protect adjacent structures. This commitment to precision directly translates to a safer procedure and a better healing experience for your patient.
Building Confidence and Skill
When your instruments work with you, not against you, your confidence naturally grows. Having a reliable, anatomically correct forcep in your hand allows you to focus entirely on your technique—the subtle rotational and buccal movements needed for a successful extraction. Proper use of these forceps is a cornerstone of successful exodontia, leading to better patient outcomes. By investing in high-quality tools like our Pro Series instruments, you are investing in your own capabilities. You can trust that the instrument will perform as expected, giving you the predictability needed to refine your skills and handle even challenging extractions with greater assurance and control.
Right vs. Left Forceps: Can You Spot the Difference?
At first glance, right and left maxillary molar forceps can look almost identical, but their subtle design differences are critical for a successful extraction. These instruments are not interchangeable. Each pair is specifically engineered to conform to the unique anatomy of the molars in the right or left maxillary quadrant. Using the correct forcep ensures a secure grip, allows for controlled movement, and minimizes the risk of complications like root fractures or damage to adjacent structures. Understanding these distinctions is a fundamental skill that makes extractions smoother and more predictable for both you and your patient. High-quality dental instruments are crafted with these precise anatomical needs in mind, providing the reliability you need for every procedure.
Reading the Beak's Curve and Orientation
The most telling feature for differentiating right and left maxillary molar forceps is the design of the beaks. One beak is smooth and rounded, while the other has a distinct point. This pointed beak is specifically designed to fit into the buccal bifurcation of the maxillary molar's two buccal roots. The smooth, broader beak is shaped to cradle the single, larger palatal root. When you hold the instrument correctly, the pointed beak should always be oriented toward the buccal side of the tooth. This anatomical fit is what allows you to establish a firm, stable grip before applying any extraction forces, preventing slippage and protecting the surrounding soft tissue.
How to Properly Engage Molar Roots
The effectiveness of these forceps comes down to how well they engage the complex root structure of maxillary molars. The design allows for optimal contact, which is essential for minimizing the risk of root fracture. The pointed beak settles securely into the buccal furcation, while the rounded beak cups the palatal root. This creates a precise fit that distributes pressure evenly across the tooth. By engaging the tooth at the cementoenamel junction (CEJ) with such accuracy, you can apply luxation forces more effectively. Instruments from collections like the SurgiMac Pro Series are engineered to provide this level of precision, ensuring you have the control needed for even the most demanding extractions.
A Simple Check for Quadrant Matching
Properly matching the forceps to the correct quadrant is non-negotiable for a safe and effective procedure. Right-sided forceps (often marked #53R or #18R) are used for maxillary molars in the patient's right quadrant, while left-sided forceps (#53L or #18L) are for the left. A simple way to verify is to hold the forceps with the beaks pointing away from you, as if approaching a patient. The pointed, buccal-side beak will curve toward the side it is intended for. Using the wrong forcep will result in a poor fit, an unstable grip, and an increased likelihood of fracturing the crown or roots, ultimately complicating the extraction.
Your Guide to Maxillary Molar Forceps Types
When it comes to maxillary molar extractions, having the right instrument is half the battle. While there are many variations, forceps are generally categorized based on their intended use, from routine extractions to more complex surgical cases. The primary goal of any design is to securely grip the tooth at the cementoenamel junction (CEJ) and transmit controlled force along the long axis of the tooth, facilitating a clean and efficient extraction. Understanding the differences between standard, universal, and specialized forceps will help you build a versatile toolkit that prepares you for any clinical scenario you might encounter.
Choosing the correct instrument not only makes the procedure smoother but also minimizes trauma to the surrounding bone and soft tissue. High-quality forceps, like those in the SurgiMac Pro Series, are crafted from premium-grade stainless steel to ensure durability and precise performance. Whether you're performing a straightforward extraction or managing a more complicated case, the right forceps provide the control and confidence needed for successful patient outcomes. Let’s look at the main types you’ll find in a typical dental practice.
The Go-To Choice: #53L & #53R Forceps
The #53L and #53R are the quintessential workhorses for maxillary molar extractions. Their design is anatomy-specific: one beak is smooth and rounded to conform to the single palatal root, while the other beak is pointed to fit precisely into the bifurcation of the two buccal roots. This configuration provides a secure, stable grip on the crown, allowing for effective luxation. As research confirms, the proper use of maxillary forceps can reduce the number of postoperative complications in many tooth extraction procedures. These forceps are a fundamental component of any surgical setup, providing reliable performance for routine extractions on the left and right sides of the arch.
The Versatile Option: #18L & #18R Forceps
Universal molar forceps, like the #18L and #18R, offer a more versatile design. Both beaks are typically grooved or serrated, allowing them to adapt to maxillary molars that may have atypical anatomy or are partially fractured. While they don't offer the same root-specific fit as the #53 series, their adaptability makes them an excellent choice for general use. Determining the appropriate size and shape of dental extracting forceps is crucial for effective extractions, and the #18 series provides a reliable option for many molar procedures. For clinicians who value ergonomic comfort and control, forceps from the SurgiMac Air Series are designed to reduce hand fatigue during these procedures.
The "Cowhorn": #88L & #88R for Decayed Molars
When you encounter a maxillary molar that is severely decayed or has a fractured crown, standard forceps may not provide an adequate grip. This is where the #88L and #88R forceps, often called "Cowhorn" or Nevius forceps, become invaluable. Their design features two sharp, pointed beaks that bypass the crown entirely, allowing you to engage the tooth directly in the buccal and palatal root area. This unique shape is specifically engineered to secure a firm hold on compromised teeth, making them a go-to instrument for extracting upper first and second molars that might otherwise require surgical sectioning. Having these specialized tools in your arsenal ensures you are prepared for more complex extraction scenarios, providing predictable outcomes even in challenging situations.
Technique and Clinical Considerations
Using Cowhorn forceps requires a specific technique. Instead of gripping the crown, the pointed beaks are carefully seated into the bifurcation of the buccal roots and against the palatal root. The goal is to use the instrument's unique shape to apply controlled pressure, which can help luxate the tooth or even section it from the root structure. The heavy, bayonet-style design provides the necessary force, but precision is key to avoid damaging the alveolar bone. For such demanding procedures, instruments from the SurgiMac Hexa Series, with their non-slip grips and ergonomic handles, provide the superior control and tactile feedback needed to work confidently.
The Universal Choice: #150 and #150S Forceps
Often considered the most universal of all maxillary forceps, the #150 is a staple in nearly every dental practice. Its slightly curved beaks are designed to be adaptable, making it suitable for extracting all upper premolars and, in some cases, molars and incisors. The "S" variant, #150S, is designed for pediatric patients or adults with smaller dental arches. While it doesn't have the anatomy-specific beaks of the #53 or #88 series, its versatility makes it an indispensable first choice for many routine extractions. Think of it as the reliable multi-tool in your extraction kit—always ready and capable of handling a wide range of clinical presentations with ease and predictability.
Focus on Third Molars: #210 Forceps
Extracting maxillary third molars, or wisdom teeth, comes with its own set of challenges, including limited access and visibility. The #210 forceps are specifically designed to address these issues. They feature a more pronounced curve and shorter, broader beaks that can securely grasp the tooth in the tight posterior space of the mouth. This design allows you to apply effective force without interference from the lower arch. For these difficult-to-see procedures, using instruments from the SurgiMac Titanium Black Series can be a game-changer. The non-reflective black finish reduces glare from overhead lights, enhancing visibility and allowing you to work with greater precision and confidence.
Specialized Tools for Roots and Premolars: #65, #69, #99, & #101
While molar forceps are essential, a well-rounded surgical kit includes specialized tools for more delicate tasks. The #65 forceps, with their thin, bayonet-shaped beaks, are ideal for retrieving fractured root tips that break off below the gumline. The #69 forceps are designed for gripping small fragments and root tips with their short, serrated beaks. For anterior teeth and premolars, the #99 and #101 forceps offer straight handles and precisely shaped ends to grip the tooth securely without damaging adjacent structures. Stocking these specialized dental instruments ensures you have the right tool for every contingency, from simple extractions to complex root recoveries.
Forceps #24: A Note on Leverage
The #24 forceps offer a unique design variation focused on maximizing leverage. This instrument often features a specialized beak contour and a distinctive hook handle. This handle modification allows for a different grip, enabling the operator to generate significant rotational force with greater control and less hand fatigue. It’s an excellent example of how ergonomic design can directly translate to procedural efficiency. When you need that extra mechanical advantage for a particularly stubborn upper molar, the #24 provides a powerful and controlled solution, underscoring the importance of having diverse instrument designs in your practice.
Tackling Complex Cases with Specialized Forceps
For more challenging extractions, specialized forceps are indispensable. This category includes instruments like cowhorn forceps (#88L & #88R), which feature two pointed beaks designed to engage the bifurcation of the roots below the decay or fracture line. They are particularly useful for teeth with severely damaged crowns. Other innovative designs, such as physics forceps, are engineered to apply leverage differently, using a bumper and beak system to facilitate extraction with less force. Studies have shown that the time required to extract a tooth using physics forceps can be significantly less than with conventional forceps, making them a valuable tool for complex cases. Having a selection of these specialized dental instruments ensures you are prepared for any anatomical variation or complication.
Understanding Forceps Design and Innovation
The evolution of extraction forceps is a story of continuous refinement, driven by a deeper understanding of dental anatomy and ergonomics. Modern forceps are more than just simple tools; they are sophisticated instruments designed to make extractions safer, more efficient, and less traumatic for the patient. From the fundamental differences in hinge design to advanced material coatings and grip technologies, every aspect of a forcep's construction is thoughtfully engineered. Understanding these innovations allows you to select instruments that not only fit the clinical situation but also complement your personal technique and reduce physical strain during procedures.
American vs. English Pattern Forceps
One of the most fundamental distinctions in forceps design is between the American and English patterns. American Pattern forceps feature a horizontal hinge, similar to a pair of scissors, and are typically used with a palm-up grip. This design is often praised for providing excellent visibility of the surgical site. In contrast, English Pattern forceps have a vertical hinge with a visible screw, resembling pliers. This configuration offers greater mechanical advantage, allowing you to generate more force with less wrist movement. As noted by industry experts at ProDentUSA, the English pattern can be particularly beneficial when working in tight spaces where maneuverability is limited. Your preference will likely depend on your training and the specific demands of the procedure.
Advanced Features for Enhanced Performance
Beyond the basic pattern, modern forceps incorporate a range of advanced features designed to enhance performance and durability. Many manufacturers now offer instruments with specialized coatings and grip technologies. For example, some high-end forceps feature diamond-dusted tips for a superior grip on the tooth surface, reducing the risk of slippage. Others utilize advanced coatings that harden the instrument, making it more resistant to scratches and corrosion over time. These innovations are all aimed at one goal: giving you more control and confidence during an extraction. At SurgiMac, we integrate similar principles into our instrument lines, ensuring every tool is built for precision and longevity in a demanding clinical environment.
Specialty Coatings and Grips
Specialty coatings are a key feature in high-performance forceps, offering tangible benefits in clinical practice. For instance, the instruments in our Titanium Black Series feature a specialized coating that significantly reduces glare from overhead lighting. This is a huge advantage, as it enhances visibility and reduces eye strain during long or delicate procedures. Beyond coatings, the handle design is crucial for ergonomic comfort and control. Our Hexa Series instruments are designed with ergonomic hollow handles and non-slip grips, ensuring a secure hold even when wet. This focus on ergonomics helps minimize hand fatigue and allows for the precise application of force, which is critical for successful outcomes.
Apical Retention Designs
The most critical part of any forcep is the beak design, and modern instruments excel in what is known as apical retention. This means the beaks are engineered to grip the tooth at or below the cementoenamel junction (CEJ), engaging the root structure itself. This design is vital for preventing crown fractures, especially in teeth with extensive decay or large restorations. The anatomical fit of the beaks—like the pointed beak designed for the buccal bifurcation and the rounded beak for the palatal root—is a perfect example of this principle in action. By securing a firm grip on the root, you can apply luxation forces directly and effectively, facilitating a smoother, more predictable extraction with minimal trauma to the surrounding bone.
Focus on Upper Third Molars (Wisdom Teeth)
The extraction of maxillary third molars, or wisdom teeth, presents a unique set of challenges due to their posterior location, variable anatomy, and often-difficult access. These factors make specialized extraction forceps not just a preference but a necessity. Standard molar forceps may not provide the reach or the specific angulation required to properly engage a third molar. Forceps designed for wisdom teeth feature longer, more pronounced curves and specialized beak designs that allow you to navigate around the second molar and establish a secure grip. Using the right instrument is paramount for minimizing patient discomfort and reducing the risk of complications, such as fracturing the maxillary tuberosity.
Common Indications for Extraction
Maxillary third molars are frequently recommended for extraction for a variety of clinical reasons. Common indications include impaction, where the tooth is unable to fully erupt into a functional position, leading to pain and potential damage to adjacent teeth. Pericoronitis, an inflammation of the soft tissue surrounding a partially erupted tooth, is another frequent cause. Additionally, their posterior position makes them difficult to clean, leading to a higher incidence of dental caries and periodontal disease. As noted by dental suppliers like OHI-S, forceps designed for third molars provide a strong, secure grip that helps dentists access these hard-to-reach teeth and reduce the risk of slippage during the procedure.
Design Considerations for Third Molar Forceps
The design of third molar forceps is tailored to overcome the challenges of their posterior position. Instruments like the #210S forceps feature a bayonet-style bend, which allows the handles to remain clear of the patient's lower jaw and lips while the beaks engage the tooth. The beaks themselves are often more delicate and offset to provide better visibility and access. The goal is to engage the tooth at the CEJ with precision, allowing you to apply controlled luxation forces without interference from the second molar. This anatomy-specific engineering is crucial for minimizing the risk of root fracture and ensuring the force is transmitted along the long axis of the tooth, leading to a cleaner and more efficient extraction.
Choosing the Right Maxillary Molar Forceps for the Job
Choosing the correct maxillary molar forceps is a foundational step for a successful and atraumatic extraction. The right instrument not only improves your efficiency but also minimizes the risk of complications like root fractures or damage to adjacent structures. Proper selection comes down to three key considerations: correctly identifying the instrument for the specific side, thoroughly assessing the tooth’s anatomy, and matching the forceps to the unique demands of the clinical situation.
A Quick Visual Guide: Left vs. Right
When selecting maxillary molar forceps, it is essential to identify the right and left instruments correctly. This isn't just a matter of preference; the design of these forceps is specifically tailored to the anatomical contours of the maxillary molars. The beaks are engineered to provide an optimal grip, with one beak designed to engage the buccal root trifurcation and the other shaped to fit the single palatal root. Holding the forceps with the beaks pointing away from you, the beak with the pointed tip is for the buccal side. This anatomy-specific design ensures maximum leverage and a secure purchase on the tooth. Instruments like those in the Hexa Series are built with these ergonomic and procedural needs in mind.
How to Assess Tooth and Root Structure
Understanding the position of the tooth and the anatomy of its roots is critical when choosing the appropriate forceps. Before beginning an extraction, a thorough clinical and radiographic examination is necessary to evaluate the molar’s root structure, which can vary significantly in shape, size, and divergence. Is there significant decay compromising the crown? Are the roots fused, or are they widely splayed? This information will guide you to the best instrument for the job. Maxillary molar forceps are designed to accommodate these unique structures, but a careful assessment ensures you select the pair that will provide the most effective grip without placing undue stress on the tooth or surrounding bone. Having a full range of high-quality dental instruments allows you to adapt to any anatomical variation.
Matching the Instrument to the Clinical Situation
Selecting the right dental extraction forceps is vital for ensuring a smooth procedure. Each type of forceps is engineered to meet specific clinical needs, enhancing both the efficiency and safety of the extraction. For example, a molar with a full, intact crown may be best suited for a standard #53R or #53L, while a tooth with a compromised crown might require a different approach. The goal is to match the instrument’s design to the tooth’s condition and location to achieve a clean extraction with minimal effort. Investing in reliable, well-crafted instruments, such as those in the SurgiMac Pro Series, ensures you have dependable tools that deliver consistent performance for every patient.
Refining Your Extraction Technique
A successful extraction is more than just removing a tooth; it’s a blend of anatomical knowledge, clinical skill, and the right instrumentation. Mastering your technique with maxillary molar forceps ensures procedures are as smooth and atraumatic as possible, leading to better patient outcomes and faster healing. This is especially true for maxillary molars, where complex root anatomy and proximity to the sinus demand a high degree of precision. The key is to work with control, allowing the instrument to do its job effectively. High-quality, well-maintained forceps are an extension of your hands, providing the tactile feedback and grip needed for confident extractions. Having a reliable set of instruments, like those in the SurgiMac Pro Series, gives you the foundation needed to refine your technique and handle even the most challenging cases with predictability. When your tools are dependable, you can focus entirely on the patient and the procedure. This section will walk you through the essential steps for using these instruments effectively, from initial assessment to the final movements, helping you turn a potentially difficult extraction into a routine success.
Your Pre-Extraction Checklist
Every successful extraction begins with a thorough assessment long before you pick up your forceps. Start by carefully reviewing radiographs to understand the root morphology, its relationship to the maxillary sinus, and the condition of the surrounding alveolar bone. This initial evaluation is critical because, as clinical research shows, determining the appropriate size and shape of your forceps is crucial for an effective procedure. Once you have a clear clinical picture, you can confidently select the correct instrument, whether it's a #53R/L for a three-rooted molar or a different design for an anomalous tooth. Proper preparation ensures you have the right tools ready, minimizing chair time and preventing unexpected complications.
Assembling Your Full Extraction Toolkit
While the right forceps are critical, a successful extraction depends on having a complete toolkit ready. Your setup should always include a selection of elevators and luxators to gently sever the periodontal ligament and create initial mobility; instruments from our Air Series are exceptionally balanced for this delicate work. You'll also need periosteal elevators for tissue reflection, fine-tipped root picks for managing potential fractures, and surgical burs for sectioning teeth if the procedure becomes more complex. Finally, ensure you have high-quality closure materials on hand. Having reliable sutures, like our MacSuture line, and hemostatic agents ready allows you to manage any outcome with confidence and ensure optimal healing for your patient.
Perfecting Your Grip, Stance, and Leverage
Your grip and positioning are fundamental to maintaining control and applying force correctly. Use a firm palm grasp on the forceps, which allows you to deliver controlled pressure without straining your hand. Ensure both you and the patient are positioned for optimal visibility and stability. The beaks of the forceps should be seated apically, parallel to the long axis of the tooth, engaging the root surface below the cementoenamel junction (CEJ). This firm, apical grip is what allows you to effectively expand the socket. A proper technique not only makes the extraction smoother but also helps reduce postoperative complications. Instruments with ergonomic designs, such as those in our Hexa Series, feature non-slip grips that further enhance control and reduce hand fatigue.
The Two-Stage Grip Technique
This technique separates the initial placement from the application of force, ensuring maximum control. The first stage is all about achieving a secure, apical grip. With finesse, seat the beaks parallel to the long axis of the tooth, making sure they engage the root surface firmly below the cementoenamel junction (CEJ). This precise placement is critical for preventing slippage and minimizing the risk of crown fracture. The second stage involves transitioning to controlled luxation. Begin with slow, steady buccal pressure to expand the socket, followed by gentle palatal and rotational movements. This deliberate approach allows you to work with the tooth’s anatomy, not against it. Instruments with enhanced visibility, like those in our Titanium Black Series, can be invaluable during this process, as their glare-reducing finish helps you confirm your grip is perfect before applying any force.
Applying Controlled Force and Rotational Movement
With the forceps properly seated, the extraction relies on slow, deliberate, and controlled movements. The primary force for maxillary molars is a strong, steady buccal pressure. This movement is designed to expand the buccal plate of the alveolar bone, which is thinner than the palatal plate. Hold this pressure for several seconds to allow the bone to respond. Follow this with a less pronounced palatal movement. A slight rotational force can then be applied to further sever the periodontal ligament fibers. The goal is to luxate the tooth by expanding its socket, not to pull it out with brute force. This methodical approach is often more efficient and significantly lessens the time required for extraction, making the entire process more comfortable for the patient.
Common Extraction Pitfalls and How to Avoid Them
Even the most routine maxillary molar extraction requires precision and careful planning. A successful procedure depends on avoiding a few common pitfalls that can lead to complications like root fractures, bone damage, or prolonged patient recovery. By focusing on proper instrument selection, controlled force application, and clear visibility, you can ensure a smoother, more predictable outcome for every patient. Mastering these fundamentals protects both the patient and the integrity of the surrounding tissue, setting the stage for optimal healing.
Pitfall #1: Incorrect Instrument Selection
Choosing the right tool for the job is the first step toward a successful extraction. Using forceps that don’t match the tooth’s anatomy can make the procedure unnecessarily difficult and risky. For instance, attempting to use a left-sided forcep on a right maxillary molar prevents the beaks from properly engaging the tooth at the cementoenamel junction (CEJ). This poor fit can lead to crown fractures or slippage, which wastes time and increases the risk of iatrogenic damage. Ensuring you have the correct instrument, like those found in the SurgiMac Hexa Series, is essential. These extraction-focused instruments are designed for a secure grip, but only when the correct left or right orientation is used for the corresponding quadrant.
Pitfall #2: Improper Force or Angulation
Extractions are more about finesse than force. The goal is to luxate the tooth by expanding the alveolar socket, not to pull it out with sheer strength. Applying excessive or uncontrolled pressure can lead to serious complications, including fracturing the maxillary tuberosity or displacing a root tip into the sinus. Instead, use slow, steady, and deliberate movements. Begin with gentle buccal and lingual pressure to expand the socket, followed by controlled rotational movements. High-quality, ergonomic instruments, such as those in our Pro Series, provide the balance and tactile feedback needed to apply precise, measured force, reducing operator fatigue and improving control throughout the procedure.
A Warning on Cowhorn Forceps
Cowhorn forceps, such as the #88L and #88R, are powerful tools reserved for challenging extractions where the molar crown is severely decayed or fractured. Their design, featuring two pointed beaks, is engineered to engage the root bifurcation directly below the fracture line, providing a grip when a conventional approach is impossible. However, this aggressive design demands extreme caution. Improper use can easily lead to iatrogenic damage, including root fractures or trauma to the alveolar bone. These are not all-purpose instruments; they are specialized solutions for when you must apply force below the CEJ. Think of them as a step just before a full surgical extraction. Having a range of high-quality instruments, like our durable Hexa Series forceps, allows you to select the most appropriate and least traumatic tool for every clinical scenario.
Pitfall #3: Poor Access and Visibility
You can’t treat what you can’t see. The posterior maxilla is notoriously difficult to access and visualize, which can complicate an extraction. Poor lighting, inadequate suction, or even glare from overhead lights can obscure your view of the surgical site. To counter this, ensure the patient is positioned correctly and your dental light is optimally aimed. For instruments, consider those designed to minimize reflection. The SurgiMac Titanium Black Series features a non-reflective finish that enhances visibility by reducing glare, allowing for more precise beak placement. Always prioritize a clear field of view and wear appropriate protective equipment from the MacSafe line to maintain safety and focus.
Instrument Care and Patient Safety Protocols
Beyond mastering the technique, ensuring the longevity of your instruments and the safety of your patients is paramount. Proper maintenance and clear protocols are not just best practices; they are fundamental to providing excellent clinical care. From selecting the right tools to guiding post-operative healing, every step contributes to a successful outcome. By integrating these habits into your workflow, you protect your investment in quality instruments and, more importantly, build patient trust through consistent, safe, and effective procedures.
Why Instrument Quality Affects Performance and Safety
The foundation of any safe and effective extraction is the quality of the instrument in your hand. When selecting maxillary molar forceps, prioritize high-grade, durable materials that can withstand the rigors of daily use and sterilization. Instruments designed with precision and ergonomic comfort not only improve your control but also reduce the risk of slippage or instrument failure. For demanding procedures like molar extractions, consider forceps from collections like the SurgiMac Hexa Series, which are crafted from corrosion-resistant stainless steel with non-slip grips to ensure reliability when you need it most. Choosing the right tool is the first step in safeguarding your patient and achieving a clean, predictable extraction.
The Role of High-Grade Materials
The foundation of any safe and effective extraction is the quality of the instrument in your hand. When selecting maxillary molar forceps, prioritize high-grade, durable materials that can withstand the rigors of daily use and sterilization. High-quality forceps, like those in the SurgiMac Pro Series, are crafted from premium-grade stainless steel to ensure durability and precise performance. This isn't just about longevity; it's about consistency. A well-made instrument maintains its integrity and sharpness through countless procedures, giving you the confidence that it will perform predictably every time. This reliability directly translates to safer procedures and better patient outcomes, as you can trust the tool won't fail under pressure.
Meeting Professional Quality Standards
Choosing the correct maxillary molar forceps is a foundational step for a successful and atraumatic extraction. The right instrument not only improves your efficiency but also minimizes the risk of complications like root fractures or damage to adjacent structures. This selection process is a direct reflection of your commitment to professional standards. It requires a thorough assessment of the tooth’s anatomy to match the forceps to the unique demands of the clinical situation. High-quality instruments, like those in the SurgiMac Hexa Series, are built to provide this level of precision for demanding surgical procedures, ensuring you can meet and exceed the standard of care for every patient.
Best Practices for Forceps Sterilization
Meticulous instrument care is non-negotiable for preventing cross-contamination and ensuring patient safety. Every set of forceps must be thoroughly cleaned and sterilized according to established clinical guidelines after each use. This process removes bioburden and eliminates pathogens, protecting both your patients and your team. Implementing a strict infection control protocol is essential for any practice. Using reliable sterilization equipment and protective supplies from our MacSafe line helps create a consistently safe environment. Proper care not only ensures compliance but also extends the life of your instruments, preserving their integrity and performance for countless procedures to come.
Proper Cleaning and Hinge Maintenance
While the beaks get most of the attention, the hinge is the heart of your forceps' functionality. This joint is a common spot for bioburden and debris to accumulate, which can lead to stiffness, corrosion, and eventually, instrument failure. Proper maintenance is key to ensuring smooth operation and extending the life of your tools. After each use, pay special attention to the hinge during cleaning. Manually scrub the joint and ensure it’s fully opened in the ultrasonic cleaner to allow for complete decontamination. Following cleaning and before sterilization, applying a surgical milk or instrument lubricant is a crucial step. This prevents rust and corrosion and keeps the hinge moving freely. Consistent care ensures that even the most durable instruments, like those in our sustainable Eco Series, perform reliably for years.
Essential Post-Extraction Patient Instructions
Your responsibility for patient safety extends beyond the chair. Providing clear, concise post-extraction instructions is a critical step in promoting proper healing and preventing complications. Patients should understand how to manage bleeding, swelling, and discomfort, as well as what to eat and how to maintain oral hygiene around the extraction site. Using high-quality maxillary forceps can help minimize tissue trauma, leading to a smoother recovery, but patient compliance with aftercare instructions is just as important. Taking a few moments to explain the healing process empowers patients to become active participants in their own recovery, reinforcing the quality of care you provide from start to finish.
Frequently Asked Questions
Q: How can I quickly tell a right maxillary molar forcep from a left one?
A: Focus on the beaks. One beak has a pointed tip designed to engage the buccal bifurcation. Hold the forceps as if you’re positioning them in the patient’s mouth—this pointed beak should face the buccal (cheek) side. If the point curves toward the patient’s right, it’s a right-sided forceps (#53R); if it curves left, it’s a left-sided one (#53L).
Q: What forceps should I use if the molar's crown is severely damaged?
A: In cases where the crown cannot provide a reliable grip, cowhorn forceps (such as #88R and #88L) are ideal. Their pointed beaks are designed to engage the furcation area between the roots, allowing you to secure the tooth from below the crown and perform a more controlled extraction.
Q: Why is applying steady buccal pressure the primary movement for maxillary molar extractions?
A: The buccal bone in the maxilla is generally thinner and more flexible than the palatal bone. Applying slow, controlled pressure in the buccal direction expands the socket and helps luxate the tooth. This technique works with the natural anatomy, making the extraction more efficient and less traumatic than relying on direct pulling forces.
Q: Does the finish on the forceps, like a black coating, actually make a difference?
A: Yes, especially for visibility. A matte black finish reduces glare from operatory lighting, improving contrast between the instrument and surrounding tissues. This enhanced visibility allows for more precise beak placement and better control during the procedure.
Q: Besides choosing the right instrument, what's the most critical step for a successful extraction?
A: A comprehensive pre-extraction assessment is essential. Reviewing radiographs helps you understand root morphology, bone density, and proximity to anatomical structures like the maxillary sinus. This preparation guides both your instrument selection and technique, making the procedure safer and more predictable.
Related Articles
- The Ultimate Guide to Dental Extraction Forceps - SurgiMac Dental Supply
- SurgiMac #74 Dental Extracting Forceps
Bleeding Management with Gauze
Clear patient instructions are the cornerstone of a smooth recovery. After the extraction, instruct your patient to bite down firmly on a sterile gauze pad placed over the socket for at least 30 to 60 minutes. This direct pressure is the most effective way to help a stable blood clot form. Reassure them that some minor oozing for the first 24 hours is completely normal. If bleeding seems persistent, they should replace the gauze with a fresh, clean pad and continue to apply firm pressure. Emphasizing the use of sterile dental disposables is a small but critical detail that reinforces a commitment to clean, uncomplicated healing and helps prevent infection at the extraction site.
Dietary and Oral Hygiene Guidelines
Guiding your patient on what to eat and how to maintain oral hygiene is crucial for preventing complications like dry socket. Advise them to stick to a soft-food diet for the first 24 to 48 hours—think yogurt, smoothies, and lukewarm soups. It's essential to warn them against using straws, smoking, or spitting forcefully, as the negative pressure can easily dislodge the protective blood clot. After 24 hours, they can begin gently rinsing with a warm saltwater solution to keep the area clean. They should continue to brush and floss their other teeth as usual but take great care to avoid the extraction site until it has had a chance to heal significantly.
Pain Management and Follow-Up
Managing post-operative discomfort is a key part of the patient experience. Let patients know that some soreness is expected and can typically be managed with over-the-counter pain relievers as directed. Applying a cold pack to the outside of the cheek in 20-minute intervals during the first 24 hours can also significantly reduce swelling and discomfort. It's vital to provide clear instructions on when to contact your office—specifically if they experience severe or worsening pain, uncontrolled bleeding, or signs of infection. This proactive communication, part of a comprehensive patient safety protocol supported by reliable MacSafe protective supplies, ensures patients feel supported and know exactly what to do if complications arise.
Tags
Blog posts
-

, by SurgiMac How to Disinfect with Metrex CaviWipes Correctly
-
, by SurgiMac Suture Sizes From Smallest to Largest: A Complete Guide
-

, by Marketing SurgiMac Stop the Bleeding: 5 Procurement Leaks Draining DSO Margins in 2026


