MacPrevent 5% Sodium Fluoride Varnish with TC...
SKU 90002-Bx
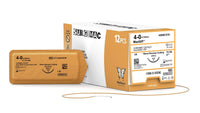
Understand what sterilization pouch color changes mean and how to ensure true sterility for dental instruments with proper infection control protocols.
That color change on a sterilization pouch? It's not the green light you might think it is. Many believe that if the indicator changes color, the tools are sterile. This is a dangerous oversimplification. The sterilization pouch color change only confirms exposure—that the package went through the sterilizer. It doesn't guarantee that the precise conditions of time, temperature, and sterilant concentration were met to kill all microorganisms. Misinterpreting this step can compromise your entire infection control protocol. We'll clarify the difference between exposure and sterility, helping you build a verification process that ensures every instrument is truly safe.

Sterilization pouches are single-use packages designed to hold dental instruments during the sterilization process and maintain their sterility until they are needed for a patient. Think of them as a protective barrier that keeps your meticulously cleaned tools safe from recontamination. Once sealed, these pouches are placed inside a sterilizer, such as an autoclave, where high temperature, steam, or chemical vapor eliminates microorganisms. This step is a non-negotiable part of your practice's infection control protocol, ensuring patient safety and compliance with health standards.
But how do you know if the instruments inside a sealed, opaque pouch have actually been through the sterilizer? That’s where chemical indicators come in. These built-in visual cues are printed directly on the pouch and change color when exposed to the specific conditions required for sterilization. This simple yet brilliant feature allows your team to quickly and confidently distinguish between processed and unprocessed instrument packs, preventing dangerous mix-ups. Using high-quality sterilization supplies is fundamental, as the reliability of these indicators is key to a safe and efficient workflow in any dental practice.
Chemical indicators (CIs) are the small, printed markings on a sterilization pouch that provide immediate visual evidence of processing. Their job is to confirm that a pouch has been exposed to the necessary sterilization parameters, such as a specific temperature, for the required amount of time. When these conditions are met inside the sterilizer, a chemical reaction causes the indicator to change color. This visual confirmation is essential for your workflow, as it helps your team easily separate sterile instrument packs from non-sterile ones. It’s a simple, effective way to avoid the critical error of using a contaminated instrument on a patient, making it a cornerstone of safe instrument handling.
The color change you see on a pouch depends entirely on the sterilization method your practice uses. The two most common methods, steam and ethylene oxide (EO), use different chemical indicators that react to different sterilants. For steam sterilization, which is performed in an autoclave, the indicator typically changes from pink or blue to a dark brown or black. For ethylene oxide sterilization, a lower-temperature process used for more sensitive instruments, the indicator often changes to yellow or another designated color. This clear visual distinction ensures that you can verify at a glance that the pack was processed using the correct method, adding another layer of safety to your protocols.
The color-changing indicators on sterilization pouches are your first visual confirmation that a package has been exposed to a
Understanding what these color changes signify, and what they don't, is fundamental to your office's entire sterilization protocol. While a correct color change confirms that the pouch has gone through the sterilizer, it doesn't, by itself, guarantee that the instruments inside are sterile. It’s an essential piece of the quality assurance puzzle, but not the entire picture. Misinterpreting an indicator or relying on it as the sole proof of sterility can lead to significant patient safety risks. Therefore, correctly reading these indicators is a non-negotiable skill for every member of your clinical team to ensure patient safety and maintain compliance with health standards. It's the foundation upon which a safe and effective instrument reprocessing system is built.
For steam sterilization, the most common method used in dental practices, the external chemical indicator typically changes color from blue to a dark brown or black. This change tells you that the pouch has been exposed to the specific conditions required for steam sterilization, namely a combination of high temperature and saturated steam under pressure. When you see that uniform brown-black color, you can confidently move the pouch to the sterile storage area, knowing it has completed the cycle. It’s a simple yet effective way to avoid accidentally using instruments that haven't been processed.
Ethylene oxide (ETO) sterilization is used for heat-sensitive or moisture-sensitive instruments that cannot withstand the high temperatures of a steam autoclave. The chemical indicators for this process are different and often show a color change from yellow to green. This transformation confirms that the pouch and its contents have been exposed to the ETO gas at the required concentration, humidity, and temperature. Just like with steam indicators, this color change is a process indicator, verifying that the pack has been through the ETO sterilizer and is ready for the next step in your workflow.
To ensure a thorough process, you should be familiar with both internal and external indicators. The external indicator is printed on the outside of the pouch and serves as the initial checkpoint to differentiate processed from unprocessed packs. The internal indicator, however, is placed inside the pouch alongside the instruments. Its color change confirms that the sterilizing agent, whether steam or ETO gas, has actually penetrated the packaging and reached the instruments. Using both types of indicators is a best practice recommended by the CDC and is a cornerstone of a robust infection control program.
It’s a critical question in every dental practice: if the sterilization pouch changes color, are the instruments inside sterile? The short answer is not necessarily. The color change on a chemical indicator is an important first step, but it doesn't provide the complete picture. Understanding the nuances of sterilization monitoring is essential for maintaining patient safety and adhering to infection control standards. True sterility assurance comes from a combination of processes, not just a single visual cue.
The most important distinction to make is between exposure and sterility. A color change on a sterilization pouch simply confirms that the package has been exposed to the sterilizing agent, whether it's steam, heat, or ethylene oxide gas. It helps you quickly distinguish between processed and unprocessed packs, preventing accidental use of contaminated instruments. However, exposure alone doesn't guarantee that the conditions required for complete sterilization were met. Sterility is an absolute state, meaning the complete absence of all viable microorganisms. Achieving this requires the correct temperature, pressure, and time, making a comprehensive infection control protocol indispensable.
Think of a chemical indicator as a simple pass/fail test for one variable. It confirms the presence of a sterilant, but it can't tell you if that sterilant was present for the right amount of time or at the correct concentration to kill highly resistant bacterial spores. An indicator changing color simply shows it was exposed to enough heat to trigger the chemical reaction in the ink. Factors like an overloaded sterilizer, improper packaging, or equipment malfunction could prevent adequate sterilant penetration, leading to a successful color change on a pouch that still contains non-sterile instruments. This is why a multi-faceted approach to sterilization is the only way to ensure every instrument is safe for patient use.
One of the biggest myths is that a successful color change means instruments are ready for use. As we've covered, this only confirms exposure. Another common misconception is that relying on the sterilizer's gauges and readouts (mechanical monitoring) is sufficient. While these readings are important for spotting a potential malfunction, they don't confirm that sterilization conditions were met inside each package. The goal of chemical monitoring is to verify that the sterilizing agent reached the instruments within the package. For true quality assurance, your practice should use a combination of mechanical monitoring, external and internal chemical indicators, and regular biological monitoring (spore testing).
In instrument reprocessing, the mantra "When in doubt, throw it out" serves as your most critical safety guideline. This principle applies to any uncertainty you might face: a sterilization pouch that is torn, damp, dropped, or shows an ambiguous indicator color. While a successful color change confirms a pack was exposed to the sterilizer, it cannot account for every variable that ensures sterility. Factors like an overloaded machine, an incorrect cycle, or a compromised seal can render the contents unsafe, even with a proper color change. Risking patient safety is never an option. The only correct and professional response is to reprocess the instruments, reinforcing a culture of vigilance that is essential to your practice's infection control standards.
Correctly interpreting the color change on a sterilization pouch is a critical step in your practice’s infection control protocol. It’s a visual confirmation that a package has been through the sterilization cycle. However, reading these indicators requires a consistent and careful approach to ensure you get it right every time. Following a clear, multi-step process helps eliminate guesswork and upholds the highest standards of patient safety. Here’s how to properly assess and verify your sterilization pouches before and after processing.
Your inspection should start long before the pouch enters the autoclave. Before loading any instruments, take a moment to examine the empty pouch. Ensure it’s free from any tears, punctures, or defects that could compromise the sterile barrier. The seals should be fully intact. Always handle pouches with clean, dry hands, preferably while wearing exam gloves to prevent contamination. Confirm that the chemical indicator shows its original, pre-sterilization color. This simple check ensures the pouch is in perfect condition to protect your instruments and verifies that you’re starting with an unprocessed item.
After the cycle is complete, the real verification begins. A distinct color change on the external indicator confirms the pouch has been exposed to the necessary sterilizing conditions, like steam or ethylene oxide. This is your first signal for distinguishing processed items from unprocessed ones, preventing a dangerous mix-up. The goal of this chemical monitoring is to confirm that the sterilant reached the pouch. Check that the color has changed uniformly and matches the "processed" color key provided by the manufacturer. Any ambiguity or incomplete change means the pack should not be used and must be reprocessed in your sterilization equipment.
Proper interpretation depends on good visibility. Always inspect pouches in a well-lit area to avoid misreading the color change. Subdued or colored lighting can distort your perception and lead to errors. If you’re ever unsure whether the color has changed sufficiently, compare it directly to an unprocessed pouch or the manufacturer’s reference chart. Some pouches are designed with high-contrast indicators to make this easier. If there is any doubt about the color, it’s best to err on the side of caution. Treat the pouch as non-sterile and run it through another cycle. A strong infection control program leaves no room for uncertainty.
While chemical indicators are designed for accuracy, their reliability isn't solely dependent on the pouch itself. Several external factors can influence whether the color change is a true reflection of the sterilization conditions. A failed or ambiguous color change doesn't always mean the sterilizer failed; it could point to issues with storage, calibration, or the surrounding environment. Understanding these variables is key to maintaining a dependable infection control process and ensuring every instrument is safe for patient use. By controlling these factors, you can trust the results you see on every pouch.
The integrity of a sterilization pouch begins long before it enters the autoclave. Unprocessed pouches must be stored correctly to protect the chemical indicators and the pouch material. It's best to keep them in a location with a room temperature between 59°F and 77°F and a relative humidity of 40% to 60%. Storing them in damp or excessively humid areas can compromise the paper, weaken the seals, and affect the indicator ink before it ever sees a sterilizer. Always check the manufacturer's expiration date on the box, as the chemical indicators can lose their reactivity over time, leading to inaccurate or inconclusive results.
Once an instrument pack is successfully sterilized, how long does it remain sterile? The answer is tied to the integrity of the pouch, not a specific expiration date. As long as the pouch remains clean, dry, and completely intact, the contents can be considered sterile for up to three years. This concept is known as event-related sterility, meaning sterility is maintained until an event—such as a tear, puncture, or exposure to moisture—compromises the barrier. This is why careful handling and proper storage are just as critical as the sterilization process itself. A damaged pouch is a contaminated pouch, regardless of how recently it was processed.
After sterilization, your work isn't finished. Protecting the integrity of the sterile barrier is paramount. Store processed pouches in a clean, dry, and dust-free environment, away from direct sunlight and areas with high humidity. The ideal storage location maintains a controlled room temperature and a relative humidity between 40% and 60%. Avoid cramming pouches into drawers or stacking heavy items on top of them, as this can cause punctures or compromise the seals. Proper storage is a core component of your infection control protocol, ensuring that when you reach for an instrument, it is as safe and sterile as it was when it first came out of the autoclave.
A chemical indicator is only as reliable as the machine it's in. Its purpose is to confirm that the contents of a pouch were exposed to the necessary sterilizing conditions, including specific temperatures, pressures, and contact times. If your sterilizer isn't properly calibrated, it may not reach these critical parameters, even if it completes a cycle. This can result in a pouch where the indicator has changed color, but the instruments inside are not sterile. Regular maintenance and calibration of your autoclave are non-negotiable steps for any clinical practice. This quality assurance process ensures your equipment creates the precise environment required for effective sterilization.
The environment where you store sterilized packages is just as important as where you store unprocessed ones. After a successful cycle, pouches should be kept in a dedicated, environmentally controlled area that is clean, dry, and free from temperature extremes. Excessive handling or storing pouches in wet or dirty locations can compromise the sterile barrier, introducing contaminants and rendering the instruments unsafe for use, regardless of what the indicator says. High-quality MacSafe sterilization pouches are designed with strong seals to protect against contamination, but proper post-sterilization handling and storage protocols are essential to maintaining instrument sterility until the point of use.
Selecting the right sterilization pouch is a critical decision for any dental practice. While they may seem like a simple disposable, these pouches are a key component of your infection control protocol. A high-quality pouch does more than just hold instruments; it provides a reliable sterile barrier and clear visual confirmation that the
Not all sterilization pouches are interchangeable. The material a pouch is made from directly dictates which sterilization methods it can be used with, and using the wrong one can lead to a failed cycle, damaged instruments, or a compromised sterile barrier. The science is straightforward: the pouch must allow the sterilizing agent to penetrate while blocking microorganisms from re-entering after the cycle. The most common pouches are made from a combination of medical-grade paper and plastic film, but specialized materials like Tyvek are required for specific low-temperature processes. Understanding this distinction is the first step in selecting the right sterilization supplies for your practice’s specific needs and ensuring every cycle is effective.
For most dental practices using steam autoclaves or Ethylene Oxide (EO) sterilizers, paper and plastic pouches are the industry standard. These pouches feature a medical-grade paper side that is porous enough to allow the sterilant—whether it's steam or EO gas—to penetrate and neutralize microorganisms on the instruments inside. The other side is a clear, multi-layered plastic film that provides a durable barrier against contaminants after the cycle is complete, while also allowing for easy identification of the contents. High-quality options, like MacSafe sterilization pouches, are specifically engineered for these common methods, ensuring reliable performance and clear, accurate indicator results every time.
When sterilizing heat-sensitive or delicate instruments that cannot withstand the high temperatures of a steam autoclave, low-temperature methods like Vaporized Hydrogen Peroxide (VHP) are necessary. These advanced processes require a different type of pouch material, as the cellulose in standard paper pouches can absorb the hydrogen peroxide, reducing its effectiveness. Tyvek, a brand of flashspun high-density polyethylene fibers, is the material of choice for VHP. It is resistant to moisture and can withstand the deep vacuum and chemical exposure of VHP cycles without degrading. This ensures that sensitive equipment can be sterilized effectively while maintaining its structural integrity and function.
Beyond the base material, sterilization pouches come with various features designed to enhance safety, efficiency, and ease of use. From the way they are sealed to the small details that facilitate aseptic opening, these features play a significant role in your daily workflow and overall infection control success. Choosing between self-sealing and heat-sealing pouches, for example, depends on your practice’s volume, equipment, and preferences. Meanwhile, built-in safety features like chevron seals and thumb notches are non-negotiable for ensuring instruments remain sterile until the moment they are used. Understanding these options helps you select a pouch that not only meets but exceeds clinical standards.
Sterilization pouches are available in two main closure types: self-seal and heat-seal. Self-seal pouches, like many in the MacSafe line, come with a pre-folded end and an adhesive strip, allowing for a quick and easy manual seal without any extra equipment. They are perfect for practices that value convenience and efficiency in their daily operations. Heat-seal pouches, on the other hand, require a dedicated heat-sealing machine to create a secure, uniform closure. While this requires an initial investment in equipment, it provides a consistent and tamper-evident seal, which is often preferred in high-volume clinics or surgical settings for its unmatched reliability and process control.
High-quality pouches incorporate several design features to ensure both a secure seal and an aseptic opening. A chevron seal, a V-shaped seal at one end of the pouch, is designed to prevent sharp instruments from poking through and provides a clean, fiber-free opening. This, combined with a thumb notch, gives you a designated spot to grip and peel the pouch open without touching and contaminating the contents. Additionally, reinforced corner seals help prevent the edges from curling during sterilization, which could create channels for contaminants to enter post-cycle. These features, along with internal and external chemical indicators, work together to provide a complete system for safe and effective instrument reprocessing.
A dependable sterilization pouch should feature both internal and external chemical indicators. The external indicator, located on the outside of the pouch, changes color after being exposed to the sterilant. This provides an immediate visual cue that the pack has been through a sterilization cycle, making it easy to distinguish between processed and unprocessed instruments. As one source notes, "A color change indicates that the unit has been directly exposed to the sterilization process." The internal indicator, which is printed on the inside or included as a separate strip, confirms that the sterilizing agent (like steam) has penetrated the pouch and reached the instruments inside, ensuring the necessary conditions for sterilization were met at the point of contact.
The effectiveness of a chemical indicator depends on its readability. Look for pouches with indicators that produce a sharp, distinct color change. Vague or subtle shifts can lead to misinterpretation, creating a significant risk in a clinical setting. The contrast between the pre- and post-sterilization colors should be dramatic and unambiguous, allowing your team to verify the results quickly and confidently. This clear visual evidence is essential for quality control and helps maintain accurate compliance records. A permanent color change serves as a reliable confirmation that the pack was properly processed in the autoclave, supporting your practice’s documentation protocols.
The physical construction of a sterilization pouch is just as important as its indicators. The pouch must be made from durable, medical-grade materials that can withstand the heat and pressure of the autoclave without tearing or puncturing. Pay close attention to the seals; high-quality pouches often feature multi-channel or triple-sealed edges to prevent bursting and ensure a complete sterile barrier after processing. This robust construction is fundamental to maintaining sterility until the moment of use. Choosing reliable pouches is a core part of any effective sterilization workflow and aligns with the principles of total practice safety found in our MacSafe line of infection control products.
Understanding the regulatory framework for sterilization pouches is key to ensuring compliance and patient safety in your practice. The U.S. Food and Drug Administration (FDA) classifies sterilization pouches as Class II medical devices, which means they are subject to special controls to ensure their effectiveness. To bring these products to market, manufacturers must often complete the 510(k) premarket notification process, where they demonstrate that their device is substantially equivalent to an existing, legally marketed product. This rigorous process ensures that the packaging and its manufacturing align with strict quality standards. This FDA oversight provides an essential layer of assurance that the pouches you rely on for your infection control protocols are designed to perform safely and reliably, protecting both your patients and your practice.
A successful sterilization process relies on more than just high-quality pouches and equipment; it requires a consistent, systematic approach. Integrating a few key best practices into your daily workflow ensures that every instrument is processed correctly, providing safety for both your patients and your team. These protocols help eliminate guesswork and create a reliable system for infection control that your entire practice can depend on.
How you prepare and load your pouches is just as important as the sterilization cycle itself. Proper loading ensures the sterilizing agent, whether it's steam or gas, can penetrate the packaging and reach every surface of the instruments inside. Overloading a pouch can create barriers that block penetration, while improper placement in the sterilizer can lead to failed cycles. Always leave about one inch of space around the instruments and never stack pouches flat on top of one another. Instead, use a rack to position them on their side. This simple step allows for proper circulation and drainage, which is critical for effective sterilization.
To ensure a pouch can do its job, it needs to be filled and sealed correctly. Start by choosing a pouch that is the right size for the instrument—it should be large enough to avoid stressing the seams but not so large that the instrument can slide around excessively. Pouches are best suited for lightweight, flat items. Once the instrument is inside, expel as much air as possible before sealing. For self-sealing pouches, peel the protective strip and fold along the perforated line, pressing firmly from the center outwards to create a tight, wrinkle-free seal. This secure closure is essential for creating a complete sterile barrier that protects the contents until they are needed.
While not a routine practice for every instrument, double pouching is sometimes used to aid in aseptic presentation, especially in surgical settings. If your practice chooses to double pouch, it's critical to follow the manufacturer’s instructions for use (IFU), as not all pouches are validated for this practice. The key is to ensure the sterilant can still penetrate both layers. This is achieved by placing the inner pouch facing the same direction as the outer pouch (paper-to-paper and plastic-to-plastic). This method allows for proper airflow and sterilant contact, ensuring the instruments inside achieve sterility while providing an extra layer for handling during procedures.
Accurate labeling is a non-negotiable part of your infection control protocol, as it ensures traceability for every instrument. The cardinal rule is to never write directly on the paper side of the pouch, as the ink can bleed through and compromise the sterile barrier. Instead, always write on the plastic side, outside of the sealed area. Your label should include the sterilizer used, the cycle or load number, and the date of sterilization. This information is crucial for quality assurance and allows you to easily retrieve a specific load in the unlikely event of a sterilization failure or instrument recall, protecting both your patients and your practice.
Sterilization pouches are designed and validated for one-time use only. Attempting to reuse a pouch is a significant patient safety risk and goes against all established infection control standards. The materials, including the paper, plastic film, and adhesive seal, are engineered to withstand a single sterilization cycle. Re-processing a pouch can degrade these materials, leading to microscopic tears, weakened seals, and a compromised sterile barrier. The adhesive on a self-sealing pouch, for example, is not designed to create a reliable seal a second time, which could allow microorganisms to enter after the cycle is complete.
The principle of "when in doubt, throw it out" is paramount. If a sterilized pouch is dropped, becomes wet, or shows any sign of damage like a tear or puncture, its sterility is considered compromised. The contents must be re-cleaned, re-packaged in a new pouch, and put through another full sterilization cycle. There are no shortcuts when it comes to patient safety. Using high-quality, reliable dental disposables, including single-use pouches from trusted lines like MacSafe, ensures your practice consistently meets the highest standards of care and compliance.
Your sterilization protocols are only as strong as the team implementing them. A comprehensive staff training program ensures everyone who handles instruments understands the entire process, from cleaning and packaging to sterile storage. Training should cover how to properly inspect pouches, operate the sterilizer, interpret chemical indicators, and document results. It’s also essential to establish clear guidelines for handling and storing sterile packages to maintain their integrity. According to the Healthcare Sterile Processing Association (HSPA), the sterile storage area must be kept clean, dry, and free of dust. Consistent training builds confidence and reinforces the critical role each team member plays in your practice's infection prevention strategy.
Thorough documentation is the cornerstone of a reliable quality assurance program. As Burkhart Dental notes, monitoring the reprocessing of instruments is a requirement for ensuring patient safety. Maintaining a detailed sterilization log for every cycle provides a traceable record that is essential for compliance and troubleshooting. Your log should include the date, cycle number, load contents, cycle parameters (time, temperature, pressure), and the results of all chemical and biological indicators. Be sure to have the operator initial each entry. This meticulous record-keeping not only meets regulatory standards but also provides invaluable data if you ever need to investigate a potential sterilization failure.
While chemical indicators are essential for differentiating processed from unprocessed packs, they are only one piece of the sterility assurance puzzle. True confidence in your infection control protocol comes from a multi-layered approach that verifies the sterilization process is actually working to kill microorganisms. This means going beyond the visual confirmation of a color change and implementing a system that includes mechanical, chemical, and biological monitoring. Mechanical monitoring involves checking the sterilizer’s gauges and readouts for time, temperature, and pressure during each cycle. Chemical monitoring uses internal and external indicators to confirm sterilant exposure. The final, and most definitive, layer is biological monitoring, which directly challenges the sterilizer's lethality. Together, these three pillars form a comprehensive quality assurance system that ensures every instrument is truly sterile and safe for patient use.
Biological indicators (BIs), often called spore tests, are the gold standard for verifying that your sterilizer is effectively killing microorganisms. Unlike chemical indicators that only confirm exposure to sterilizing conditions, BIs directly test the machine's ability to kill. Each BI contains a known number of highly resistant bacterial spores, such as Geobacillus stearothermophilus, which are far tougher to eliminate than the common microbes found in a dental practice. The logic is simple: if your sterilizer can kill these super-resilient spores, it can certainly kill everything else. As one expert source confirms, BIs are the most reliable method for verifying that sterilization conditions were met. Integrating regular spore testing into your workflow is a non-negotiable step for ensuring patient safety and meeting regulatory standards.
Running a biological indicator test is a straightforward process that should be a routine part of your weekly protocol. First, place the BI vial inside a representative instrument pack and position it in the most challenging area of the sterilizer—typically the bottom shelf near the door. Run a normal, fully loaded cycle. Once complete, retrieve the BI, allow it to cool, and then activate it according to the manufacturer's instructions, which usually involves crushing an internal glass ampule. Next, incubate the processed BI along with a control BI (from the same lot but not sterilized) for the specified time. A successful test is one where the processed BI shows no color change, while the control BI does change color, confirming the spores were viable. A color change in the processed vial indicates a sterilization failure.
To ensure consistent performance, the CDC recommends that you conduct biological indicator testing on your sterilizer at least once a week. This regular cadence helps you catch potential equipment malfunctions before they become a systemic problem. In addition to weekly tests, you should also run a BI test for every load that contains implantable devices, as the standard of care for these items is exceptionally high. It's also critical to run a test after any sterilizer repairs or when introducing a new type of packaging material. If a test fails, you must immediately take the sterilizer out of service, review your procedures, and run three consecutive empty-chamber BI tests. The sterilizer should not be returned to service until you have three successful results.
After a sterilization cycle is complete, it’s crucial to inspect every package for moisture. A "wet pack" is any pouch that is damp or has visible water droplets on it after the sterilizer door has been opened and the items have cooled. Wet packs are considered contaminated because moisture can act as a wick, drawing bacteria and other microorganisms from the outside environment through the pouch material. This compromises the sterile barrier you worked so hard to create. Any wet pack must be completely reprocessed—this means opening it, re-cleaning and drying the instruments, and placing them in a new pouch like those from our MacSafe line before running them through another full sterilization cycle. Common causes include overloading the sterilizer, improper instrument placement, or an insufficient drying time setting, so always review your loading protocols if you encounter this issue.
Choosing the right sterilization supplies is a critical decision that directly impacts patient safety and your practice’s reputation. To maintain the highest standards of care, it’s essential to partner with a supplier that provides reliable, compliant, and effective infection control products. Your sterilization pouches, indicators, and protocols are the foundation of a safe clinical environment, ensuring every instrument is ready for use.
When selecting sterilization pouches, always prioritize products that meet stringent industry specifications. The chemical indicators on these pouches are designed to provide a clear visual confirmation that items have been exposed to sterilizing conditions. This process is a fundamental part of your quality assurance protocol. Proper compliance and traceability are not just about meeting regulations; they are about creating a verifiable record of safety for every patient. Using high-quality, compliant supplies demonstrates a commitment to excellence and provides peace of mind for both your team and the people you treat.
At SurgiMac, we provide a comprehensive range of infection control products designed to support the needs of modern dental practices. Our MacSafe line includes sterilization pouches engineered with durable materials and strong seals to maintain sterility long after the cycle is complete. These pouches feature clear, easy-to-read internal and external indicators that help you distinguish between processed and unprocessed instruments at a glance. By equipping your practice with professional-grade supplies, you can streamline your sterilization workflow, ensure consistent results, and uphold the highest standards of patient care with confidence.
Does a color change on the pouch mean my instruments are definitely sterile?
No. A color change on the external indicator confirms that the pouch has been exposed to the sterilization process, but it does not verify that the instruments inside are sterile. Sterility depends on the sterilizer achieving the correct combination of time, temperature, pressure, and sterilant penetration. Proper sterilization assurance requires routine monitoring using mechanical, chemical, and biological indicators.
Why are both internal and external indicators necessary?
External and internal indicators serve different purposes. The external indicator verifies that the package has been processed through a sterilization cycle, making it easy to distinguish processed from unprocessed packs. The internal indicator confirms that the sterilizing agent successfully penetrated the pouch and reached the instruments inside. Using both provides a more reliable assessment of the sterilization process and supports best practices for infection control.
What should I do if an indicator doesn't change color correctly or looks ambiguous?
If the indicator fails to change color as expected or the result is unclear, the package should be considered non-sterile. Do not use the instruments. Instead, inspect the sterilization process for possible issues, repackage the instruments in a new sterilization pouch, and repeat the complete sterilization cycle. When in doubt, it is always safest to reprocess the instruments.
How does the way I load the sterilizer affect the pouches?
Proper loading is essential for effective sterilization. Sterilization pouches should be placed on edge or in a pouch rack whenever possible to allow adequate circulation of steam or gas around each package. Avoid overcrowding or stacking pouches tightly together, as this can restrict sterilant penetration and prevent uniform exposure. Following the sterilizer manufacturer's loading recommendations helps ensure consistent and effective sterilization.
Can I use any sterilization pouch for either steam or ethylene oxide (ETO) sterilization?
No. Sterilization pouches are designed and validated for specific sterilization methods. Steam sterilization pouches contain chemical indicators that respond to heat and steam, while ETO sterilization pouches use indicators formulated for ethylene oxide gas at lower temperatures. Always use pouches that are compatible with your sterilization system and follow the manufacturer's instructions to ensure accurate monitoring and effective sterilization.