


Dental Sterilization Pouches: A Complete Guide
- , by SurgiMac
- 47 min reading time
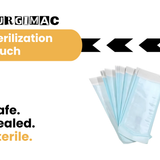
Get expert tips on dental sterilization pouches, including proper use, storage, and compliance to keep your instruments sterile and your patients safe.
A perfect sterilization cycle can be undone by one simple mistake—and it usually involves the packaging. An overstuffed pouch, a weak seal, or a tiny puncture can render instruments non-sterile, creating a significant risk for cross-contamination. These errors are easy to make in a busy clinic, but they are also completely preventable. This guide is your go-to resource for mastering dental sterilization pouches. We cover everything from proper loading and sealing to correct storage, helping you create a foolproof system that protects your patients, your team, and your valuable instruments.
Key Takeaways
- Match your pouch to your process: Always confirm that your sterilization pouches are compatible with your specific sterilizer—whether steam, dry heat, or chemical vapor—and are the right size for your instruments. This is your first line of defense against failed cycles and compromised patient safety.
- Seal and store with care: A perfect sterilization cycle can be undone by a poor seal or improper storage. Avoid overfilling pouches, protect sharp instrument tips, and store sterile packs in a clean, dry, and protected environment to maintain sterility until the moment of use.
- Read the signs for safety: Chemical indicators offer essential visual confirmation. Make it a rule to check both the external indicator for cycle exposure and the internal indicator for sterilant penetration to ensure every instrument is safe for patient care and compliant with CDC guidelines.

What Are Dental Sterilization Pouches?
Dental sterilization pouches are single-use packaging systems designed to keep instruments sterile after they have been processed in a sterilizer. Think of them as a protective barrier that maintains the sterility of your tools from the moment they leave the autoclave until you’re ready to use them chairside. As a critical component of any effective infection control program, these pouches are essential for ensuring both patient safety and regulatory compliance in a modern dental practice.
The construction of a typical pouch is simple yet brilliant, featuring a medical-grade paper side and a transparent plastic film side. This dual-material design serves a specific purpose: the paper is porous, allowing the sterilizing agent—whether it's steam, chemical vapor, or gas—to penetrate and neutralize any microorganisms on the instruments. The clear film allows for easy identification of the contents without needing to open the pouch and break the sterile barrier. Once the sterilization cycle is complete, the pouch is sealed to protect the instruments from airborne contaminants, dust, and moisture during storage. This makes them a non-negotiable tool for preventing cross-contamination and upholding the highest standards of patient care.
How Do Sterilization Pouches Actually Work?
The function of a sterilization pouch is straightforward but precise. First, you place clean and dry instruments inside, making sure not to overfill it, which could compromise the seal. The pouch is then sealed shut, either with a built-in adhesive strip (self-sealing) or with a heat sealer. During the sterilization cycle, the sterilant penetrates the paper side of the pouch to sterilize the instruments inside. Once the cycle is complete and the pouch is dry, the paper’s pores close, creating a microbial barrier. This barrier keeps the contents sterile as long as the pouch remains clean, dry, and intact. Most pouches also feature built-in chemical indicators that change color, providing visual confirmation that the pouch has been exposed to the sterilization process.
Which Sterilization Methods Use Pouches?
Not all sterilization pouches are created equal; they are specifically designed for certain sterilization methods. Using the wrong pouch can lead to a failed cycle and compromise instrument sterility. The most common methods in dental settings are steam sterilization (autoclave), dry heat, and unsaturated chemical vapor. Paper and plastic combination pouches are the most widely used and are typically compatible with steam autoclaves and Ethylene Oxide (EO) sterilizers. It is critical to always verify that your pouch is compatible with your sterilization unit. Products within the MacSafe line are clearly labeled with their intended sterilization methods, helping you match the right pouch to your equipment for reliable and compliant results.
Common Pouch Materials
The design of a sterilization pouch is brilliantly simple yet highly effective, typically featuring a dual-material construction. One side is made from medical-grade paper, which is specifically engineered to be porous. This porosity is critical because it allows the sterilizing agent, such as steam or chemical vapor, to penetrate the pouch and neutralize any microorganisms on the instruments inside. The other side is a transparent plastic film, which serves the practical purpose of allowing for quick and easy identification of the contents. This clear view eliminates the need to open a pouch to see what’s inside, preserving the sterile barrier until the moment of use and supporting an efficient clinical workflow.
The materials used must be strong enough to withstand the rigors of the sterilization process without tearing or getting punctured. The plastic side is often a laminate of polypropylene and polyethylene, chosen for its durability and clarity. The paper must be robust enough to hold up against sharp instrument tips while maintaining its porous nature. When selecting sterilization supplies, it's essential to choose pouches made from high-quality materials that won't compromise the sterile barrier. A weak seal or a small tear can render the entire sterilization cycle useless, which is why dependable construction is a non-negotiable feature for maintaining infection control standards and ensuring patient safety.
Why Your Dental Practice Can't Skip Sterilization Pouches
Sterilization pouches are far more than simple packaging; they are a critical component of your infection control protocol. They serve two foundational functions for any successful dental practice: protecting your patients and ensuring you meet professional standards of care. Think of them as the final, crucial step that locks in the sterility of your instruments, from the moment they leave the autoclave until they are ready for use.
Without a reliable pouch, the entire sterilization process is compromised. Instruments can be re-contaminated by airborne particles, improper handling, or poor storage. This not only puts patients at risk but also undermines the trust they place in your practice. Furthermore, regulatory bodies like the CDC and state dental boards have clear guidelines on instrument processing, and proper pouching is a key part of that compliance. Using high-quality, appropriate pouches demonstrates a commitment to excellence and safety, safeguarding your patients, your team, and your practice's reputation. It’s a simple tool that plays a massive role in your daily operations.
Putting Patient Safety and Infection Control First
At its core, proper sterilization is all about protecting people. Sterilization pouches act as a validated barrier, keeping your dental instruments sterile from the autoclave to the chairside. This is essential for preventing cross-contamination and protecting both patients and staff from healthcare-associated infections (HAIs). When an instrument is sealed in a pouch, you create a self-contained sterile environment that maintains sterility until the moment of use.
Using an incompatible or damaged pouch can lead to a failed sterilization cycle, potentially damaging expensive instruments and creating a significant patient safety risk. A robust infection control protocol, which includes reliable pouches and protective supplies from lines like MacSafe, is the bedrock of patient trust. It shows your commitment to providing the highest standard of care.
Understanding Instrument Risk Levels
To ensure every instrument is processed correctly, the CDC categorizes them based on their risk of transmitting infection. This framework, known as the Spaulding Classification, divides instruments into three categories: critical, semi-critical, and non-critical. Understanding where each tool falls is fundamental to your practice’s infection control strategy because it dictates the required level of reprocessing. Following these guidelines ensures you meet the standard of care and provide the safest environment for your patients. It removes the guesswork from your sterilization workflow and creates a clear, repeatable system for your entire team to follow.
Critical Instruments
Critical instruments are those that penetrate soft tissue, contact bone, or enter into or contact the bloodstream. Because they present the highest risk of infection transmission, they must be sterilized after each use, typically using a steam autoclave. This category includes surgical instruments like scalpels, bone chisels, and periodontal scalers. All critical instruments must be packaged in a sterilization pouch before processing to maintain sterility during storage. Properly handling high-quality tools, such as those from the Pro Series or Hexa Series, with a meticulous sterilization protocol is essential for protecting both your patients and your investment in precision instruments.
Semi-Critical Instruments
Semi-critical instruments are those that come into contact with mucous membranes or non-intact skin but do not penetrate soft tissue. Examples include mouth mirrors, reusable impression trays, and amalgam condensers. These items should be sterilized whenever possible. If an instrument is heat-sensitive and cannot be sterilized, it must undergo, at a minimum, high-level disinfection. According to the CDC guidelines, sterilization is the preferred method for all heat-tolerant semi-critical instruments. When you choose to sterilize them, they must be cleaned and placed in a sterilization pouch just like critical instruments to prevent contamination before their next use.
Non-Critical Instruments
Non-critical instruments and devices are those that only contact intact skin. These items, such as X-ray heads, blood pressure cuffs, and curing lights, have the lowest risk of transmitting infection. Sterilization is not required for these instruments; instead, they should be cleaned and then disinfected with a low-level or intermediate-level disinfectant between patients. While sterilization pouches are not necessary for non-critical items, maintaining a rigorous cleaning and disinfection schedule is a key part of a comprehensive infection control plan. This practice helps minimize the risk of cross-contamination in the clinical environment and ensures every surface a patient might touch is safe.
Meeting CDC and FDA Compliance with Ease
Using sterilization pouches isn't just a clinical best practice—it's a professional requirement. The Centers for Disease Control and Prevention (CDC) outlines specific guidelines for instrument processing in dental settings, and using FDA-cleared pouches is a critical part of meeting these standards. The FDA classifies sterilization pouches as Class II medical devices, meaning they must be proven to be safe and effective for their intended use.
This ensures that the pouches you use can withstand the sterilization process and maintain a sterile barrier until the point of use. Adhering to these regulations protects your practice from potential liability and ensures you are aligned with the national standard of care. Sourcing your sterilization supplies from a trusted provider ensures you have access to products that meet these stringent requirements, simplifying your compliance efforts.
Regulations and Standards for Sterilization
Navigating the landscape of sterilization regulations is essential for any dental practice that prioritizes safety and compliance. These rules aren't just suggestions; they are enforceable standards set by federal agencies to protect both patients and healthcare professionals. Adhering to these guidelines, from the FDA's device classifications to OSHA's workplace safety mandates, forms the backbone of a credible infection control program. Understanding these requirements ensures that every instrument you use is not only clean but verifiably sterile, safeguarding your practice's reputation and, most importantly, the well-being of everyone who walks through your doors. It’s about creating a system where safety is standardized, repeatable, and reliable every single day.
FDA Classification and ISO Standards
Using the right sterilization pouch is a non-negotiable aspect of professional dental care. The U.S. Food and Drug Administration (FDA) classifies sterilization pouches as Class II medical devices, which means they are subject to stringent performance standards to prove they are safe and effective. This classification ensures that every FDA-cleared pouch can withstand the rigors of a sterilization cycle and maintain a sterile barrier. Furthermore, the Centers for Disease Control and Prevention (CDC) provides clear guidelines for instrument processing, and using these validated pouches is a fundamental step in meeting the national standard of care. Consistently using the correct supplies is the easiest way to build compliance directly into your workflow.
The Role of OSHA in Dental Sterilization
While the CDC and FDA focus on patient safety and device efficacy, the Occupational Safety and Health Administration (OSHA) is dedicated to protecting your team. OSHA’s Bloodborne Pathogens Standard mandates a safe work environment, which directly impacts your sterilization protocol. This includes providing and ensuring the use of appropriate personal protective equipment (PPE) when handling contaminated instruments, establishing clear procedures for instrument cleaning and sterilization, and training staff on all safety measures. Equipping your team with reliable PPE, such as the gloves and lab coats found in the MacSafe collection, is a critical part of fulfilling your OSHA obligations and fostering a culture of safety in your practice.
The Complete Sterilization Workflow: A CDC-Guided Process
A successful sterilization outcome depends on a meticulous, step-by-step process where every detail matters. From the moment an instrument is used until it’s ready for the next patient, following a consistent workflow is the only way to guarantee sterility. The CDC has outlined a clear sequence for instrument reprocessing that minimizes the risk of cross-contamination and ensures predictable results. This workflow isn't just a series of tasks but a continuous loop of safety protocols that should be standardized across your entire practice. By treating each step—from cleaning to storage—with the same level of importance, you create a robust system that protects your patients, your team, and your instruments.
Step 1: Pre-Cleaning and Cleaning
The sterilization process begins long before the autoclave is even turned on. The first and most critical step is thoroughly cleaning instruments to remove all visible bioburden, such as blood, saliva, and tissue. Sterilants cannot effectively penetrate organic debris, so if an instrument isn't clean, it can't be sterilized. This is typically done through manual scrubbing or with an ultrasonic cleaner, but it must always be performed while wearing heavy-duty utility gloves and other appropriate PPE to prevent sharps injuries. This initial cleaning phase is foundational; without it, the subsequent steps in the workflow are rendered ineffective, compromising the entire process.
Step 2: Rinsing and Drying
After cleaning, instruments must be thoroughly rinsed with water to remove any residual cleaning agents or loosened debris. Leaving detergents on instrument surfaces can interfere with the sterilization process and may even cause damage to your equipment over time. Once rinsed, the instruments must be completely dried. Any remaining moisture can cause corrosion and pitting on your valuable tools and, more importantly, can compromise certain sterilization methods like dry heat or chemical vapor. Taking the time to ensure every instrument is perfectly dry is a simple but crucial step for maintaining instrument integrity and ensuring the sterilant can do its job effectively.
Step 3: Packaging Instruments
With instruments clean and dry, the next step is to package them correctly. Place instruments into a sterilization pouch, being careful not to overfill it, as this can strain the seams and compromise the seal. Arrange them in a single layer to allow for adequate sterilant circulation, and use tip protectors on sharp or delicate instruments to prevent them from puncturing the pouch. Whether you use a self-sealing pouch or one that requires a heat sealer, ensure the seal is complete and airtight. Proper packaging is what creates the sterile barrier that will protect your dental instruments until they are needed for patient care.
Step 4: Sterilization
Once packaged, instruments are ready for the sterilizer. It's essential to load the autoclave correctly to ensure the sterilant—typically steam under pressure—can reach all surfaces. Place pouches on their edges in racks or baskets, making sure they don't overlap. This allows for proper circulation and drainage. Always follow the manufacturer's instructions for the specific cycle time, temperature, and pressure required for your load. After the cycle, check that the chemical indicators on the outside of the pouches have changed color, providing the first visual confirmation that the packages have been exposed to the sterilization process.
Step 5: Sterile Storage
After the sterilization cycle is complete and the pouches are fully dry, they must be stored in a way that protects their integrity. The ideal storage area is a clean, dry, enclosed space, such as a cabinet or drawer, away from high-traffic areas and potential sources of moisture or contamination. Before placing an instrument tray-side, always inspect the pouch for any signs of compromise, like tears, punctures, or a broken seal. A pouch that is damaged in any way is no longer considered sterile. Proper storage is the final step in preserving the sterility you worked so carefully to achieve.
Designing an Effective Sterilization Area
The physical layout of your sterilization area is just as important as the process itself. To prevent cross-contamination, the space should be designed to support a one-way workflow, moving from dirty to clean. This means having distinct, physically separate areas for: 1) receiving and cleaning contaminated instruments, 2) packaging and preparation, 3) sterilization, and 4) sterile storage. This linear flow ensures that contaminated items never cross paths with sterile ones, minimizing the risk of procedural errors. A well-organized sterilization center is the operational heart of your practice’s infection control program and a key investment in patient safety.
What to Look For in a Quality Sterilization Pouch
When you're stocking your clinic, it's easy to think one sterilization pouch is just like another. But the small details make a huge difference in maintaining a sterile environment and ensuring patient safety. High-quality pouches are designed with specific features that verify sterilization, protect instruments from contamination, and hold up under pressure. Knowing what to look for helps you select a product that not only meets compliance standards but also supports a seamless and safe workflow for your team. Let's walk through the essential features every reliable sterilization pouch should have.
Why Medical-Grade Materials and ISO Certification Matter
The foundation of a reliable sterilization pouch is its construction. Quality pouches are made from medical-grade paper on one side and a transparent, puncture-resistant plastic film on the other. This design is intentional: the paper allows sterilizing agents like steam or chemical vapor to penetrate, while the film provides a durable barrier against microbes after the cycle is complete. To ensure consistent quality, look for pouches manufactured in an ISO-certified facility. This certification means the product is made under strict quality controls, giving you confidence that every pouch meets the necessary safety and performance standards for your practice’s sterilization protocols.
Reading the Signs: Internal vs. External Indicators
Visual confirmation is key to a confident sterilization process. That’s why quality pouches include both internal and external chemical indicators. The external indicator, printed on the outside of the pouch, changes color once it has been exposed to a sterilization cycle. This helps you quickly distinguish processed from unprocessed packs. The internal indicator, placed inside with the instruments, provides an even greater level of assurance. It confirms that the sterilizing agent successfully penetrated the pouch and reached the instruments themselves. These built-in indicators are a critical component of your practice’s infection control system, offering a clear, at-a-glance verification of proper processing.
Self-Sealing or Heat-Sealing: Which Is Right for You?
How a pouch is sealed is crucial for maintaining sterility until the point of use. You’ll generally find two types of closures: self-sealing and heat-sealing. Self-sealing pouches are incredibly convenient for a busy practice. They feature a pre-folded end with an adhesive strip—simply peel and press to create a secure closure without any extra equipment. Heat-sealing pouches, on the other hand, require a heat-sealing device to create a solid, airtight seal. While they involve an extra step, many high-volume clinics prefer them for their uniform and exceptionally strong closure. The right choice depends entirely on your practice’s workflow, volume, and equipment availability.
The Advantage of a Heat-Sealed Pouch
While self-sealing pouches offer clear convenience, the superior security of a heat-sealed pouch makes it the preferred choice for practices prioritizing absolute certainty. A heat sealer delivers a perfectly uniform, airtight closure every time, virtually eliminating the risk of human error that can cause an incomplete seal. This consistent and exceptionally strong barrier offers enhanced protection against microbial contamination during storage and handling—a cornerstone of any effective infection control protocol. For high-volume clinics where reliability is non-negotiable, a heat-sealing system for your sterilization pouches ensures every instrument pack meets the highest standards of safety, protecting your patients and your practice.
Choosing the Perfect Pouch Size for Your Instruments
Using the correct pouch size is one of the most critical yet overlooked steps in the sterilization process. A pouch that is too small can be stressed or punctured by the instrument during handling, creating a breach in the sterile barrier. Conversely, a pouch that is too large allows the instrument to slide around, which can also compromise the seal or damage delicate tips. As a best practice, choose a pouch that leaves about one inch of space around the instrument on all sides. This ensures a secure seal and allows for adequate circulation of the sterilant. Stocking a variety of sizes ensures all your dental instruments, from explorers to forceps, are packaged correctly every time.
Verifying Sterilization: A Three-Part Approach
Running a sterilization cycle is just the first step. True confidence that your instruments are sterile comes from a multi-layered verification process. This comprehensive approach combines mechanical, chemical, and biological monitoring to ensure every instrument is safe for patient use. It’s not about choosing one method over another; it’s about using all three to create a system of checks and balances that leaves no room for error in your practice’s infection control protocol.
Mechanical Indicators
Mechanical indicators are the built-in gauges, screens, and printouts on your sterilizer. They track the cycle's vital signs—time, temperature, and pressure. At the end of every cycle, your first step should be to check these readings to confirm the machine operated at the correct parameters set by the manufacturer. This tells you that the sterilizer completed its programmed cycle as intended. While essential, this is only the first checkpoint. It confirms the machine ran correctly, but it doesn't verify that the conditions inside each individual pouch were sufficient to achieve sterility.
Chemical Indicators
Chemical indicators provide the visual proof that sterilization conditions were met inside each package. Quality pouches, like those in our MacSafe line, include both external and internal indicators. The external indicator changes color to show it has been through a cycle, helping you easily distinguish processed from unprocessed packs. The internal indicator is even more critical—it confirms that the sterilant, such as steam, successfully penetrated the packaging and reached the instruments themselves. Checking both indicators on every pouch is a non-negotiable step for confirming proper processing and ensuring patient safety.
Biological Indicators (Spore Tests)
Often called spore tests, biological indicators are the gold standard for verifying that your sterilizer is effectively killing microorganisms. These tests use vials containing spores of specific bacteria that are highly resistant to sterilization. The logic is straightforward: if your sterilizer can kill these incredibly tough spores, it can certainly eliminate the less-resistant pathogens commonly found in a dental setting. Passing a spore test provides the highest level of assurance that your sterilization process is effective and your instruments are truly sterile, offering definitive proof of efficacy.
How Often to Perform Spore Testing
According to the CDC, you should perform a spore test on your sterilizer at least once a week. This regular monitoring ensures your equipment is consistently performing as expected. However, it's crucial to always check your state and local dental board regulations, as their requirements may be more frequent or specific. In addition to weekly testing, you should also run a spore test whenever you are using a new type of packaging material, after training new personnel, or after your sterilizer has been repaired to confirm it’s working correctly before it’s put back into service.
Match Your Pouch to Your Sterilization Method
Selecting the right sterilization pouch isn’t just about size; it’s about compatibility. Using a pouch that isn’t designed for your specific sterilization method can lead to failed cycles, damaged instruments, and a compromised sterile field. Each method—whether steam, dry heat, or chemical vapor—uses a different agent to achieve sterility, and the pouch material must be able to withstand the process while allowing the sterilant to penetrate and do its job.
Think of the pouch as a gatekeeper. It needs to let the sterilizing agent in, hold the instruments in a sterile state after the cycle, and then allow for aseptic presentation when you’re ready to use them. The three most common sterilization methods in dental offices are steam under pressure (autoclave), dry heat, and unsaturated chemical vapor. Each requires a specific type of pouch to ensure the entire process is effective. For example, the porous paper of a steam autoclave pouch is designed to let steam penetrate, but it might block the larger molecules of a chemical vapor or degrade under intense dry heat. Choosing the correct pouch is a fundamental step in your practice’s infection control protocol and ensures you’re protecting both your patients and your team.
Selecting Pouches for Steam Autoclave Sterilization
Steam autoclaves are the workhorses of most dental practices, using pressurized steam to sterilize instruments. The best pouches for this method are typically constructed from a combination of medical-grade paper and a clear plastic film. The paper side is porous, allowing steam to enter and sterilize the contents, while the plastic film provides a durable, clear view of the instruments inside.
Most modern pouches, including MacSafe Self-Sealing Sterilization Pouches, are designed for steam and chemical vapor processes. The self-sealing adhesive strip creates a secure closure without the need for a separate heat-sealing machine, streamlining your workflow. When the cycle is complete, the paper-plastic barrier maintains sterility until the pouch is opened for use.
What to Use for Dry Heat and Chemical Vapor Sterilizers
Dry heat and chemical vapor sterilizers require different pouch materials due to their unique processes. Dry heat sterilizers use high temperatures without moisture, so you’ll need pouches made of materials that won’t scorch or melt, such as nylon or specific heat-resistant paper. Standard paper-plastic pouches can become brittle and their seals may fail under intense dry heat.
Chemical vapor sterilization uses a mixture of chemicals, heat, and pressure. Pouches for this method must allow the chemical vapor to penetrate without reacting to or degrading the pouch material. While many paper-plastic pouches are compatible with chemical vapor, it's crucial to confirm this with the manufacturer before use. Always check the product specifications to ensure your pouch is validated for your specific sterilizer.
Choosing the Right Sterilizer for Your Practice
Choosing the right sterilizer for your practice is a foundational decision that shapes your entire infection control workflow. The most common options—steam autoclaves, dry heat sterilizers, and chemical vapor units—each come with their own set of considerations regarding cycle time, capacity, and instrument compatibility. Your choice will depend on the volume of your practice, the types of instruments you use most frequently, and your team's workflow. This decision directly influences your purchasing needs for other critical supplies, as your chosen method dictates the type of sterilization pouches, monitoring systems, and maintenance protocols you'll need. Ensuring your sterilization equipment and supplies are fully compatible from the start is the key to creating an efficient, compliant, and safe system for your practice.
Getting Temperature and Time Right for Effective Sterilization
Every sterilization pouch has its limits. It’s essential to follow the manufacturer’s instructions for use (IFUs) for both your sterilizer and your pouches. These guidelines specify the correct temperature, pressure, and cycle time required to achieve sterility. Exceeding the recommended temperature or time can compromise the pouch’s integrity, causing it to melt, tear, or lose its ability to maintain a sterile barrier.
For example, paper/plastic pouches are typically designed for steam or Ethylene Oxide (EO) sterilization cycles, which operate within specific temperature ranges. Using them in a high-heat dry sterilizer could lead to failure. Always verify that your cycle parameters align with what your pouches can handle to ensure every instrument is properly sterilized and safe for patient use.
Common Mistakes to Avoid with Sterilization Pouches
Even the best sterilization pouches can fail if they aren't used correctly. A simple mistake in the packaging, loading, or storage process can compromise the entire cycle, putting patient safety at risk and violating compliance standards. Knowing the common pitfalls is the first step toward creating a foolproof sterilization workflow in your practice. Let's walk through the most frequent errors and, more importantly, how to prevent them so you can ensure every instrument is perfectly sterile, every time.
Avoiding the Pitfall of a Compromised Seal
A faulty seal is like leaving a door wide open for contaminants. If the pouch isn't sealed perfectly, the sterile barrier is broken, and the instruments inside are no longer safe for use. This often happens when pouches are overfilled, causing the seals to stretch and weaken, or when the adhesive strip on a self-sealing pouch isn't pressed down firmly and completely. For heat-sealed pouches, an incorrect temperature or worn-out sealer can create a weak bond. Always leave at least one inch of space around instruments and run your finger firmly across the entire adhesive strip to ensure a tight, continuous seal. For reliable performance, consider using high-quality pouches like MacSafe Sterilization Pouches, which are designed for secure closure.
How to Prevent Punctures and Tears in Your Pouches
Sharp or heavy instruments can easily puncture or tear a pouch, creating a direct path for microorganisms to enter after sterilization. Using a pouch that is too thin or incompatible with the instruments inside is a common cause of this problem. To prevent this, always use instrument tip protectors for sharp items like scalers and explorers from our Pro Series collection. It's also crucial to choose the right size pouch; a pouch that’s too large allows instruments to shift during handling, increasing the risk of a puncture, while one that’s too small puts stress on the seams. Select pouches made from durable, medical-grade paper and transparent film that resist tearing.
The Right Way to Store and Handle Sterile Pouches
How you store and handle pouches before and after sterilization is just as important as the cycle itself. Overcrowding a pouch prevents adequate steam penetration and can trap air, leading to incomplete sterilization and damp packs. After a successful cycle, sterile pouches must be stored in a clean, dry, closed environment away from direct sunlight and moisture. Avoid stacking them too high or cramming them into drawers, as the weight and pressure can compromise the seals and packaging integrity. Proper handling—grabbing them by the edges and ensuring your hands are clean—is a simple but critical step in maintaining sterility until the moment of use. Following these infection control principles is fundamental to patient safety.
The Importance of Packaging for Storage
The sterilization pouch’s most important job begins the moment the autoclave cycle ends. During storage, the pouch serves as the sole barrier protecting sterile instruments from airborne contaminants, dust, and moisture. A perfect sterilization cycle is completely undone if the packaging fails. Without a reliable pouch, instruments can be re-contaminated through improper handling or simply by sitting in a non-sterile environment. This is why the integrity of your sterilization packaging is a non-negotiable part of your infection control protocol. A small tear or a weak seal compromises the entire process, creating a direct risk to patient safety and undermining the standards of care your practice upholds.
Are You Reading Your Chemical Indicators Correctly?
Chemical indicators are your visual confirmation that sterilization parameters have been met. A common mistake is relying only on the external indicator. The external indicator simply shows that the pouch has been exposed to heat; it doesn't confirm that the sterilant penetrated the packaging and reached the instruments. The internal indicator is what verifies this crucial step. According to the CDC, you must check both the internal and external indicators before using any instruments on a patient. If either indicator shows an incorrect reading or an incomplete color change, the pack must be opened, repackaged, and put through the sterilization cycle again.
Never Reuse Single-Use Pouches
It might seem resourceful, but reusing a sterilization pouch is one of the most significant errors a practice can make. Sterilization pouches are classified by the FDA as single-use medical devices for a critical reason: their integrity is compromised after just one cycle. The intense heat, steam, and pressure of an autoclave permanently alter the pouch’s materials. The medical-grade paper’s pores are designed to open to allow the sterilant to penetrate and then close to form a microbial barrier as it dries. This process is not repeatable. After one cycle, the paper can become brittle, the plastic can weaken, and the adhesive on a self-sealing pouch loses its ability to create a reliable seal. Reusing a pouch means you are no longer using a validated barrier, rendering the entire sterilization process ineffective and putting patient safety at severe risk.
Troubleshooting Common Sterilizer and Instrument Issues
Even with a perfect pouching technique, issues can still arise with your sterilizer or instruments. A discolored instrument or a sterilizer that won't hold pressure can disrupt your entire workflow and raise concerns about safety and compliance. The good news is that most of these problems are preventable with routine maintenance and proper troubleshooting. Understanding the common culprits behind these issues allows you to address them quickly and efficiently, ensuring your sterilization process remains reliable and your instruments stay in prime condition. Let's explore some of the most frequent challenges and how to solve them.
Identifying Rust vs. Stains on Instruments
Seeing a reddish-brown spot on a recently sterilized instrument can be alarming, but it isn't always rust. Often, what appears to be corrosion is actually a mineral deposit or a stain caused by debris that wasn't fully removed during cleaning. Before you discard a valuable tool, there's a simple way to tell the difference. Try rubbing the spot with a pencil eraser. If the mark disappears and the metal underneath is smooth, it’s just a stain. However, if the mark remains and the metal surface feels pitted or rough, you're dealing with true corrosion. Proper cleaning is your first line of defense, but using high-quality, corrosion-resistant dental instruments, like those in our stainless steel Hexa and Pro Series, significantly reduces the risk of rust from the start.
Maintaining Your Sterilizer
Your sterilizer is one of the most critical pieces of equipment in your practice, and its performance directly impacts patient safety. Just like any complex machine, it requires regular care to function correctly and last for years. Proactive maintenance not only prevents unexpected breakdowns but also ensures that every cycle meets the required parameters for effective sterilization. Simple habits, like using the right type of water and performing routine checks on key components, can save you from costly repairs and the stress of failed cycles. A well-maintained sterilizer is the cornerstone of a dependable infection control system.
Using the Correct Water Type
One of the most critical aspects of autoclave maintenance is using the correct type of water. Autoclaves require distilled water to create the pure steam needed for sterilization. Using tap water, purified water, or spring water can introduce minerals and solutes into the machine's internal components. Over time, these minerals build up, forming a hard scale that can clog the delicate valves and tubes, leading to malfunctions, overheating, and ultimately, costly repairs. Always stick to steam-distilled water to protect your investment and ensure your sterilizer operates efficiently and reliably for every cycle.
Addressing Pressure Loss and Overheating
If your sterilizer is failing to reach or maintain the correct pressure, or if it's overheating, the first place to check is the door seal. A worn or dirty door gasket is the most common cause of pressure leaks. Without a perfect seal, steam escapes, preventing the chamber from pressurizing correctly and potentially causing the heating elements to work overtime. Before starting a cycle, visually inspect the gasket for any cracks, debris, or signs of wear. A simple wipe-down can sometimes solve the problem, but if the gasket is compromised, it will need to be replaced to ensure a secure seal.
Door Gasket Care and Replacement
The door gasket is a consumable part that requires regular replacement to maintain your sterilizer's performance. As a general rule, most sterilizer manufacturers recommend replacing the door gasket and its accompanying door dam annually. However, for certain high-use models like the Midmark M9 and M11, this should be done every six months. Sticking to a consistent replacement schedule is a simple, proactive measure that prevents the vast majority of pressure-related issues. Keeping a spare gasket on hand is also a smart practice to avoid any unexpected downtime in your practice’s sterilization workflow.
Top Dental Sterilization Pouch Brands
When it comes to selecting sterilization pouches, the brand you choose matters. Different manufacturers offer specific features designed to enhance safety, compliance, and workflow efficiency. Here’s a look at some of the top brands trusted by dental professionals to keep their instruments sterile and their patients safe.
SurgiMac: Reliable Sterilization You Can Trust
SurgiMac provides a comprehensive line of sterilization pouches engineered for reliability and safety. A key focus is ensuring compatibility with various sterilization cycles to prevent failures, protect valuable instruments, and ensure patient safety. Using an incompatible pouch can compromise an entire cycle, making dependable supplies a cornerstone of infection control. SurgiMac’s commitment extends across their entire MacSafe line, which offers a full suite of products for maintaining a sterile clinical environment. Their pouches are designed to provide clear, easy-to-read indicator changes, giving your team confidence that proper sterilization conditions have been met every time.
A Look at Henry Schein and Halyard Health
Henry Schein and Halyard Health are established names known for high-quality sterilization supplies. Many of their pouches feature built-in chemical indicators that verify instruments have been exposed to the necessary conditions during the cycle. This feature is essential for adhering to the CDC’s guidelines for sterilization monitoring. The clear color change of the indicator provides an immediate visual check before the pouch is even opened, streamlining the verification process for your team. These brands are a go-to for practices that prioritize well-known, time-tested products for their infection control protocols, ensuring consistency and reliability in their daily operations.
Exploring Options from Crosstex and Medline
Crosstex and Medline are trusted brands that often incorporate both internal and external chemical indicators into their pouch designs. This dual-indicator system provides an extra layer of assurance. The external indicator confirms that the pouch has gone through a sterilization cycle, which is helpful for distinguishing processed from unprocessed packs. The internal indicator, placed inside with the instruments, verifies that the sterilizing agent—whether steam or chemical vapor—has successfully penetrated the packaging. This comprehensive approach helps your practice confirm that the conditions for sterilization were met both outside and inside the pouch, significantly enhancing patient safety.
Considering Reusable? A Guide to EnviroPouch
For practices looking to implement more sustainable solutions, EnviroPouch offers a compelling alternative to single-use disposables. Their reusable sterilization pouches are designed to reduce clinical waste and lower supply costs over time. Made from durable materials, these pouches can withstand numerous sterilization cycles while maintaining their integrity. This makes them an excellent choice for environmentally conscious clinics aiming to minimize their carbon footprint without compromising on sterilization efficacy. By investing in reusable options, your practice can achieve long-term savings and align your operations with green initiatives, demonstrating a commitment to both patient health and environmental responsibility.
How Much Should You Budget for Sterilization Pouches?
While patient safety is always the top priority, managing your practice’s overhead is a close second. Sterilization pouches are a recurring expense, and the costs can add up quickly. Understanding the factors that influence their price and knowing where to find savings can make a significant impact on your budget without compromising on quality or compliance. Let's break down how to evaluate the costs so you can make the most informed purchasing decisions for your clinic.
Breaking Down the Cost Per Pouch
The price of a single sterilization pouch can seem small, but it varies based on brand, size, and features. When you multiply that by the hundreds or thousands of pouches your practice uses, the differences become significant. The market for dental self-sealing sterilization pouches is growing, which means more options but also more price variations to sort through. To get a clear picture, calculate your cost per pouch by dividing the total box price by the number of pouches inside. This simple metric allows you to compare apples to apples across different suppliers, ensuring you find a balance between quality and affordability. High-quality, reliable options like our MacSafe sterilization pouches are designed to offer excellent value without cutting corners on safety.
Can Bulk Purchasing Save Your Practice Money?
One of the most effective ways to lower your cost per pouch is by purchasing in larger quantities. Most suppliers, including SurgiMac, offer discounts for bulk orders, which can lead to substantial savings over time. Before placing a large order, take a moment to assess your practice’s average consumption rate. This will help you determine an order size that maximizes savings without overstocking and tying up valuable storage space or cash flow. By planning ahead, you can ensure you always have essential infection control supplies on hand while keeping your operational costs in check. It’s a simple strategy that directly benefits your bottom line.
Are Reusable Pouches a Cost-Effective Choice?
Reusable sterilization pouches present a different cost structure. While the initial investment is higher than for disposables, they can be a cost-effective alternative in the long run by reducing waste and eliminating the need for constant repurchasing. However, it's important to factor in the entire lifecycle cost. Reusable options require specific cleaning and inspection protocols between uses, which adds labor and time to your team's workflow. As dental IPAC trends evolve, weighing the convenience and guaranteed sterility of single-use pouches against the long-term savings and environmental benefits of reusables is a key consideration for any modern practice.
Your Step-by-Step Guide to Using Sterilization Pouches
Mastering the use of sterilization pouches is fundamental to any dental practice's infection control protocol. It’s a process where precision matters at every stage, from selecting the right pouch to storing it correctly after the cycle. Following these established best practices ensures your instruments are sterile, your patients are safe, and your practice remains compliant.
Step 1: How to Properly Load and Seal Each Pouch
Before sealing, ensure instruments are thoroughly cleaned and dried. Place them in a single layer inside the pouch, avoiding any overlap that could obstruct sterilant penetration. Choosing the right size is key; a pouch that’s too small can be punctured by sharp instruments, while overcrowding prevents adequate steam circulation and drying. When you're ready to seal, press firmly along the adhesive strip of a self-sealing pouch to create an unbroken barrier. For heat-sealed pouches, verify your equipment is calibrated correctly. Finally, label each pouch with the sterilization date and its contents to maintain an organized, traceable inventory of your dental instruments.
Step 2: Correctly Placing Pouches in the Sterilizer
Once your pouches are sealed, the next critical step is arranging them correctly inside the sterilizer. How you load the chamber is just as important as how you pack each pouch. The goal is to create clear pathways for the sterilizing agent—whether it's steam or chemical vapor—to circulate freely and make contact with every surface. Improper loading can create cold spots, trap air, or block penetration, leading to a failed cycle. It also impacts the drying phase; correctly placed pouches allow moisture to evaporate efficiently, preventing wet packs that can compromise sterility.
Placement for Racked Pouches
If you use a rack in your sterilizer, the best practice is to place pouches on their edge, like files in a cabinet. This vertical orientation ensures that all pouches are facing the same direction, with the paper side of one pouch next to the plastic side of the adjacent one. This arrangement creates unobstructed channels for steam to flow around each package, ensuring even heat and sterilant distribution. It also facilitates proper drying at the end of the cycle, as condensation can drain away more effectively, preventing moisture from getting trapped between pouches.
Placement for Flat Pouches
When laying pouches flat without a rack, the correct orientation depends on the type of sterilizer used. In a gravity displacement sterilizer, where steam rises from the bottom, you should place pouches with the plastic side facing down. This allows the rising steam to easily enter through the porous paper side. Conversely, in a pre-vacuum sterilizer, which pulls steam down from the top, you should place pouches with the plastic side facing up. This ensures the vacuum can effectively draw steam down and into the pouch through the paper, guaranteeing complete penetration.
Step 2: Storing Pouches to Maintain Sterility
The sterilization process doesn't end when the autoclave door opens. To maintain sterility, proper storage is non-negotiable. Store processed pouches in clean, dry, closed cabinets away from sinks or areas with high humidity. Handling is just as important—always ensure your hands are clean before touching sterile packs. Organize your inventory using a “first-in, first-out” system to ensure older pouches are used before they expire. According to Infection Prevention and Control (IPAC) standards, this systematic approach is vital for preventing contamination and upholding the highest standards of patient care within your practice's overall infection control strategy.
Step 3: Keeping Records for Quality Control
Consistent documentation is the backbone of a reliable sterilization program. After each cycle, inspect the external and internal chemical indicators on every pouch. A correct color change confirms the pack was exposed to the sterilant, but it isn't the sole proof of sterility. That's why regular biological monitoring, or spore testing, is essential for verifying that your sterilizer is effectively killing microorganisms. Maintain meticulous logs for each cycle, recording the date, sterilizer used, cycle parameters, and the results of all indicators. This detailed record-keeping is not just a best practice—it’s a critical component of quality assurance and helps you avoid common compliance mistakes.
Choosing the Right Sterilization Pouches for Your Practice
Selecting the right sterilization pouch isn’t just about ticking a box for compliance—it’s about creating a system that protects your patients, your instruments, and your practice’s efficiency. The ideal pouch integrates seamlessly into your workflow, is compatible with your equipment, and provides clear, reliable results every time. Making a thoughtful choice means fewer sterilization failures, longer instrument life, and a more confident team. Think of it as the foundation of your infection control protocol. When you standardize your pouch selection based on your specific needs, you create a predictable, safe, and streamlined process from start to finish.
Start by Assessing Your Sterilizer's Needs
Before you even think about pouch sizes or brands, start with your sterilization unit. The method you use—whether it's a steam autoclave, dry heat sterilizer, or chemical vapor unit—is the single most important factor in determining which pouches are compatible with your practice. Most dental offices rely on steam autoclaves, which use steam heat under pressure to sterilize instruments. However, other methods exist, and not all pouches can withstand every process. Using a pouch not designed for your specific sterilization method can result in melted packaging, incomplete sterilization, and damaged equipment. Always check the manufacturer’s specifications on both your sterilizer and the pouches to ensure they are a perfect match.
How to Match Pouch Features to Your Instruments
Once you’ve confirmed compatibility with your sterilizer, turn your attention to the instruments themselves. The size, shape, and delicacy of your tools will guide your choice. For example, fine-tipped instruments from our Air Series require pouches that protect them from damage, while larger cassettes need appropriately sized packaging to ensure proper sterilization. You’ll also choose between self-sealing and heat-sealing pouches. Self-sealing pouches offer convenience with a pre-folded end and adhesive strip, making them great for busy workflows. Heat-sealing pouches require a machine but can provide a more customized and secure seal, which is ideal for heavier or awkwardly shaped instrument kits. Using an incompatible pouch can lead to failed cycles and put patient safety at risk.
Finding Pouches That Fit Your Clinical Workflow
The right sterilization pouch does more than just hold instruments; it enhances your entire clinical workflow. Features like clear internal and external indicators give you an immediate visual confirmation that the contents have been processed correctly. Choosing pouches that are easy to label and seal reduces the risk of human error and ensures your documentation is always accurate. Sizing is also critical for efficiency. Using a pouch that is too small can overcrowd instruments, preventing adequate steam penetration and proper drying. A pouch that is too large is wasteful and takes up unnecessary space in your sterilizer and storage. By selecting high-quality MacSafe pouches designed for clarity and ease of use, you support a safer, faster, and more reliable sterilization process.
Frequently Asked Questions
How long does a sterilized pouch remain sterile?
The sterility of a pouched instrument is not determined by time but by the integrity of the packaging. As long as the pouch remains clean, dry, and completely sealed with no punctures or tears, the contents are considered sterile. This concept is known as event-related sterility. Proper storage in a closed, dry cabinet is essential to protect the pouch from contamination or damage.
Is it ever okay to double-pouch instruments?
Yes, double-pouching can be appropriate when grouping instruments for a specific procedure, but it must be done correctly. The inner pouch should be placed plastic side to plastic side inside the outer pouch. This orientation allows the sterilizing agent to penetrate the paper sides of both pouches effectively. Always verify that your sterilizer manufacturer’s instructions permit double-pouching, as it can affect cycle parameters and drying efficiency.
What should I do if a sterilized pouch gets wet?
If a pouch becomes wet, its contents are no longer considered sterile. Moisture compromises the paper’s function as a microbial barrier, allowing contaminants to pass through. The correct response is to open the pouch, clean and dry the instruments, repackage them in a new sterilization pouch, and process them through a full sterilization cycle again.
Where is the correct place to write on a sterilization pouch?
You should write only on the plastic side of the pouch or on the designated paper margin outside the sealed area. Writing on the main paper surface can create microscopic perforations or cause ink to bleed through during steam sterilization, compromising sterility. Always use a non-toxic, sterilization-safe marker.
Why do I need to check both the internal and external indicators?
Each indicator serves a different safety purpose. The external indicator confirms that the pouch has been exposed to a sterilization cycle, helping distinguish processed from unprocessed packs. The internal indicator is critical because it verifies that the sterilizing agent actually penetrated the pouch and reached the instruments inside. Both indicators must show the correct color change before the instruments can be considered safe for patient use.
Read More
- What Are Self Sealing Sterilization Pouches? | SurgiMac Dental Supply
- How to Choose Disinfectant Wipes and Sprays
- CaviWipes vs. Optim: Which Disinfectant to Choose?
Related Articles
Tags
Blog posts
-
, by SurgiMac A Clinician's Guide to Absorbable Suture Material
-

, by SurgiMac A Clinician's Guide to Dental Composite Resin Kits
-
, by SurgiMac How to Disinfect with Metrex CaviWipes Correctly


