


How to Perfect Your Dental Material Mix Technique
- , by SurgiMac
- 38 min reading time
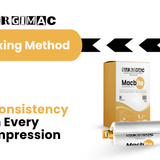
Master your dental material mix with these five essential techniques for consistent, accurate results and improved clinical outcomes in every procedure.
Consistent, predictable outcomes with dental materials don't happen by chance—they begin with a well-prepared environment and a flawless technique. A structured setup not only improves efficiency but also significantly reduces the risk of material failure, procedural errors, and wasted product. An organized space minimizes variables and ensures you have everything you need within arm's reach. This foundational step is key to translating a material's ideal properties from the lab into your clinical practice. Mastering your dental material mix in a controlled environment leads to better-fitting restorations with materials like MacImpress, reduced chair time, and greater patient satisfaction.
Key Takeaways
- Master the Manufacturer's Instructions: Your material's success starts with the IFU. Strictly following the recommended ratios and mixing times is the only way to guarantee the predictable strength and setting characteristics needed for durable restorations.
- Match Your Method to the Material: A one-size-fits-all approach doesn't work. Use a vigorous spatulation for alginates like AlgiMac to achieve a creamy mix, but rely on a steady, submerged automix tip for a void-free VPS impression with MacImpress.
- Standardize Your Setup for Success: An organized workspace and the right tools eliminate variables and prevent errors. Automating your mix with systems for cements and impression materials ensures a perfect, homogenous blend every time, saving material and chair time.

The Purpose of a Perfect Dental Impression
Creating a Precise Blueprint for Restorations
Think of a dental impression as the foundational blueprint for any successful indirect restoration. Its primary purpose is to create an exact negative replica of a patient's teeth and surrounding oral tissues. This blueprint is what the dental lab uses to fabricate everything from crowns and bridges to dentures and implants. The quality of this initial step directly dictates the final fit, function, and longevity of the restoration. As noted by industry resources, accurate impressions are essential for creating well-fitting dental appliances. A minor distortion, void, or drag can translate into a significant error, leading to frustrating adjustments, costly remakes, and lost chair time.
Achieving this precision starts with selecting the right materials and mastering your technique. A high-quality Vinyl Polysiloxane (VPS) material, like those in our MacImpress Collection, is engineered for exceptional accuracy, dimensional stability, and tear resistance, ensuring every detail is captured flawlessly. The process is further refined by your tools. Using the correct mixing tip, for example, is crucial for a homogenous, void-free mix while minimizing waste. As dental labs point out, the right tip helps clinicians work with precision and efficiency. A perfect impression isn't just a procedural step—it's your commitment to a predictable, high-quality outcome.
Why Your Dental Material Mix Matters
In any dental practice, precision is everything. From the angle of a bur to the fit of a crown, every detail matters. This same principle applies to one of the most fundamental, yet often overlooked, procedures: mixing dental materials. It’s far more than just combining a base and a catalyst; it’s a critical step that directly influences the physical properties, working time, and ultimate success of a restoration. An improper mix can compromise the integrity of the finest materials, leading to clinical complications that waste valuable chair time and affect patient outcomes.
Think of it as the foundation of your clinical work. Whether you're working with cements, liners, or impression materials, the quality of your mix determines the material's performance. A homogenous, bubble-free consistency ensures predictable setting times, optimal strength, and the dimensional stability needed for a perfect fit. Mastering a few essential mixing techniques is a simple way to guarantee that your materials perform exactly as intended, every single time. This guide will walk you through the core principles to help you achieve consistent, reliable results for every procedure.
How a Perfect Mix Impacts Clinical Outcomes
The success of many dental procedures hinges on the chemical reaction initiated during mixing. This process is what activates the material’s properties, and any deviation can have a significant clinical impact. For instance, an inconsistent mix of dental cement can lead to a weak bond, creating microscopic gaps that allow for microleakage and potential restoration failure. Similarly, incorporating air bubbles into an impression material like our MacImpress VPS can result in voids or inaccuracies in the final model, forcing a frustrating and time-consuming retake. Proper technique ensures that every restoration is built on a solid, reliable foundation, enhancing longevity and patient satisfaction.
Your Step-by-Step Guide to a Consistent Mix
A structured workflow is your best defense against common mixing errors. Before you even dispense the material, start by reading the manufacturer’s instructions—different products have unique requirements for temperature, humidity, and spatulation time. Begin by dispensing the precise base-to-catalyst ratio onto a clean mixing pad or into a mixing well. Use a firm, deliberate motion to quickly incorporate the two components into a single mass. Then, switch to a broad, sweeping or figure-eight spatulation technique to create a smooth, homogenous mix free of streaks or air bubbles. This systematic approach ensures you stay within the recommended working time and produce a flawless material ready for application.
Mastering the Fundamentals of Mixing
Achieving a perfect mix is as critical in dentistry as it is in a recording studio. While we’re not balancing audio tracks, the principles of precision, balance, and organization are universal. The success of a restoration, impression, or cementation often comes down to how well the materials are prepared. An improper mix can compromise setting times, physical properties, and ultimately, the clinical outcome.
Thinking about material preparation through a structured lens can help refine your technique and ensure consistency. By adopting a few fundamental principles, you can turn material mixing from a routine task into a precise science. Let’s explore three core techniques that ensure your dental materials perform exactly as they should, every single time.
Getting the Powder-to-Liquid Ratio Just Right
In the dental operatory, achieving the correct "balance" refers to the precise ratio of components, such as powder-to-liquid or base-to-catalyst. This is the single most important factor in determining a material’s final properties. An incorrect ratio can lead to a cascade of problems: a weak final set, altered working and setting times, or poor dimensional stability. For instance, our cements and liners are formulated to perform optimally only when the manufacturer's recommended proportions are followed. Think of it as the foundation of your mix; if the balance is off from the start, the entire procedure is compromised.
Ensuring an Even Distribution of Materials
While "panning" might sound out of place, think of it as ensuring a completely homogenous mix and even distribution of your material. When you mix impression materials like MacImpress VPS or AlgiMac alginate, your goal is to eliminate all streaks and create a uniform consistency. This ensures that every part of the material has the same properties and will set uniformly. An uneven mix is like having an unbalanced restoration—certain areas will be weaker or set at different rates. Proper technique ensures the material flows and adapts perfectly, capturing every detail without voids or discrepancies.
How to Stage Your Materials for a Smooth Procedure
Just as an audio engineer groups tracks into busses, a clinician should organize their materials and instruments for an efficient workflow. This means having a dedicated, clean space with all necessary components laid out before you begin. For a cementation procedure, this "bus" would include your mixing pad, spatula, the cement itself, and any applicators. This systematic approach minimizes the risk of cross-contamination and reduces chairside stress. Using high-quality dental disposables and having your preferred instruments from our Air Series ready creates a streamlined process, allowing you to focus entirely on the clinical application.
How Technique and Timing Perfect Your Dental Material Mix
A flawless restoration begins long before the material touches the tooth—it starts with a perfect mix. The way you combine your dental materials directly impacts their physical properties, handling characteristics, and ultimate clinical success. This isn't just about stirring ingredients; it's a precise procedure where every detail, from ratio to temperature, defines the outcome. Mastering your mixing technique ensures materials perform exactly as designed, giving you complete control over viscosity, flow, and setting times. This control is fundamental for achieving predictable, durable, and accurate results, whether you're taking a preliminary impression, cementing a final crown, or placing a direct composite.
A poor mix can introduce a host of complications. Voids can create weak points that lead to fractures, improper setting can compromise marginal integrity and cause microleakage, and poor flow can fail to capture the critical details needed for a perfect fit. Conversely, a great mix sets the stage for success, ensuring excellent adaptation, strong bonds, and long-lasting restorations. By focusing on a few key principles, you can transform material mixing from a routine task into a cornerstone of your clinical excellence. Let’s break down how to control the most important variables to achieve an ideal mix, every time.
How to Achieve the Ideal Viscosity for Any Application
The consistency of your material is everything. A mix that’s too thick won’t flow into the fine details of a preparation, while one that’s too thin can be difficult to control and may lack the necessary strength. Achieving the ideal viscosity starts with adhering strictly to the manufacturer's recommended powder-to-liquid or base-to-catalyst ratios. For alginates like AlgiMac, using the provided scoops and measuring cylinders is non-negotiable for predictable results. For Vinyl Polysiloxane (VPS) materials, such as our MacImpress line, automix systems are fantastic for guaranteeing a perfect, homogenous ratio without any guesswork, ensuring your impression material has the exact flow needed to capture every detail.
Take Control of Working and Setting Times
Every clinician knows the pressure of the clock during a procedure. Your control over working and setting times is crucial for a stress-free workflow and optimal material performance. The primary factor influencing this is temperature; a warmer environment, including a warmer mixing slab or water, will typically accelerate the setting reaction and shorten your working time. Conversely, a cooler environment can slow it down. Being mindful of your operatory's temperature and using chilled mixing slabs for materials like certain dental cements can give you those extra valuable seconds you need for precise placement. Always be aware of the specific properties of the material you're using, as each is formulated with a specific timeline in mind.
Tips for a Smooth, Void-Free Mixture Every Time
The final goal of mixing is to create a completely uniform, or homogeneous, material free of air bubbles and streaks. Voids create weak points in the final restoration or impression, leading to fractures or inaccuracies. To prevent this, use a confident, deliberate spatulation technique with the right dental instruments. For materials mixed on a pad, press the material against the slab with a flexible spatula, using wide, sweeping strokes to eliminate air. For alginates, press the mixture against the side of the rubber bowl to force out trapped air. This is especially critical for materials like MacBite, where a void-free mix is essential for capturing an accurate occlusal relationship.
The Right Tools for a Flawless Dental Mix
Achieving the perfect mix is fundamental to the success of many dental procedures. The physical properties of materials like impression materials, cements, and composites are directly tied to how well they are blended. An inconsistent or improper mix can lead to premature material failure, inaccurate impressions, or compromised bond strength, ultimately affecting patient outcomes. Using the right tools is not just about convenience; it’s about ensuring clinical predictability and excellence.
From automated dispensing guns to classic spatulas and bowls, each tool is designed to help you achieve a homogenous, void-free mix with the correct viscosity and working time. Investing in high-quality mixing equipment ensures that your materials perform exactly as intended by the manufacturer. This allows you to work with confidence, knowing that the foundation of your restoration or impression is sound. Let’s look at the essential tools that help you master the art and science of dental material mixing.
Why Automix Systems Are Your Key to Consistency
For materials where precision is non-negotiable, automix systems are the gold standard. These systems, which include a dispensing gun, a dual-barrel cartridge, and a static mixing tip, eliminate the guesswork and variability of hand mixing. They are essential when working with Vinyl Polysiloxane (VPS) materials, ensuring a perfectly proportioned and homogenous blend every time. This process minimizes air bubbles and material waste, leading to highly accurate and detailed results.
Our own MacImpress collection is designed for these systems, providing exceptional accuracy and tear resistance for flawless final impressions. Similarly, MacBite relies on automix delivery to capture precise occlusal relationships without distortion. By using an automix system, you guarantee a predictable working and setting time, which streamlines your workflow and contributes to superior-fitting restorations.
Choosing the Right Mixing Tip for the Job
The mixing tip on your dispensing gun is more than just a nozzle—it's an active component that performs the final, critical stage of blending your material. The internal design, often featuring a series of helical elements, is precisely engineered to fold and shear the base and catalyst together, ensuring a homogenous, bubble-free mix as they travel through it. Selecting the correct tip for the material and procedure is essential for activating the material's ideal properties and achieving clinical success. The right choice not only guarantees a perfect mix but also minimizes waste by using the most efficient design for the material's viscosity. It also allows for precise, controlled application, whether you're filling a small preparation or taking a full-arch impression.
Intraoral and Universal Mixing Tips
Intraoral tips are your go-to for direct-to-prep placement. Their small, often angled design allows you to dispense materials like temporary dental cements or flowable composites with pinpoint accuracy, even in hard-to-reach areas. This direct application reduces waste and improves efficiency. Universal mixing tips, on the other hand, are the versatile workhorses of the operatory. They are designed to work with a wide range of materials and fit most standard dispensing guns, making them a reliable choice for everyday procedures where direct intraoral placement isn't the primary goal. Having a stock of both ensures you're prepared for any clinical situation.
Dynamic, Teardrop, and Penta Mixing Tips
When mixing high-viscosity materials like VPS, specialized tips are essential for achieving a flawless consistency. Dynamic static mixing tips contain internal spiral channels that thoroughly blend the material as it’s extruded, which is crucial for impression materials like MacImpress that demand a perfectly homogenous mix for accuracy. Teardrop and Penta mixing tips offer further refinements; the teardrop shape promotes a smoother flow to reduce voids, while Penta tips use five internal elements to make extrusion easier and more consistent. These advanced designs ensure your impression material is perfectly blended and ready to capture every detail without distortion.
Specialized Endodontic Mixing Tips
Endodontic procedures require a unique level of precision, and the tools used must match that demand. Endodontic mixing tips are specifically designed for this purpose. They are significantly longer and thinner than other tips, allowing you to deliver root canal sealants deep into the canal system with accuracy and control. Their slender profile ensures the material reaches the apical portion of the canal without creating voids, which is critical for achieving a complete and durable seal. Using these specialized dental disposables is non-negotiable for successful endodontic outcomes, where proper obturation is key to long-term success.
Mastering the Classic Spatula and Mixing Bowl
While automix systems are ideal for many modern materials, the classic spatula and bowl remain indispensable for mixing products like alginates, stones, and certain dental cements. The key to success here lies in technique and the quality of your tools. A flexible rubber bowl allows you to press the material against the sides, effectively eliminating air pockets and ensuring all powder is thoroughly hydrated.
When working with materials like AlgiMac for preliminary impressions, using a firm, deliberate spatulation technique is crucial for achieving a smooth, creamy consistency. The choice of spatula—whether rigid plastic or stainless steel—can also influence the final mix. These simple tools are foundational in any dental practice, providing reliable results for a wide range of everyday procedures, from creating study models to luting temporary crowns.
Applying Your Mix with Precision Instruments
Once your material is perfectly mixed, its precise application is the next critical step. The instruments you use to place and sculpt materials like composites, cements, or liners play a significant role in the final outcome. A high-quality composite instrument, for example, should have a non-stick surface and an ergonomic design that allows for meticulous shaping and contouring without pulling at the material.
For this reason, our instrument lines are crafted for superior handling and control. The lightweight design of the Air Series and the precision-focused build of the Slim Series reduce hand fatigue and allow for delicate, accurate placement of restorative materials. Using the right dental instruments ensures that your perfectly mixed material is applied effectively, preserving its integrity and leading to a successful, long-lasting restoration.
Key Accessories That Support Accurate Impressions
Even the most advanced impression material can't perform at its best without the right supporting cast. The accessories you use—from the impression tray and syringe to the lab putty and gingival masks—are not just supplementary items; they are integral to achieving a clinically perfect result. These tools ensure that your material is delivered precisely where it's needed, capturing every subgingival margin and anatomical detail without voids or distortions. Investing in quality accessories is an investment in predictability, reducing the likelihood of costly and time-consuming retakes. They bridge the gap between the material's potential and its actual performance, forming a complete system for restorative success.
Dental Impression Syringes for Precise Application
Achieving a flawless impression often comes down to how well you capture the most critical areas, particularly the preparation margins. This is where a dental impression syringe becomes an indispensable tool. By allowing you to dispense a low-viscosity wash material like MacImpress directly into the sulcus and around the prepared tooth, a syringe ensures complete coverage without trapping air. This technique is far more accurate than simply loading a tray and hoping for the best. The precise, controlled application guarantees that the material flows into every minute detail, resulting in a sharp, clear impression that provides the dental lab with all the information they need for a perfectly fitting restoration.
Lab Putty and Gingival Masking Materials
The pursuit of accuracy doesn't end once the impression leaves the operatory. In the lab, creating a precise working model is just as critical. Lab putty provides a stable and accurate base for pouring stone models, preventing distortion and ensuring the relationship between the prepared tooth and adjacent structures is perfectly replicated. Furthermore, gingival masking materials are used to create a flexible replica of the soft tissue around the preparation on the model. This allows the lab technician to remove and replace the die while visualizing the exact emergence profile and marginal fit, ensuring the final crown or bridge integrates seamlessly with the surrounding tissues.
Are You Making These Common Mixing Mistakes?
Achieving a flawless restoration, impression, or bond depends heavily on the integrity of your materials. Yet, the seemingly simple step of mixing is where inconsistencies often begin. Even minor deviations from protocol can compromise a material's physical properties, leading to reduced durability, poor marginal seals, or inaccurate models. Understanding the most common mixing pitfalls is the first step toward eliminating them from your practice. These errors are often subtle, stemming from habit, haste, or a slight oversight, but their cumulative effect on clinical outcomes can be significant. By focusing on a deliberate and precise mixing technique for every procedure, you ensure that materials like cements and adhesives perform exactly as they were engineered to. This commitment to fundamentals protects the quality of your work, minimizes the need for adjustments, and ultimately supports long-term patient satisfaction.
The Risk of Over-Mixing and Incorrect Ratios
One of the most frequent errors is altering the manufacturer-prescribed ratio of components, such as powder-to-liquid or base-to-catalyst. Adding "a little extra" liquid to thin a cement or using uneven scoops of alginate can seem like a minor adjustment, but it fundamentally weakens the material's final structure. This imbalance disrupts the chemical reaction, compromising compressive strength and dimensional stability. Similarly, over-mixing—spatulating too vigorously or for too long—can introduce air bubbles and accelerate the setting time. For materials like AlgiMac, a controlled, confident mix is essential to capture fine details without distortion. Always use the provided measuring scoops and follow timed protocols to ensure a homogenous, void-free consistency that delivers predictable results.
Keeping the Full Clinical Picture in Mind
It's easy to develop tunnel vision and focus intensely on achieving the perfect material consistency while losing track of the broader clinical workflow. This is the clinical equivalent of getting lost in the details of a single instrument while forgetting the entire symphony. For instance, you might spend too much time mixing a dental cement, leaving insufficient working time for a clean, stress-free crown seating. Or you might focus so much on loading an impression tray that you neglect to ensure proper moisture control in the patient's mouth. A successful outcome depends on how well each step is integrated. The mixing process should be a seamless part of the entire procedure, timed and executed in harmony with patient management and application.
Why You Can't Ignore the Manufacturer's Instructions
The manufacturer's instructions for use (IFU) are your definitive guide to success. Think of the IFU as the reference track for your clinical technique—it provides the gold standard for achieving optimal results. Every material, from cements to advanced VPS impression materials, has unique properties and handling characteristics. The IFU specifies critical parameters like water temperature for alginates, precise mixing times, working times, and setting times. Deviating from these guidelines by "eyeballing" measurements or guessing at timings is a direct path to inconsistent outcomes. For a high-precision material like MacImpress VPS, following the IFU is non-negotiable for achieving flawless, dimensionally stable impressions.
How to Stay Focused During Repetitive Procedures
After performing a procedure hundreds of times, it's natural to become complacent. You might start taking shortcuts, like mixing materials on a contaminated surface or relying on muscle memory instead of a timer. This procedural fatigue, especially at the end of a long day, can lead to subtle but critical errors. Maintaining mindfulness and treating every mix with the same level of precision as the first is essential for consistency. Using high-quality, ergonomic dental instruments, such as those in the SurgiMac Air Series, can also help reduce the physical strain that contributes to mental fatigue. By staying engaged and respecting the process every time, you ensure that your material preparation never becomes the weak link in your clinical chain.
Can Automation Really Improve Your Mix?
Moving beyond the spatula and mixing pad isn't just about convenience; it's about clinical precision. Automated mixing systems are designed to take the guesswork out of preparing dental materials, ensuring every mix is homogenous, predictable, and free of the inconsistencies that can plague manual techniques. When you introduce automation, you standardize a critical step in your workflow, which translates directly to more reliable clinical outcomes. Whether you're working with impression materials, cements, or bite registration materials, an automated system delivers the perfect consistency every time.
This technology significantly reduces the manual labor involved, which helps alleviate repetitive strain on your team and frees up valuable time to focus on the patient. By controlling variables like mixing speed and ratios, these systems eliminate common issues such as air bubbles, improper setting times, and material waste. As one study notes, advancements in automation are enhancing the efficiency, precision, and hygiene of material mixing. Ultimately, integrating an automated mixing device is an investment in consistency, allowing you to deliver predictable results with every procedure.
Get Perfect Ratios with Automated Dispensing
One of the most significant advantages of automated mixing is the ability to achieve perfect base-to-catalyst ratios with every single use. Manual mixing can introduce variability, but an automated dispenser ensures the precise volume of each component is dispensed and blended correctly. This is critical for materials like the MacImpress VPS line, where the material’s setting time, tear strength, and dimensional stability depend on an exact ratio. An impeccable mix guarantees that the material performs exactly as intended, providing you with a reliable foundation for high-quality restorations. This level of control eliminates a major variable, leading to more predictable and successful clinical outcomes.
How Automation Delivers Predictable Results
The quality of your mix directly impacts the final properties of the dental material. A homogenous, void-free mix ensures optimal strength, stability, and accuracy. Automated systems excel at eliminating air bubbles and ensuring a uniform consistency that is difficult to replicate by hand. This is especially important for dental cements and adhesives, where a flawless mix is essential for achieving a strong, durable bond. By standardizing the mixing process, you can be confident that your materials will consistently deliver their specified performance characteristics, from working time to final hardness, procedure after procedure.
Work Faster and Reduce Material Waste
Automated mixing streamlines your clinical workflow by reducing chair time and minimizing material waste. These systems dispense only the amount of material needed for the procedure, which is a significant advantage over manual methods. In fact, research confirms that using an automated mixing device results in less waste of impression material. Furthermore, by minimizing manual handling, you also enhance your infection control protocols. Less direct contact with materials supports a cleaner, safer environment for both your team and your patients, complementing the use of essential protective gear like MacSafe disposable gloves.
Ready for Advanced Mixing Techniques?
Once you’ve mastered the fundamentals, you can begin to incorporate advanced techniques that refine your results and improve clinical efficiency. These approaches are less about following a rigid recipe and more about developing a strategic mindset for material handling. By thinking critically about how different materials and application methods can work together, you can achieve superior outcomes in complex restorative and prosthodontic cases. These advanced strategies focus on creating synergy between materials, optimizing placement for both function and aesthetics, and ensuring predictable performance from the first mix to the final cure. This level of control is what separates a good clinical result from a great one, giving you the confidence to tackle even the most demanding procedures. It’s about understanding the unique properties of your chosen dental materials and using them in concert to create a final product that is stronger, more accurate, and more lifelike than any single material could achieve on its own.
Layering Techniques for Custom Shades and Effects
In advanced prosthodontics, success often comes from combining materials to leverage the best properties of each. Think of this as a clinical version of parallel and bus compression, where two materials work together to create a result that’s better than either could achieve alone. A perfect example is the one-step impression technique using a heavy-body and light-body VPS material. The heavy-body material acts as a stable tray or “bus,” providing a solid, supportive structure. Simultaneously, the injectable light-body material acts in “parallel,” flowing into the sulcus and around fine anatomical details to capture every margin with precision. Using a high-quality system like MacImpress ensures both materials are chemically compatible and set perfectly, creating a single, flawless impression.
Combining Multiple Viscosities for Better Impressions
This concept translates beautifully to advanced aesthetic restorations, where you must manage different needs in different zones of a tooth. Think of the core of the restoration as the “mid” channel—it needs strength, opacity, and a solid bond. The outer, visible surface is the “side” channel, where translucency, polishability, and perfect shade matching are critical. This is the foundation of the composite layering technique, a method detailed in publications like Dentistry Today. By using a stronger, more opaque dentin-shade composite for the core and layering a more translucent enamel-shade composite over it, you can create restorations that are both durable and indistinguishable from natural teeth. This approach requires precise application, best achieved with ergonomic dental instruments that offer superior control.
Using Temperature to Control Setting Reactions
In clinical terms, “dynamic range” refers to a material’s behavior from the moment it’s mixed to the moment it’s fully set. This includes its working time, viscosity, and setting curve. “Loudness” is the final, predictable strength and accuracy of the result. Managing this process means having complete control over the material’s performance. For example, a material like AlgiMac offers a generous working time for proper tray loading and seating, followed by a rapid snap-set that minimizes distortion. This controlled “dynamic range” ensures a consistently accurate and reliable impression every time. Similarly, using a fast-setting material like MacBite for bite registrations gives you control by minimizing the time the patient can introduce inaccuracies, ensuring a “loud” and clear final result.
How to Adapt Your Mix for Different Materials
Just as different procedures require different instruments, various dental materials demand unique mixing techniques. The chemical composition, setting reaction, and intended clinical use all dictate the proper handling protocol. A technique that creates a perfect alginate impression could lead to a complete failure with a VPS material. Understanding these nuances is fundamental to achieving predictable and successful outcomes, whether you're taking a preliminary impression, cementing a permanent crown, or capturing a precise bite registration.
Mastering the specific mixing method for each material ensures you unlock its full potential, leading to optimal viscosity, accurate setting times, and the desired physical properties in the final restoration or model. From the vigorous spatulation of alginates to the steady extrusion of automix silicones, the right technique is the first step toward clinical excellence. Below, we’ll break down the proper mixing approaches for three common categories of dental materials, helping you refine your skills and ensure consistent results in your practice.
Perfecting Your AlgiMac Alginate Mix
Alginate is a go-to for preliminary impressions, and achieving a smooth, bubble-free mix is all about technique and timing. The key is an aggressive, confident spatulation. After measuring the correct water-to-powder ratio, combine them in a flexible rubber bowl. Use a stiff spatula to press and wipe the mixture against the side of the bowl, rotating it as you go. This method ensures all powder particles are fully hydrated and breaks up any clumps, resulting in a homogenous, creamy consistency. For reliable and efficient results, AlgiMac offers a fast-setting, high-precision formula perfect for study casts and orthodontic models where speed and accuracy are essential.
Tips for Mixing MacImpress VPS Materials
Unlike alginates, Vinyl Polysiloxane (VPS) materials offer superior dimensional stability and are the standard for final impressions. Most VPS systems use an automix delivery method, which simplifies the process but still requires proper technique. Before attaching the mixing tip, always bleed a small amount from the cartridge to ensure an even flow from both base and catalyst chambers. Once the tip is on, keep it submerged in the extruded material—whether loading a tray or syringing around a prep—to prevent introducing air bubbles. This steady, controlled approach is crucial for capturing flawless detail with a product like MacImpress, which is engineered for exceptional accuracy and tear resistance.
Working with Polyether Impression Materials
Polyether impression materials are renowned for their reliability, especially in challenging clinical situations where moisture control is difficult. Thanks to their hydrophilic nature, they have an excellent ability to capture fine details accurately, even in the presence of slight moisture, making them a top choice for impressions involving subgingival margins. This material is also known for its exceptional dimensional stability, meaning it maintains its shape accurately over time, which is essential for creating precise models and restorations that fit perfectly. While they are generally stiffer than VPS materials upon setting, their rigidity ensures minimal distortion when the stone is poured, contributing to a highly accurate final cast.
Mixing Impression Compound and Zinc Oxide Eugenol (ZOE)
Zinc Oxide Eugenol (ZOE) is a versatile material commonly used for bite registrations and temporary fillings. When working with ZOE, success hinges on one critical factor: the powder-to-liquid ratio. It is absolutely essential to follow the manufacturer's instructions to the letter, as even a small deviation can significantly impact the material's final properties. An incorrect mixing ratio can result in a weak final set, which may compromise the integrity of the restoration and lead to clinical complications down the line. A proper technique ensures the material sets correctly, providing a reliable bond and preventing issues like microleakage, which is why a consistent and methodical approach is non-negotiable.
Handling Dental Cements and MacBite Registration Materials
This category includes a wide range of materials, from luting agents to bite registration silicones. Many modern cements, liners, and adhesives come in automix syringes or capsules for trituration, which standardizes the mix. For materials requiring manual mixing, like glass ionomers, use the supplied paper pad and follow the manufacturer's instructions for incorporating the powder into the liquid incrementally. For bite registration, a fast-setting VPS material like MacBite is ideal. The technique involves a direct, steady application onto the occlusal surfaces to capture the patient’s bite without distortion, ensuring a perfect fit for the final restoration.
How to Practice and Perfect Your Mixing Skills
Mastering the art of mixing dental materials is a hands-on skill. While understanding the science is important, true proficiency comes from developing muscle memory and a tactile feel for how different materials should behave. A perfect mix is the foundation for successful clinical outcomes, whether you're taking a preliminary impression or cementing a permanent crown. A homogenous, properly timed mix ensures dimensional accuracy, optimal strength, and predictable setting times, which directly impacts the quality of your restorations and the comfort of your patients. The key to achieving this consistency is deliberate practice. By focusing on your tools, establishing a routine, and critically evaluating your results, you can turn material mixing from a routine task into a refined clinical skill. This practice builds the confidence you need to handle any material efficiently under the time pressures of a busy practice.
Start with the Right Tools for Practice
Effective practice starts with using the same high-quality materials and tools you rely on for patient care. Working with inferior products can create inconsistencies that have nothing to do with your technique, making it difficult to learn and improve. Start with a reliable alginate, like AlgiMac, to perfect your powder-to-water ratios and spatulation. For more advanced practice, use a high-performance VPS material such as MacImpress to understand its flow and handling characteristics. Using professional-grade materials ensures that the feedback you get is a true reflection of your technique, allowing you to make meaningful adjustments. This approach helps you build confidence in both your skills and your supplies.
Creating a Consistent Practice Schedule
Consistency is built through repetition. Set aside a few minutes each week to focus on mixing one specific type of material. Start by carefully reading the manufacturer’s instructions for use (IFU), paying close attention to the recommended powder-to-liquid ratio, mixing time, and working time. Use a timer to stay precise. For hand-mixed materials like cements or liners, focus on your spatulation technique. Practice a firm, wiping motion against the mixing pad to incorporate all the powder and eliminate air bubbles, ensuring a smooth, homogenous consistency. By dedicating time to a specific dental cement or adhesive, you’ll quickly become familiar with its unique properties and develop a feel for the perfect mix.
How to Judge the Quality of Your Mix
Practice is only effective when you have a way to measure your progress. After each mix, take a moment to critically assess the result. Is the consistency smooth and uniform, or can you see streaks of unincorporated powder? Are there visible air bubbles trapped in the material? For impression materials, take a practice impression of a dental model to check how well the material captures fine details. For cements and bite registration materials like MacBite, check the setting time against the manufacturer’s specifications. This immediate feedback loop is crucial for refining your technique. It helps you identify and correct small errors, leading to more predictable and reliable mixes during actual clinical procedures.
Setting Up Your Workspace for a Perfect Mix
Consistent, predictable outcomes with dental materials don't happen by chance—they begin with a well-prepared environment. Just as a chef preps their station before cooking, a clinician must organize their workspace before mixing to ensure every component is ready for a flawless procedure. A structured setup not only improves efficiency but also significantly reduces the risk of material failure, procedural errors, and wasted product. When you’re working with sophisticated materials designed for precision, the environment in which you handle them is just as critical as the technique itself. An organized space minimizes variables, prevents cross-contamination, and ensures you have everything you need within arm's reach, from mixing tips to applicators.
Taking a few moments to prepare your operatory ensures that every mix is as perfect as the last, allowing you to focus entirely on the patient and the procedure at hand. This foundational step is key to translating a material's ideal properties from the manufacturer's lab into your clinical practice. It leads to better-fitting restorations, reduced chair time, and ultimately, greater patient satisfaction. It’s about creating a system of control in a dynamic clinical setting, where every second counts. By establishing a clean, logical, and repeatable process, you get the most out of your high-quality dental supplies and set the stage for the best possible clinical outcomes.
Organize Your Station for Efficiency and Control
Your immediate workspace is the stage for clinical success. A cluttered or poorly organized counter can lead to cross-contamination, wasted materials, and unnecessary stress. Start by ensuring your mixing area is clean and uncluttered, with only the necessary items for the procedure. Arrange your materials and instruments in the order you’ll use them to create a logical, seamless flow. Good lighting is also non-negotiable, as it allows you to accurately assess color, consistency, and the complete incorporation of components. An organized tray, paired with ergonomic tools like our Air Series instruments, helps you work efficiently and maintain complete control from start to finish.
Why Accurate Dispensing is the First Step
The first step in any mix dictates its final quality. For materials supplied in dual-barrel cartridges, like many impression materials and dental cements, it's crucial to ensure an even flow of the base and catalyst from the very beginning. Before attaching a mixing tip, always purge a small, pea-sized amount of material onto a mixing pad. This simple action confirms that both components are dispensing equally and removes any unmixed material that may have settled at the opening. This step is vital for achieving a homogenous mix and unlocking the superior accuracy of advanced materials like MacImpress VPS, ensuring every impression is dimensionally stable and flawlessly detailed.
How a Mixing Template Can Standardize Your Process
Standardizing your setup for routine procedures is one of the best ways to improve efficiency and reduce cognitive load. Think of it as creating a "mixing template" or a pre-planned tray for specific treatments like crown cementations or preliminary impressions. Before the patient is even seated, have all your components laid out: the material, the correct mixing tips, applicators, pads, and any necessary instruments. This preparation is especially important for time-sensitive materials. For example, when working with a fast-setting material like AlgiMac alginate, having everything ready ensures you can mix, load, and seat the tray without rushing or compromising the quality of the impression.
Related Articles
Frequently Asked Questions
How does room temperature affect dental materials?
Room temperature acts as a catalyst for the setting reaction of most dental materials. A warmer operatory or even a warm mixing slab accelerates the chemical reaction, shortening working time and potentially creating challenges when precise placement is required. Conversely, cooler temperatures slow the reaction, offering additional working time that can be beneficial in complex procedures. For example, using a chilled glass slab for certain cements can provide valuable extra seconds when seating a restoration.
What is the best technique to avoid air bubbles during mixing?
The most effective method is to press rather than merely stir. When hand-mixing materials such as alginates, use a firm spatula to press and wipe the material against the sides of a flexible bowl. This technique removes trapped air and promotes a smooth, homogenous consistency. For automix gun-delivered materials, submerge the mixing tip in the material while dispensing. This prevents air from being incorporated as trays are loaded or as material is applied around a preparation.
Is an automix system necessary for VPS materials?
While acceptable results are possible with hand-mixing, automix systems guarantee greater consistency and eliminate errors in base-to-catalyst ratio or uniformity. For high-performance impression materials such as MacImpress VPS, precision is non-negotiable. Automix guns ensure that the chemistry is delivered accurately every time, supporting predictable, stable, and dimensionally reliable results. The investment in automix systems ultimately enhances the reliability and quality of the final impression.
Why should the liquid-to-powder ratio never be adjusted?
Though it may be tempting to add extra liquid when a cement appears too thick, the manufacturer’s ratio is a precisely engineered chemical formula. Altering it disrupts the material’s performance profile, reducing compressive strength, increasing solubility, and changing setting characteristics. These effects weaken the final bond and increase the risk of restoration failure. Adhering strictly to recommended proportions is the only way to ensure reliability and long-term success.
How can alginate mix consistency be improved quickly?
Inconsistent alginate is usually the result of incomplete powder hydration. Rather than stirring in the center of the bowl, use a firm wiping and pressing method with a stiff spatula, working the material firmly against the bowl walls. This technique ensures uniform incorporation of particles and results in a smooth, creamy mix. A properly handled alginate such as AlgiMac will produce accurate and dependable preliminary impressions with greatly improved consistency.
Read More
Tags
Blog posts
-
, by SurgiMac A Clinician's Guide to Absorbable Suture Material
-

, by SurgiMac A Clinician's Guide to Dental Composite Resin Kits
-

, by SurgiMac How to Disinfect with Metrex CaviWipes Correctly


