


Sterilization Pouches: Dental Selection Guide
- , by SurgiMac
- 11 min reading time
Get sterilization pouches guidance for dental offices, including pouch sizes, indicators, storage, workflow checks, and ordering tips.
Choosing sterilization pouches is not only a supply-ordering task. The pouch has to fit the instrument set, close securely, support the validated sterilizer cycle, and protect the processed item until it is opened for care.
Shop reliable sterilization pouches for your dental workflow.
Sterilization pouches are disposable packaging systems used to hold cleaned dental instruments through sterilization, handling, and storage. The right choice depends on pouch size, seal type, process indicators, sterilizer compatibility, storage conditions, and staff workflow. Dental teams should always follow the validated instructions for use from the pouch, device, and sterilizer manufacturers. The CDC dental sterilization guidance also emphasizes following manufacturer instructions when reprocessing items.
For office managers, hygienists, assistants, and DSO buyers, the goal is simple: make pouch selection repeatable enough for daily use without ignoring clinical requirements. Use the following framework to standardize pouch sizes, indicators, storage, and purchasing decisions.
How dental offices should choose sterilization pouches
Quick answer: Choose sterilization pouches by confirming sterilizer compatibility, matching each pouch to the instrument set, selecting a seal type staff can use consistently, and documenting approved sizes for ordering.
A strong pouch decision starts before anyone compares box prices. Review the sterilizer model, cycle type, instrument set, cassette size, and manufacturer instructions for use. If those directions limit packaging material, loading position, or drying requirements, those instructions take priority over convenience.
Start with compatibility
List every sterilizer used in the practice, then connect each routine instrument set with an approved pouch size and closure method. This prevents staff from choosing a pouch that is too small for bulky items or too large for routine sets. It also gives purchasing teams a clear standard when replacing stock.
Compatibility should include the pouch, the sterilizer, and the instrument. Sharp tips, hinged instruments, handpieces, and cassettes may need extra clearance or a separate pack. When in doubt, check the instrument and sterilizer instructions before adding that item to the standard size chart.
Build a simple approved list
A short approved list is easier to train than an open shelf of random sizes. Start with the sizes used for routine exams and hygiene appointments, then add separate options for cassettes, handpieces, and larger kits. SurgiMac's MARK3 self-sealing sterilization pouches can be evaluated as part of that approved supply mix when self-seal packaging fits the workflow.
- Match each pouch to a specific instrument set or load type.
- Confirm the seal closes flat without pressure.
- Keep sharp tips away from pouch edges and film stress points.
- Record approved SKUs, sizes, reorder points, and alternates.
Sterilization pouch sizes for common dental instruments
Quick answer: The correct pouch size leaves space around the instrument, avoids pressure on the seal, and keeps sharp or bulky items from stressing the paper or film barrier.

Do not size a pouch by instrument length alone. Consider width, thickness, hinges, tips, cassette corners, and how the item will sit during processing. A pouch that barely closes can place constant stress on the seal. An oversized pouch may waste supplies and make organization harder.
Fit checks by load type
| Load type | Sizing approach | Fit check |
|---|---|---|
| Light instruments | Use a slim pouch with open space around the set. | Tips do not press into the film. |
| Cassettes | Choose a pouch wide enough for the cassette depth. | Edges do not strain the pouch. |
| Handpieces | Allow room for the full device without bending. | The pouch closes flat. |
| Accessory kits | Size for the widest arranged point. | Small parts stay controlled without crowding. |
Pair the size chart with the practice's broader proper instrument sterilization process. Instruments should be cleaned and dried before packaging. If a load does not fit cleanly, divide it into separate pouches rather than forcing one oversized or crowded package.
Self-seal vs. heat-seal pouches: which workflow fits?
Quick answer: Self-seal pouches fit many chairside and small-practice workflows because they close without separate equipment. Heat-seal pouches may fit centralized, higher-volume workflows with trained staff and compatible sealers.
Self-seal pouches use a built-in adhesive strip that staff fold and press. Heat-seal pouches require compatible equipment to close the open edge. Both can support a sound workflow when the pouch, sealer, sterilizer, cycle, and instrument instructions align.
Compare labor and consistency
Self-seal formats reduce equipment needs and can work well when staff package instruments at different points in the day. The tradeoff is that every closure still depends on correct folding, pressure, and inspection. Heat-seal workflows create a defined sealing station, but they add equipment, maintenance, training, and supply-compatibility checks.
Instead of labeling a practice as simply high or low volume, count daily pouch use, rejected packs, closure time, supply waste, and end-of-day backlogs. Those details show whether a simple self-seal setup or a dedicated heat-seal station is the better operational match.
Reorder MARK3 self-sealing sterilization pouches before your next supply gap.
Indicators, monitoring, and documentation
Quick answer: Pouch indicators help show exposure to processing conditions, but they do not prove sterility alone. Dental teams still need mechanical, chemical, and biological monitoring records.
Many sterilization pouches include a chemical process indicator printed on the package. That indicator can help staff separate processed packs from unprocessed packs. It should be easy to read in the sterilization area and visible without covering the seal or label space.
Use indicators correctly
A changed process indicator is not the same as sterilization proof. The CDC explains that dental teams should use a combination of mechanical, chemical, and biological monitoring to confirm that required conditions were reached. Mechanical monitoring reviews cycle displays or printouts. Chemical monitoring checks exposure at the load or package level. Biological monitoring tests the sterilization process under defined conditions.
Pouch selection should also support documentation. Staff need enough writing space for load details without damaging the package or blocking the indicator. A clear label area helps practices connect a stored pouch with the related cycle record when questions arise.
Storage and sterile barrier integrity after autoclaving
Quick answer: Processed pouches should be cooled, dry, intact, and stored where they will not be crushed, punctured, opened, or exposed to moisture before use.
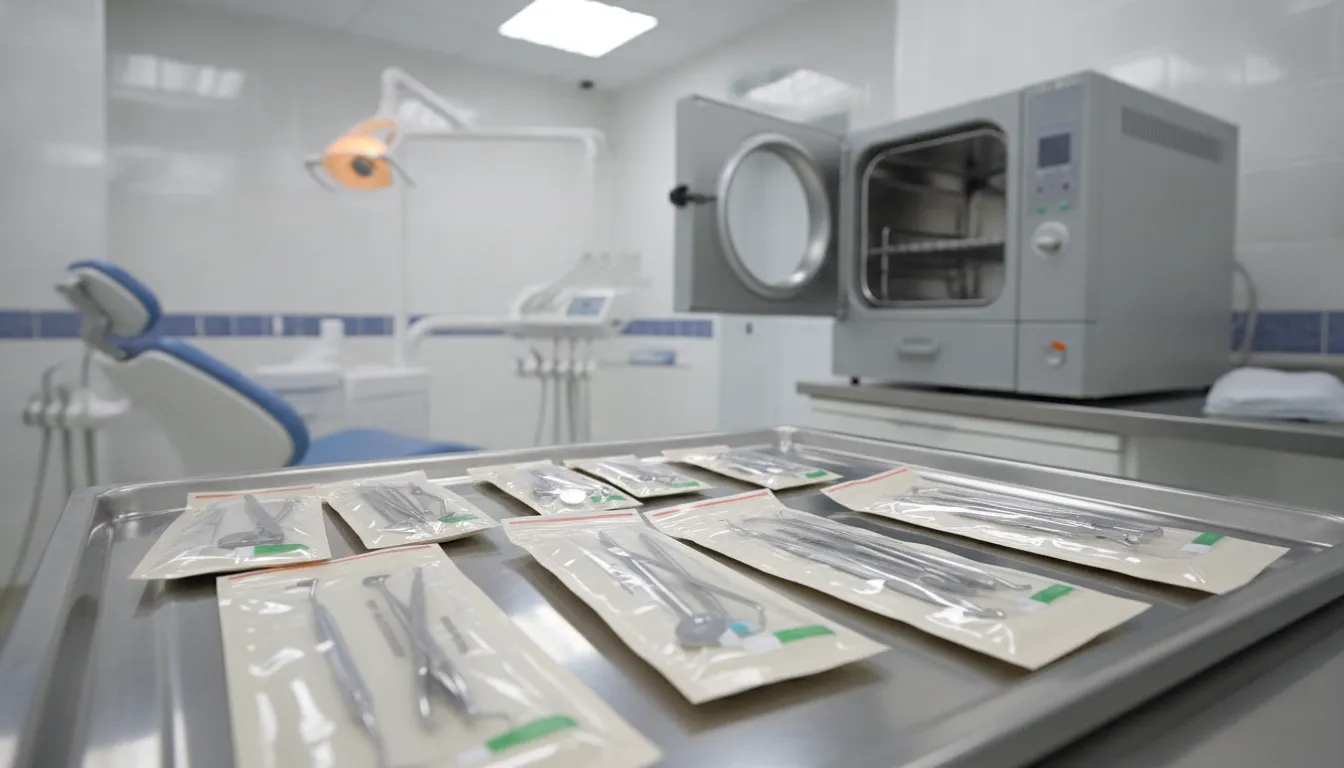
A processed instrument stays protected only while the pouch remains intact. Build cooling, inspection, storage, and rotation into the same written workflow. If a pouch is wet, torn, punctured, opened, or crushed, the instrument should be removed from ready-to-use stock and reprocessed according to practice policy.
Inspect before storage and use
Let pouches dry and cool before staff move, stack, label, or store them. Then inspect the seal, paper side, clear film, corners, and edges. Store accepted packs in a clean, dry, enclosed area where they are protected from dust, splashes, crushing, and repeated handling.
Use first-in, first-out rotation so older packs are selected before newer packs. Train staff to perform the same barrier check when stocking, selecting, and opening packages. This step fits naturally with broader infection control guidelines for dental offices.
How to build a repeatable sterilization pouch workflow
Quick answer: A repeatable workflow assigns approved pouch sizes, closure steps, labeling rules, inspection points, storage practices, and reorder thresholds so staff package instruments consistently.
Written workflow reduces variation. It also helps new staff learn the process and gives managers a way to audit waste, damaged packs, and supply gaps. Keep the workflow short enough to post near the packaging area.
A practical seven-step process
- Choose approved pouch sizes. Match each size to instrument sets, cassettes, and compatible sterilizer cycles.
- Set reorder points. Track weekly usage by size and keep a buffer for delivery delays.
- Prepare instruments. Package only clean, dry instruments after the required cleaning steps.
- Seal and label. Follow pouch instructions, check the full seal, and add traceability details.
- Load the sterilizer. Arrange packs as directed, without crowding the chamber.
- Cool and inspect. Reject wet, torn, opened, or damaged packs.
- Audit results. Review monitoring records, damaged-pack counts, and stock use on a schedule.
For multi-location groups, the same workflow can support purchasing consistency across offices. A shared approved-product list should include pouch size, item number, approved use, reorder point, backup option, and training notes. Include related MacSafe infection control supplies when reviewing the full sterilization and PPE supply plan.
Procurement checklist for dental practices and DSOs
Quick answer: A strong procurement checklist covers sterilizer compatibility, pouch sizes, seal type, indicators, case quantities, lead times, lot tracking, and approved alternates for each location.
Procurement should support the clinical workflow, not complicate it. Buyers need enough detail to prevent substitutions that look similar but do not fit the practice's approved process. Clinical leads need enough inventory control to avoid running short during busy procedure days.
What to document before ordering
- Approved pouch sizes and the instrument sets they support.
- Seal type, indicator format, and compatible sterilizer cycles.
- Box quantity, lead time, reorder point, and backup supplier option.
- Lot tracking expectations and storage requirements.
- Training notes for staff who package, inspect, store, or open pouches.
Review purchasing records monthly. Compare open boxes, damaged packs, procedure volume, and back orders. A sudden rise in waste can point to poor sizing, rough handling, crowded loads, or weak training. SurgiMac helps dental teams source practical supplies, including sterilization pouch options and infection-control products that support daily clinical operations.
Internal link plan after publish
Once this article is approved and live, the strongest inbound links should come from existing sterilization and infection-control education pages. Add a contextual link from the proper instrument sterilization article using anchor text such as "selecting sterilization pouches." Add a second link from the disinfection and sterilization guidelines article using anchor text such as "sterilization pouch workflow." If SurgiMac publishes or updates a MacSafe infection-control collection description, reference this guide as supporting education for pouch selection, storage, and reordering.
Frequently Asked Questions
What is the difference between self-seal and heat-seal sterilization pouches?
Self-seal sterilization pouches use a built-in adhesive closure and do not require separate sealing equipment. Heat-seal pouches require a compatible sealer and may fit higher-volume workflows. Dental teams should confirm pouch, sealer, instrument, and sterilizer compatibility before standardizing either option.
How do you choose the right sterilization pouch size?
Choose a pouch that holds the complete instrument or cassette without crowding, bending, or seal stress. The package should close flat, protect sharp tips, and leave enough space for sterilant contact according to the device, pouch, and sterilizer instructions for use.
Do pouch indicators prove that instruments are sterile?
No. A pouch indicator helps show exposure to certain processing conditions, but it does not prove sterility by itself. Dental offices should use mechanical, chemical, and biological monitoring together, following CDC guidance and manufacturer instructions.
How should processed sterilization pouches be stored?
Processed pouches should be dry, cool, sealed, and intact before storage. Store them in a clean, dry area where they will not be crushed, punctured, opened, or exposed to moisture. Reprocess instruments if the pouch is wet, torn, opened, or otherwise compromised.
When should a dental office reorder sterilization pouches?
Set reorder points by pouch size using weekly usage, supplier lead time, and a practical safety buffer. Review stock before boxes run out, especially for high-use exam setup sizes and approved alternates across multiple practice locations.
Ready to simplify sterilization pouch ordering?
Waiting to standardize pouch selection can lead to wasted supplies, rushed restocking, and avoidable disruptions in the sterilization area. A clear purchasing plan helps staff match pouch sizes with instruments, check indicators, protect stored packs, and keep approved stock available.
Shop reliable dental sterilization pouches and infection control supplies from SurgiMac.
Contact SurgiMac to compare available supplies, confirm practical ordering options, and keep your purchasing process focused on the needs of a busy dental office.
Tags
Blog posts
-
, by SurgiMac A Clinician's Guide to Absorbable Suture Material
-

, by SurgiMac A Clinician's Guide to Dental Composite Resin Kits
-
, by SurgiMac How to Disinfect with Metrex CaviWipes Correctly


